Do many of your landscape photos look washed out? Are there some occasional ones that look a lot more dramatic, but you don't know quite what you or the camera did to achieve that? Here are several suggestions to achive that dramatic look on a regular basis.
First of all, we want to offer what is hoped to be a SIMPLE summary of "f-stops", "fast" vs "slow" lenses, "focal length", and the like. This will greatly help in understanding the suggestions outlined below.
Camera Terms de-mystifiedBy far, the biggest gain will come from "stopping down" on days with sun or bright clouds.
Stopping DownMerely changing the ISO can help the camera to "automatically" select the shutter/lens opening you want for saturated landscape scene colors, or when you are zoomed out, or when you are shooting fast-moving objects.
Changing the ISOYou need LIGHT. There's not much you can do on days with dense cloud cover.
Need some sunTo help you more easily get good focus, Try setting the focus to the center dot
Changing focus modeAnd finally, keep your Photographer-as-Artist eye open for unique scenes.
Creative shotsMore Suggestions
Polarizing Filters: When it's sunny or very otherwise very bright, a polarizing filter can really make your photos
look more dramatic. Forgot your polarizing filter (or dropped it in the sand like I did)? Check the pictures in the "Stopping Down" section below.
Stopping down can provide an effect almost a good as using a polarizing filter. See particularly the fourth picture set.
Don't forget to turn the polarizing filter to maximize the effect. It changes depending on which direction the camera is pointing to. BUT: always
turn in the direction of "tightening"! Otherwise, after a while you might find that the polarizing filter to be so loose it might fall in the sand!
Also, note that polarizing filters will reduce the brightness of water "sparklies", glistening dew-drops, and the like. See the last two pictures under
"Changing the ISO" for an example. In this case, turn the filter to reduce the darkening or remove the filter.
The horizon line: Usually it's better to avoid putting the horizon line in the center. If the clouds are interesting, put the horizon in the lower third.
If the land/water is interesting, place the horizon line in the top third. See the third and fourth set of pictures in the "Stopping Down" section.
Background Information on the equipment used for these pictures: The camera was a Canon 70D for most pictures on this page, and all of the "wave action" pictures under "Highway 101 Beaches General Info". This is a great camera that came out recently as a replacement for the 60D, and compares favorably with the new 7D Mk II. The lens used was almost exclusively the Canon 15-85 EFS lens. It was used for all non-zoom photos throughout this blog, and has proven to be a very versatile and very sharp piece of glass. If a zoom lens was used in any pictures, the lens was the Canon 70-200 (f4), a really nice, sharp, relatively long lens. The majority of the individual beach pictures in the "Hwy 101 Beaches" sections were taken with my former camera, a Rebel T3i. General camera settings: Almost all these photos (and the Highway 101 Beach photos) were taken with the "P" ("Program")
setting, usually ISO 100, usually "Auto" color balance, and almost exclusively stopped down 1/3 or 2/3 (unless a polarizing filter was used.)
Specific camera settings are given with each picture. For some nice high-resolution shots taken with these two lenses, click here. 15-85 and 70-200 SHOWOFFAbout the links on the right: These are links allowing you to purchase either the 70D or either of the lenses covered in this
article. |

|
|
|
Camera Terms De-mystifiedCamera and lens terms are somewhat confusing, and also have a way of being used to mean more than one thing, which makes them even more so. Lenses are specified as "50 mm", "135 mm", and the like. What is that a measure of? What exactly is this semi-universal term "f-stop"? Some articles refer to f-stops in reference to lens opening, so that an opening of f/5.6 is called "one stop down" from f/4, but other articles might talk about "f-stop" in shutter speed, as for example, a speed of 1/60 is "one stop down" from 1/30, and still others might say that ISO 200 is "one stop down" ISO 100. You will see a photograph labeled 1/125 @ f/4, and you will see a lens labeled 1:4. Does the "4" mean the same thing? What makes a lens "fast" vs "slow"? So some clarification is in order. First item: Lens "mm" numbers such as "50mm", "70-200mm" and the like refer to the "focal length". For "simple" one glass element, lenses: Focal Length is the distance between the lens to the camera sensor (or film plane on film cameras).
So for example, the lens element of a simple "50mm" lens would be 50 mm (1.96 in) from the sensor. (There are 25.4 mm per inch.) So, to simplify it can be said that the "mm" number essentially just indicates whether the lens is a "wide-angle", "nominal", or "telephoto" lens.
The pictures below show the differences that you would typically see for various lenses (or zoom settings) of the three classes.
Note that the image at the top displays the scene at the "nominal" focal length, or "standard" lens, meaning this is what you would see with the naked eye
(not counting peripheral vision). A lens zoomed to approximately 31 mm would yield this image, for most digital cameras. For "Full frame" digital cameras
and film cameras, the "nominal" focal length/standard lens is 50mm. |
|||
|
Columns "read" from TOP to BOTTOM. |
31 mm. "Nominal"  |
The picture on the left is the |
SOME NOTES: |
15 mm 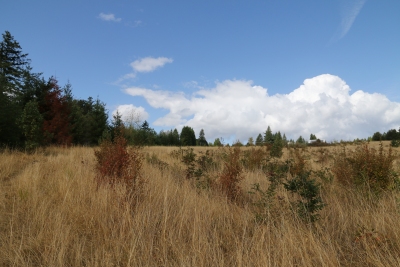 |
50 mm 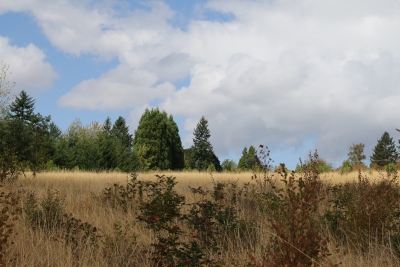 |
105 mm 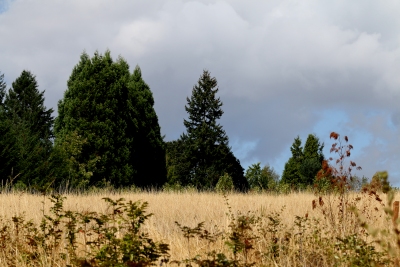 |
18 mm 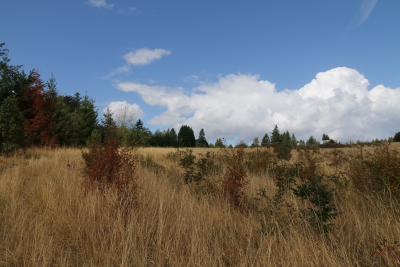 |
70 mm 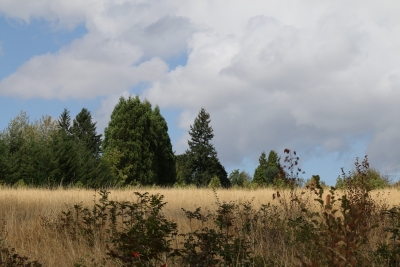 |
135 mm 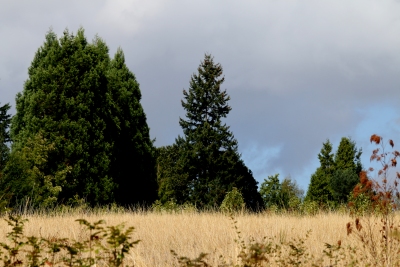 |
|
24 mm 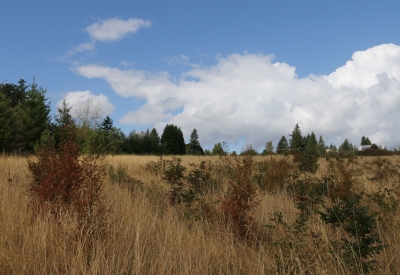 |
85 mm 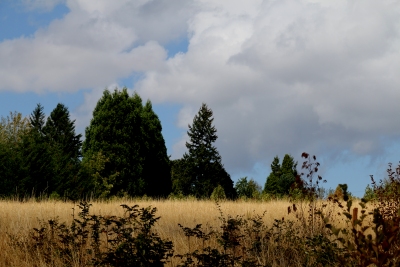 |
200 mm  |
|
|
|||
|
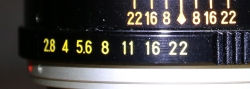
Second item: f-stops as applying to all three: lens aperture, shutter speed, and ISO: In photography, "f/N" is the "f-number" or "f-stop", as in "f/2.8", "f/4", and the like. It applies to the lens opening, or aperture.
Canon cameras label this as "Aperture Value" (AV). Aperture: f/1, f1.4, f/2, f/2.8, f/4, f/5.6, f/8, f/11, f/16, f/22, f/32 Shutter (in seconds): 1, 1/2, 1/4, 1/8, 1/15, 1/30, 1/60, 1/125, 1/250, 1/500, 1/1000 ISO setting: 100, 200, 400, 800, 1600, 3200, 6400 |
Lens and Shutter dial from film |
||
|
|||

Canon 70-200 lenses. Note that the "f2.8" lens has a larger diameter. |
Third Item: The difference between "f/4" as applies to a camera or photograph and "1:4" as applies to a lens. As described above, "f-numbers" like "f/4" apply mainly to the lens opening, or aperture. Yet the label on the front of lenses
is usually "1:N", such as 1:2.8, 1:4, 1:5.6 for fixed, and some zoom, lenses. For most zoom lenses a range of numbers are given,
such as 1:3.5-5.6. The first number applies to the lowest zoom factor and the second applies to the highest zoom factor. This means the
lens gets effectively "darker" when fully zoomed out. In this case it's not that the opening is smaller. It is that the light has to travel further and interact
with more pieces of glass. This has the same effect as a smaller opening. So for lenses, the number 2.8, 4, and the like could be considered the "maximum aperture ratio". If we change the word order to "Aperture Ratio Maximum", we could create an acronym "ARM". Why not? It's an acronym-driven world we live in. . . Thus for example a a "2.8 ARM" lens gives a maximum opening, a maximum light-gathering-ability, of "f/2.8" when it is wide open. Remember, the lens also has an internal iris which will close that opening when you select "f/4", "f/5.6" and the like on the camera. This is the "f-stop", or "stop-down" part. |
||
|
|||
|
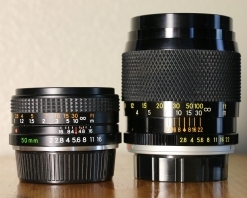
Fourth item:"fast" vs "slow" lenses Lenses with a lower "Aperture Ratio Maximum" are said to be "fast". Those with higher numbers are said to be "slow". In this
sense the number might be thought of as a "lens rating". Lenses with lower numbers will let in more light, allowing
you to use a faster shutter speed (Hence "fast" or "slow"!) It's usually because the lens is of higher quality, better ground glass, and the like. Or it can simply be that the lens has a bigger diameter. See the image above, showing the two Canon 70-200 lenses. Both are of essentially the same quality, but the "f/2.8" has a bigger diameter (and more weight, too!) The lens can be simpler and with fewer glass elements. Some of the big telephoto lenses have 15-20 pieces of lens glass! |
 |
||
|
So, what is the real takeaway from all this! What is the biggest tip of all? The "focal length" will help you decide on "wide-angle", "prime", or "telephoto", based on your picture-taking
preferences. The Maximum Aperture Ratio can help you decide if you need a bit "faster" lens or not. But the biggest "tip" of all is this: Depth of Field: NOTE: Most of the time, in the "P" (Program) mode, and most of the "pre-set" modes as well,
digital cameras will do their best to have the lens wide open! For example, the author tried the "Sports"
automatic setting on his camera for a few shots during the summer 2015 Air Show. This resulted in very fast shutter speeds
such as 1/2000, but the lens was wide open each time. The result? Almost all of the shots were "soft" and not in focus. Finally, what's the advantage of the "faster" lens - the lower "Aperture Ratio Maximum"? It is that when you
are 1 or 2 "f-stops" down from the maximum, the lens can admit more light. A "2.8 ARM" lens stopped down 2 stops is at f/5.6,
whereas a "5.6 ARM" lens stopped down 2 stops is at f/11! |
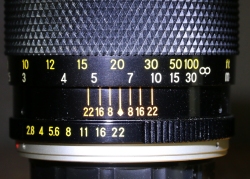
"Depth of Field" markings |
||
|
My old Yashica camera, which had an "f/2", or "2 ARM", lens. It's "wide open" on the left, and "stopped down" one notch on the right. Note how much larger these two openings are compared to the camera in the right, whose lens is "f/3.5". |
My old Vivitar camera, whose lens was rated at "f/3.5". It is shown wide open on the left and stopped down one notch on the right. Note the considerably smaller openings compared to the Yashica. |
||
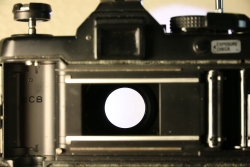
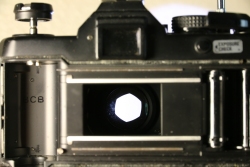
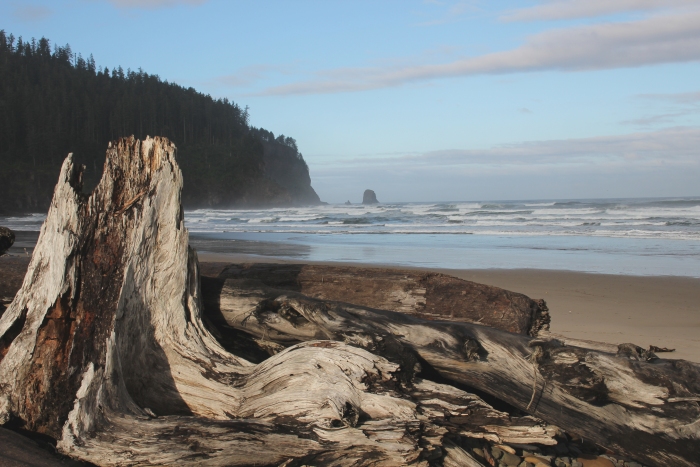
Stopping DownThe term "Stop down" can mean many things in photography, depending on the source. Here it is taken to mean one "notch" of exposure compensation. For Canon SLRs, this means "stopped down 1/3". The graphic on the right shows the exposure "needle" one notch to the left of center. To stop down one notch, do the following (works in "P", "AV", "TV", or "M" modes):
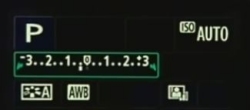
If you look through the viewfinder, or the top-of-the-camera mini display (see screenshot on right), you will notice
the small needle shift left one notch ("stopped down 1/3") or two notches ("stopped down 2/3"). |
|
This picture was taken with no "exposure compensation". i.e., not "stopped down". 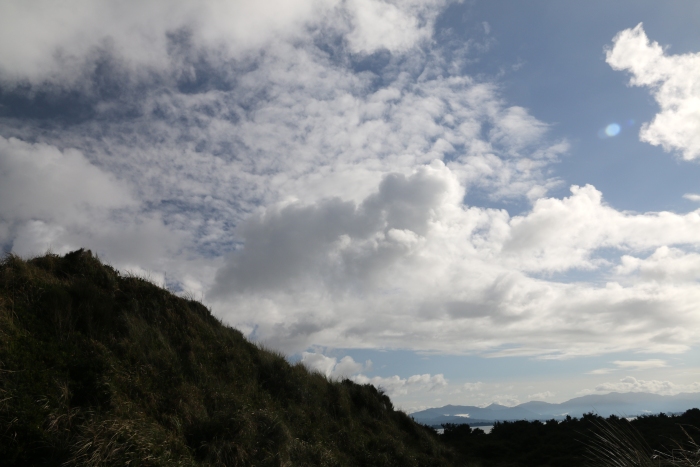 |
This picture was taken "stopped down 1/3". 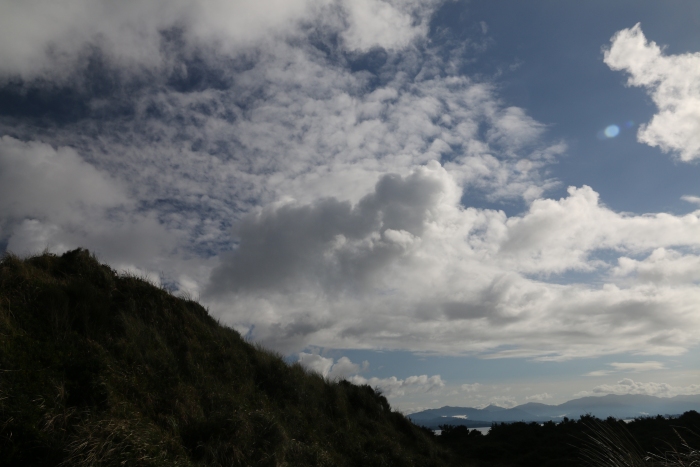 |
 |
This picture was taken "stopped down 2/3". That is, two "notches". Often the dramatic effect is increased even further by "stopping down twice",
especially on bright sunny days." 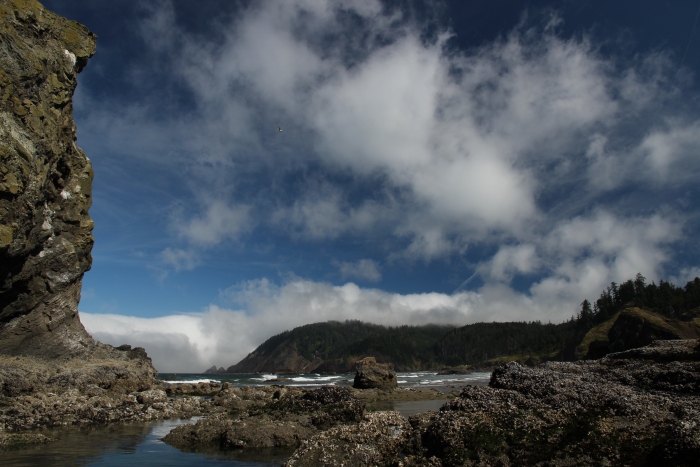 |
 |
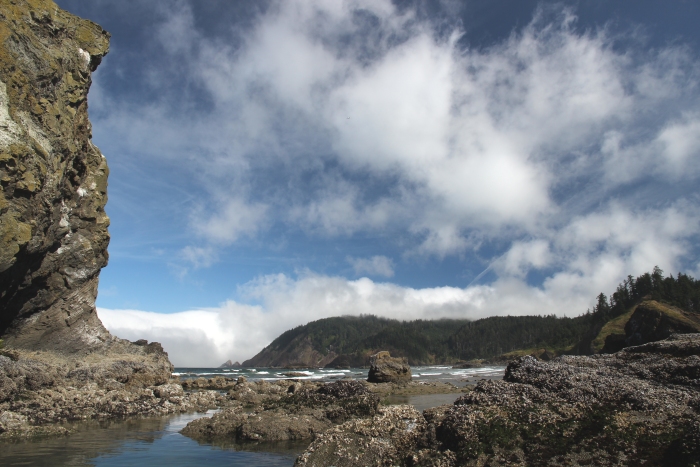
This picture was taken "stopped down 1/3". Note too that the shot has been improved
by moving the horizon down to the lower third. We did this because the clouds were the main area of interest. 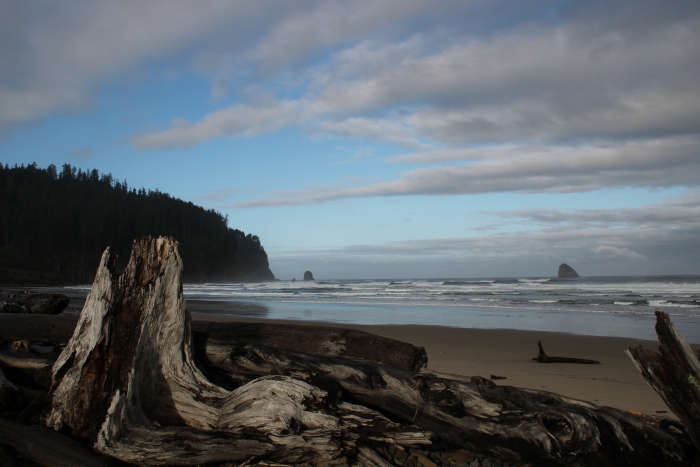 |
 |
This picture was taken "stopped down 2/3". That is, two "notches".
Note that this gives you almost the same effect as using a polarizing filter! 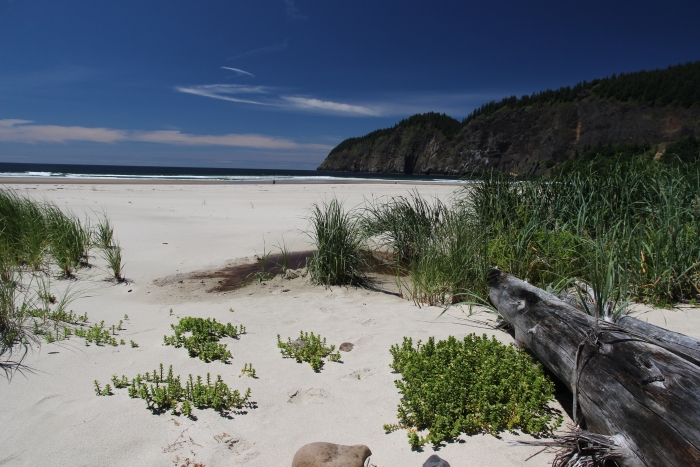 |
If you have a dark, stormy sky and a bright foreground, this can create some very
interesting contrast. But the foreground can end up too bright unless you stop down -2/3, or even -1. (This is a "full f-stop").
This picture was taken "stopped down -1/3". 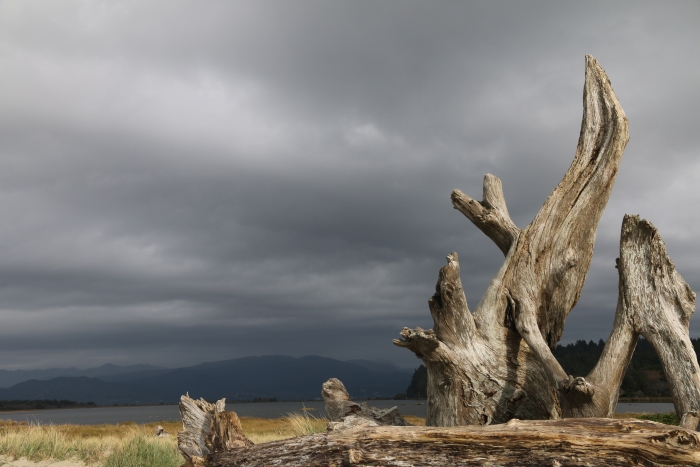 |
 |
Using ISO for quick changesThe term "ISO" is a measure for the camera's sensitivity to light. With older film cameras, you had to choose the "ISO"
when you bought film. If you thought you were going to be doing portraits or landscape pictures on relatively bright days, you selected ISO 100.
If you thought you were going to do action shots, or landsape photos on cloudy days, you selected ISO 200 or ISO 400 film. One of the many
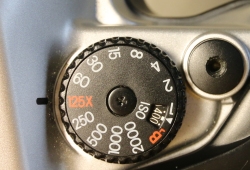
advantages of digital cameras is that you can simply change the ISO with a few quick turns on a dial. For landscape shots on relatively bright days, use ISO 100. Use ISO 200 for fully cloudy days. For indoor portraits without flash, set the ISO to 400 or even higher, depending on your lens. Or just set it to "auto". The reason for the higher ISO is that only the really "fast" lenses can let in enough light in the typical indoor low-light situation. The fast lenses are normally "2.8" or better, meaning that they have relatively wide openings. So for example the 15-85 lens used by the author in all these pictures is a bit of a "slow" lens, with a range of 3.5 - 5.6 (depending on the amount of zoom). Setting the ISO higher will allow the camera to be more "sensitive" and handle the low light better - the shutter speed won't be so slow among other things. For fast-moving objects, try ISO 400 or even 800 on brighter days. (But see the notes on some of the pictures below.) If you have a zoom lens, try ISO 400 or perhaps even 800. (Again see the notes on some of the pictures below.) For close-up pictures, you can get a wider range of focus with a higher ISO, say 200 or 400. NOTE: Changing ISO to "whole stop" settings: By default, the Canon 70D (and possibly others) give you more choices
for ISO speed. You can set ISO to 100, 125, 160, 200, 250, 320, etc. This is far too many choices, and it restricts your ability to change ISO quickly. Also,
you simply don't need all those choices. You can set it to use "whole stop" settings, as ISO 100, 200, 400, 800, etc. It is NOT EASY to find this on the
menu. It's under "C.fn I:Exposure"! Select that menu function and you will see "ISO speed setting increments". Change it from "0:1/3 stop" to "1:1-stop". |
|
Here's a good example on why you don't want to be on a low ISO when using a zoom lens.
With the relatively narrow range of focus ("depth of field"), the osprey is a little "soft". Camera shake likely contributed to the softness of the
image. Also, with a relatively slow shutter speed, the wings are blurred. (The author had not learned about the ISO trick yet.)
This is also a good example on why you need good "glass"! It was taken with an inexpensive non-Canon lens. 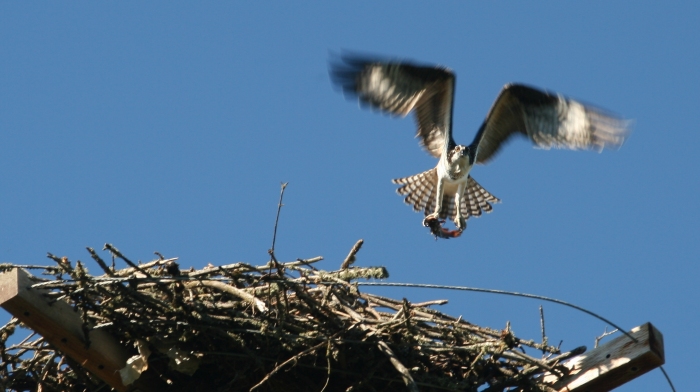 |
For this shot, the ISO was set to 400. So the bird is far better in focus, and its wings are frozen in mid-flight. ISO 400, AV 7.1, TV 1/640 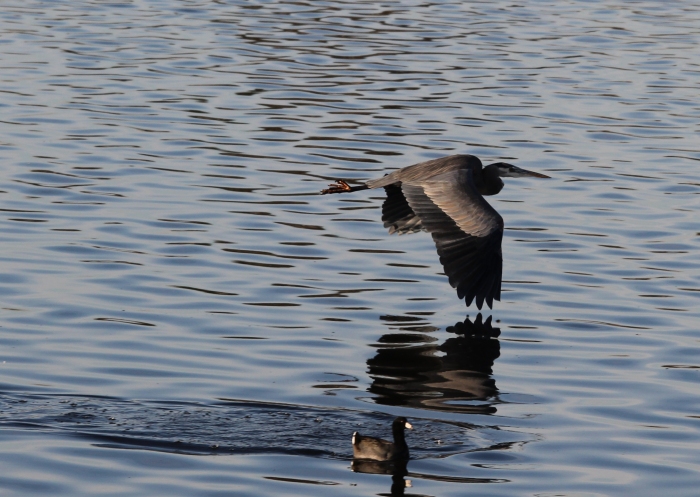 |
The ISO was set to 400 for this shot as well. But I had a bit of time to make some checks
while the bird was still perched on a rock. When using ISO for "quick changes", you might check to see what the resulting settings will be
(by pressing lightly on the shutter). I noticed that the shutter speed was going to be a bit slow. So I set the camera on "TV" instead of "P".
and set the shutter to 1/500. 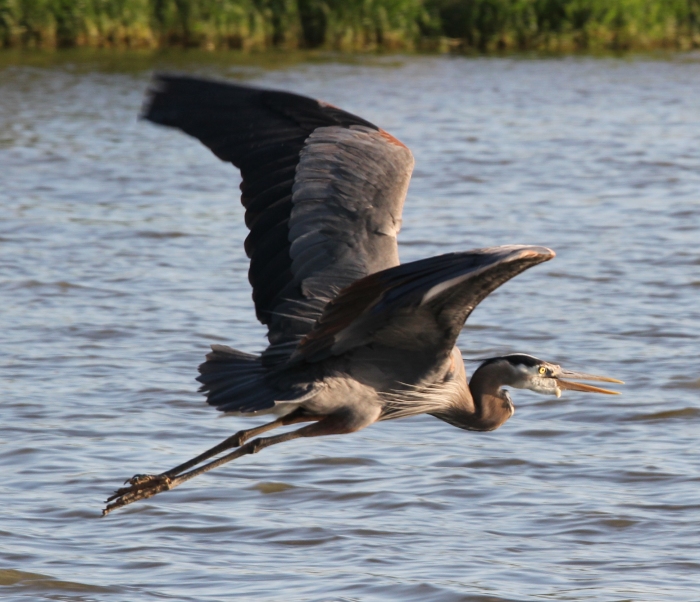 |
For this shot, I set the ISO to 200. I checked the settings and decided that the lens opening
was a bit large - 5.6 (smaller numbers are larger lens openings). So I set the camera on "AV" instead of "P" and set the lens opening to "f8", or AV 8. 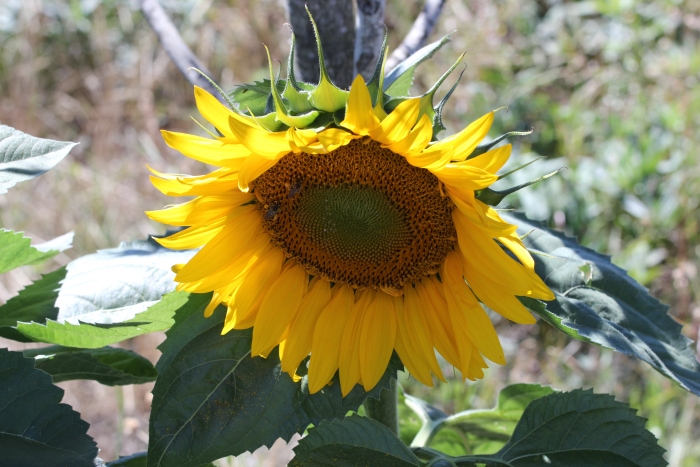 |
And here are 4 Blue Angels in formation at the 2015 Air Show. Notice how incredibly tight
they are! The front plane's wing tip almost looks like it is touching the cockpit of the lower aircraft! 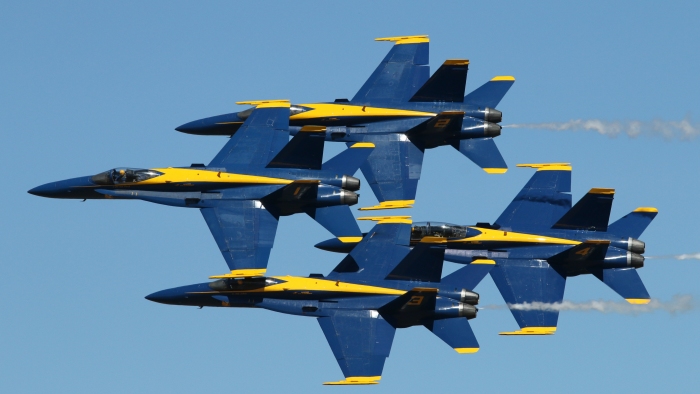 |
And here's two more. Notice that by simply changing the ISO to 400 accomplished two
things: The lens was stopped down to 10 and the shutter speed was plenty fast. 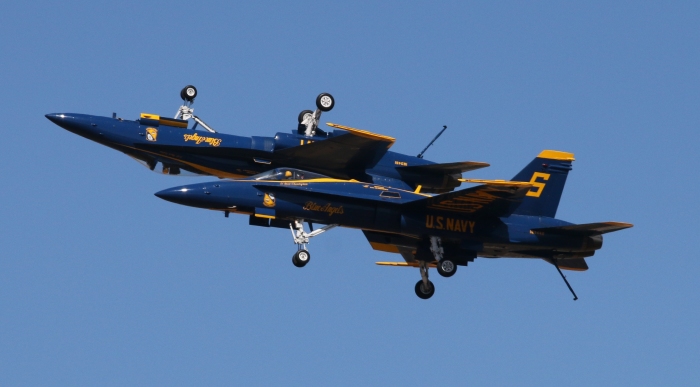 |
For this shot of our Rhodies, I had the ISO on 100. The shot is fine, but notice that the flowers
to the left are soft. 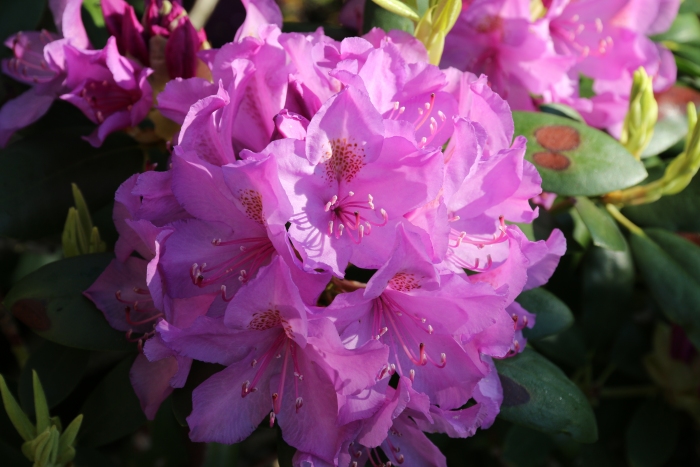 |
I took another shot of the same area with the ISO set to 400. Notice that the flowers
on the left are sharper. 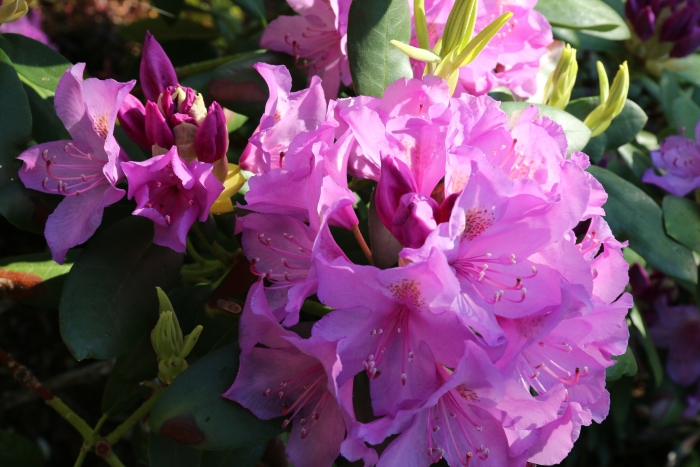 |
By simply setting the ISO to 400, I was able to freeze the motion of this sea wave action.
It would be well to check the shutter speed ("TV") after setting the ISO to 400, though. Make sure it's at least 1/320 or 1/500 sec.
Note that the lens opening was small (f11, or "AV=11"). This helps considerably in guaranteeing sharper focus. 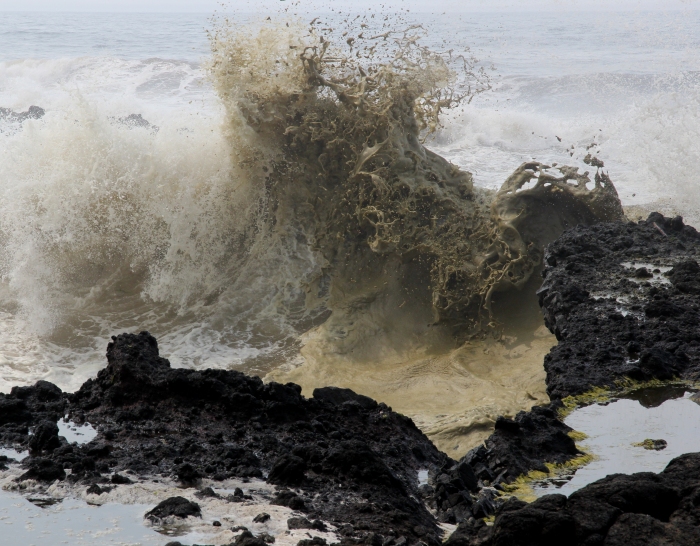 |
This shot. too, was taken at ISO 400  |
Light in photography (It's all about LIGHT)This section will offer samples that will remind us that in photography, it's all about LIGHT. Sometimes there's not much you can do about this one. If it's cloudy, photos look a bit bland. The exceptions are foggy days or perhaps an abundance of sea mist. However in general, you will have a greater chance of shooting more engaging pictures if there is bright sun with some clouds for additional interest. |
|
Here are some sea grasses on a cloudy day. Not too bad I suppose.
At least the clouds themselves are interesting. Stopped down -1/3 (Even on cloudy days, stopping down can bring out
more of the clouds.) 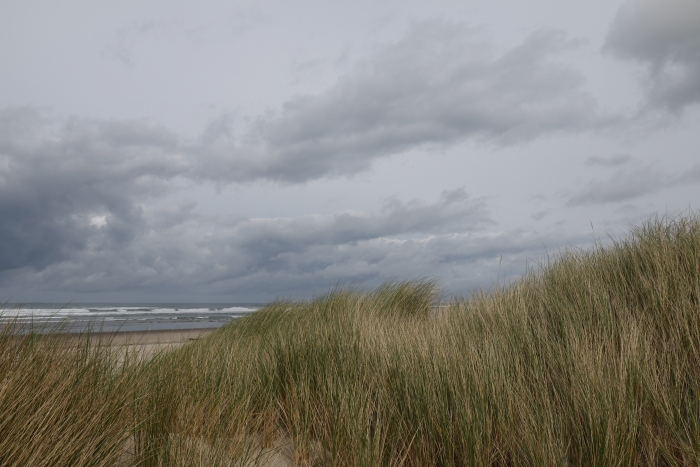 |
Here are some more sea grasses on a bright day with some cirrus clouds for
additional interest. A polarizing filter was used, but still stopped down -1/3. (Even with a polarizing filter, you can bump the
dramatic effect by stopping down a bit, especially if it's bright.) 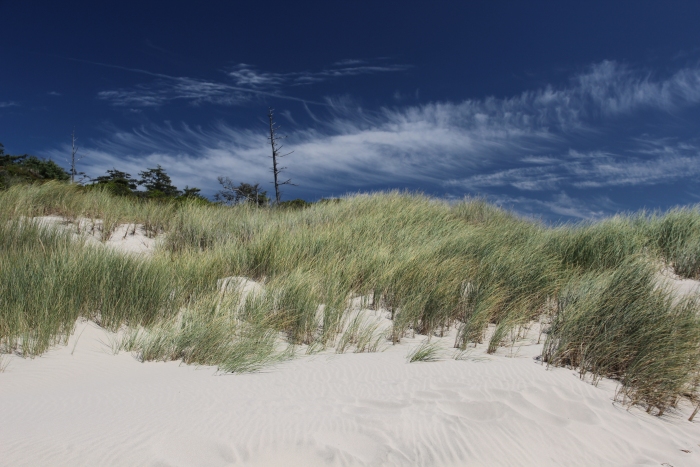 |
This is a nice one. A polarizing filter was used, also stopped down -2/3. 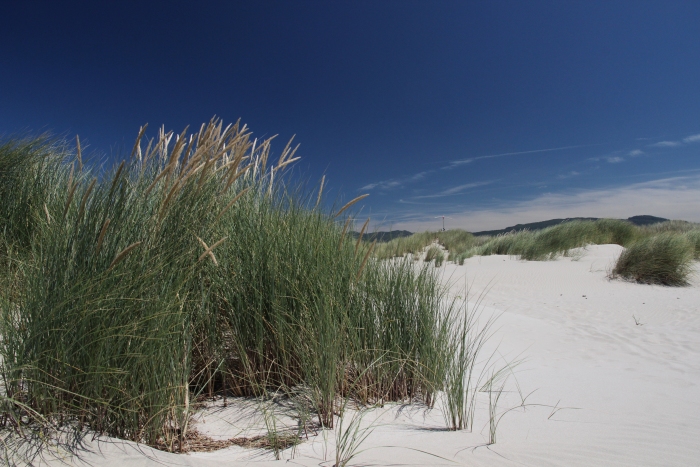 |
Here's a nice dramatic one. The use of a polarizing filter as well as stopping
down -2/3 yielded a cobalt blue sky, and helped the foreground branch stand out. These techniques can help you take shots
that almost look like paintings. 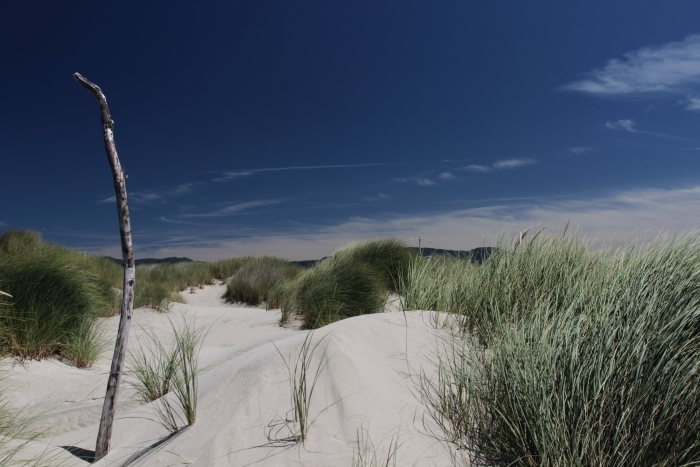 |
Scenes take on a deep golden color at sunrise or sunset. This is a good
time to be out taking landscape photographs! During these times of reduced light, it is well to start using ISO 200 or ISO 400.
This keeps the lens from being wide open, and the shutter fast enough to help with camera shake. Stopped down -1/3 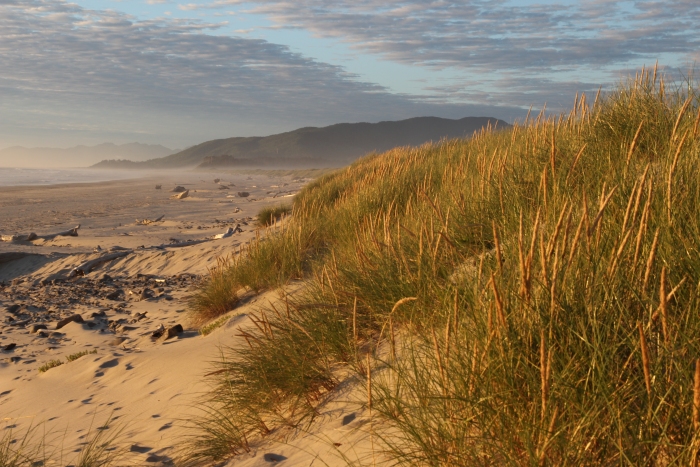 |
One very good use of light is "backlit". Objects, and people, become
quite dramatic when backlighted. (Canon 70-200 lens used here.) Stopped down -1/3. 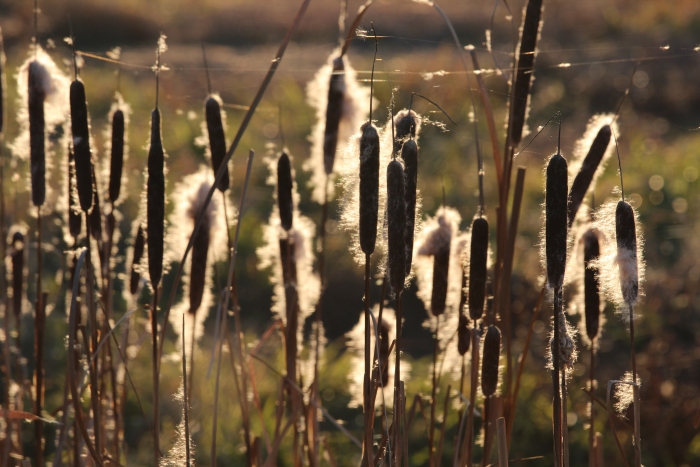 |
And finally, here is another comparison of taking shots, in this case wave
action, during cloudy vs sunny days. Compare this to the adjacent picture. Stopped down -1/3. 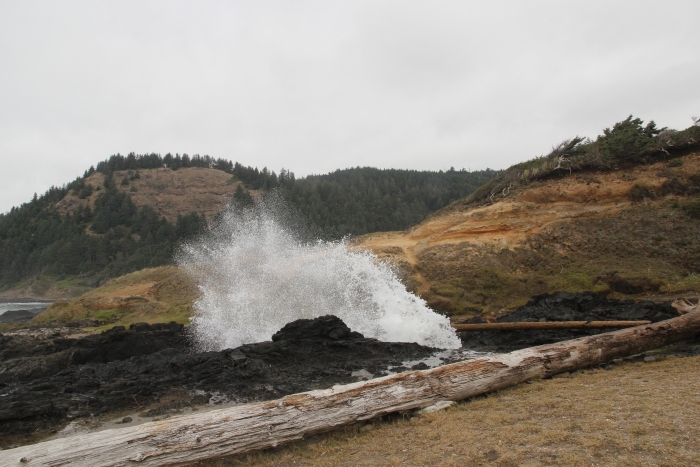 |
Here is a shot taken on a sunny day. Notice how the wave splash is bright
white and at a high contrast to the rest of the picture. The big log is also brighter, almost as if it were illuminated. Somehow the
image happened to be framed almost identically to the picture on the left, even though it was taken on a different day!
Polarizing filter only - not stopped down.  |
Here's a quick note about polarizing filters. If the scene is a lake or other body
of water with "sparklies", the polarizing filter removes the sparklies! Compare this shot with the one on the right (with the polarizing
filter removed). Polarizing filter only - not stopped down.  |
Here I have removed the polarizing filter (and stopped down -1/3).  |
Setting the camera to "Single Point Focus"Want to get more reliable focus? You might find it helpful to change the camera from its
default of using multiple focus points to just the center point. In the default mode, the camera will achieve focus by
using one of several points (9 on Rebels, 19 on the Canon 70D). This is OK for most scenes, but in crowded areas
such as a bird on a beach littered with seaweed, or your baby's face when the baby is surrounded by crib toys,
the camera may or may not focus on the desired object in the scene.
So you can improve your ability to focus on your desired objects by changing to "Single Point AF".
NOTE: The author prefers to use "manual focus" exclusively. But this is certainly a matter of preference. |
|
Here are some shots showing the advantage of having the focus
on the center dot (Canon 70-200 lens). This one would have next to impossible with "multi-point focus", since the cattails
predominated the scene. Other applications where the single-dot recommendation helped greatly were the "wave action"
shots, both those on this page and especially those on the wave action page under "Highway 101 Beaches General Info." 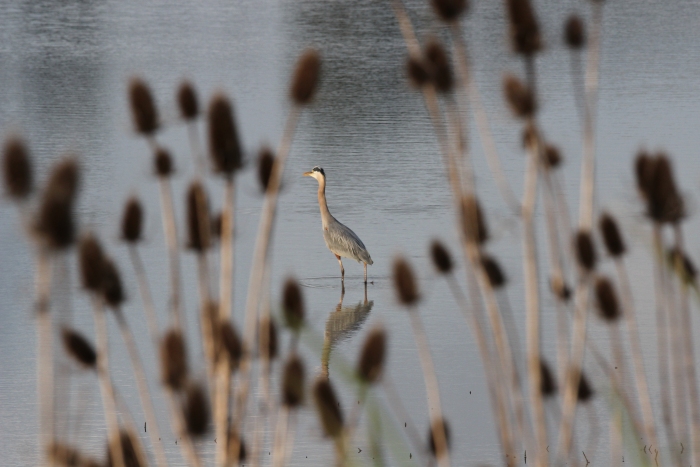 |
An osprey perched on a branch, with other branches crowding
the foreground. 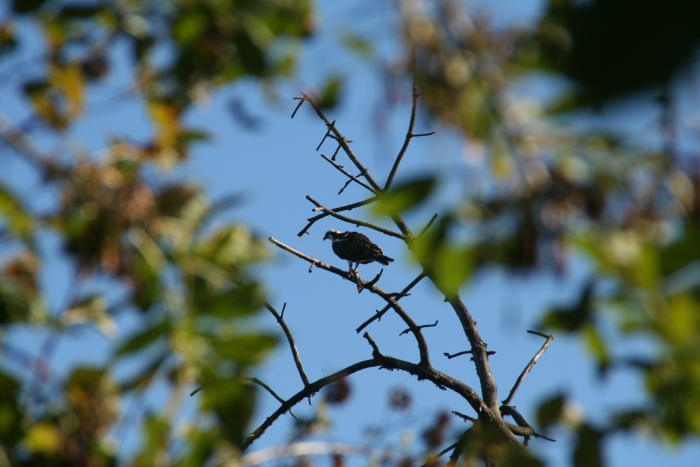 |
An osprey in flight shot through the branches. 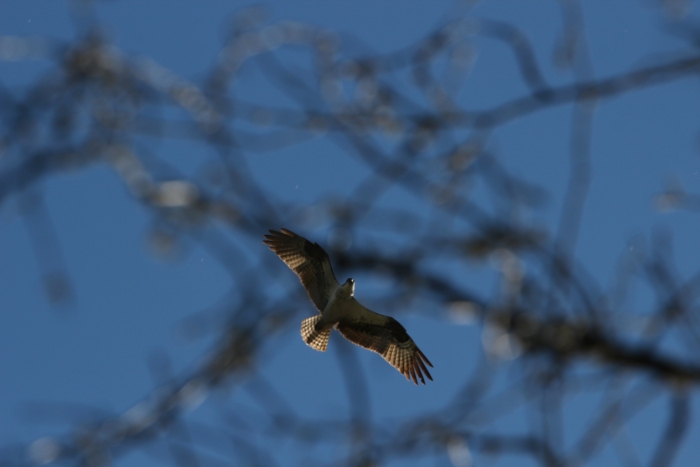 |
A lili pad flower among grasses 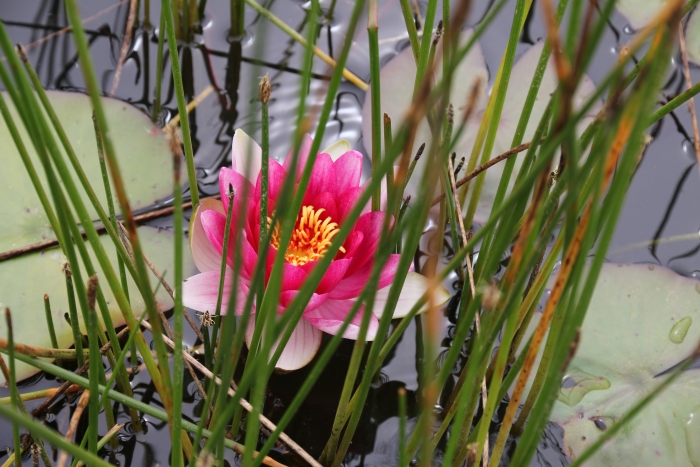 |
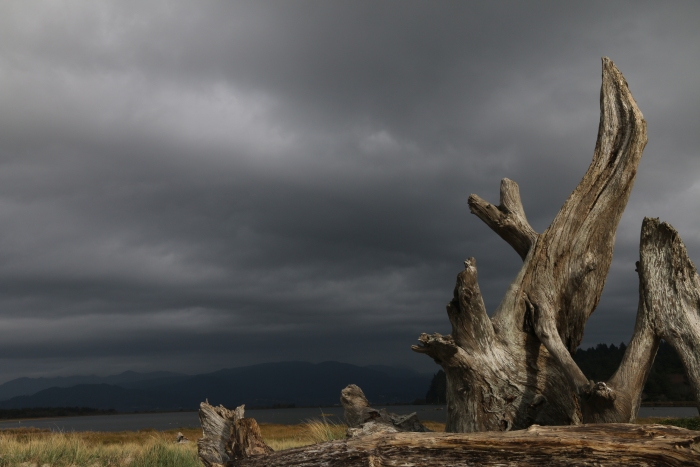
Watch for unique scenesFinally, one of the best suggestions for better landscape shots is to keep the lens cap off your
"photographer's eye". Look for unique scenes, intense colors (such as a deep cobalt sky), interesting patterns, and whatever
else that Existence might present to you. Also, try zooming in or out. An area that looks bland to your normal vision may
take on a completely different appearance when zoomed in. |
|
Look for opportunities to frame something. This might be a large piece of
driftwood on the beach, or something else unique such as this large tire with a rusted rim. 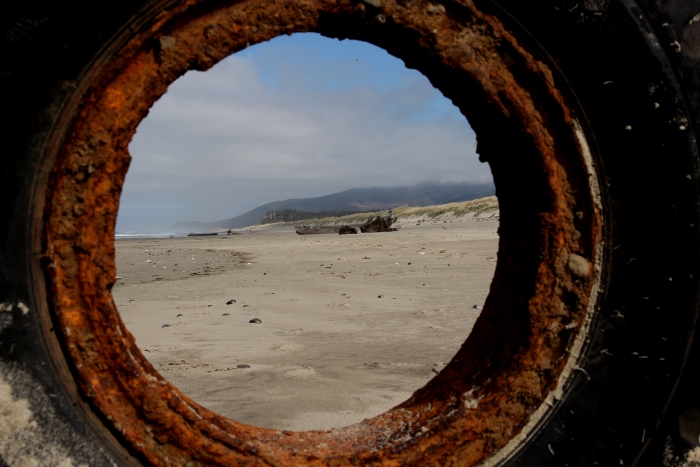 |
And from time to time, the whimsical will make its appearance for you.
This was taken by my wife.  |
Often a patch of still water will reflect clouds, as is the case for some sea water here. 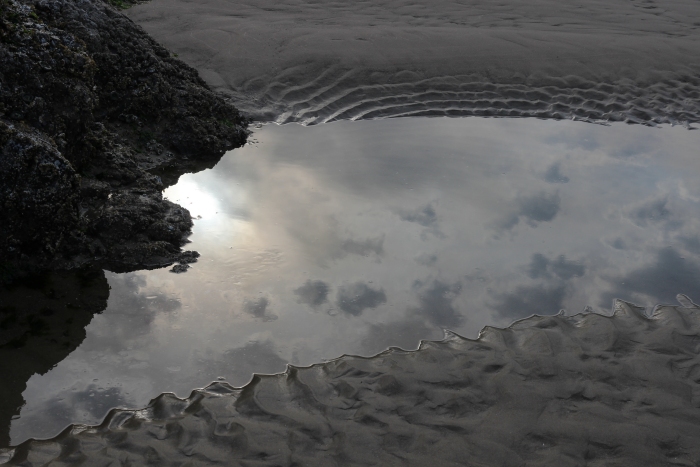 |
Here's a small pond offering up its illusion of looking up at the sky through a
hole in the ground. Another one taken by my wife. 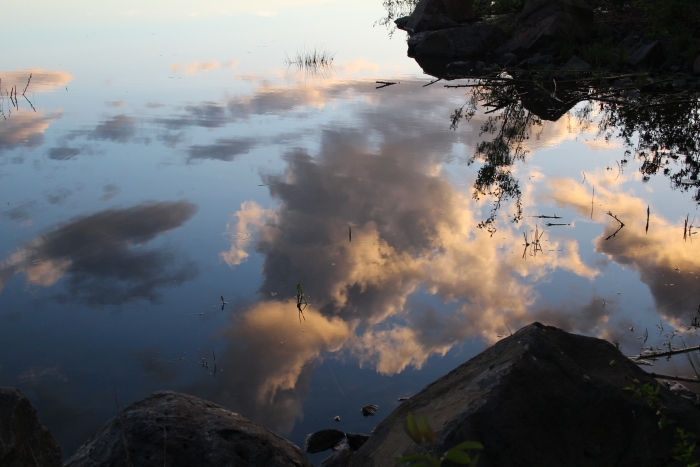 |
Some flowers taken near sunset, with its golden glow, taken by my wife 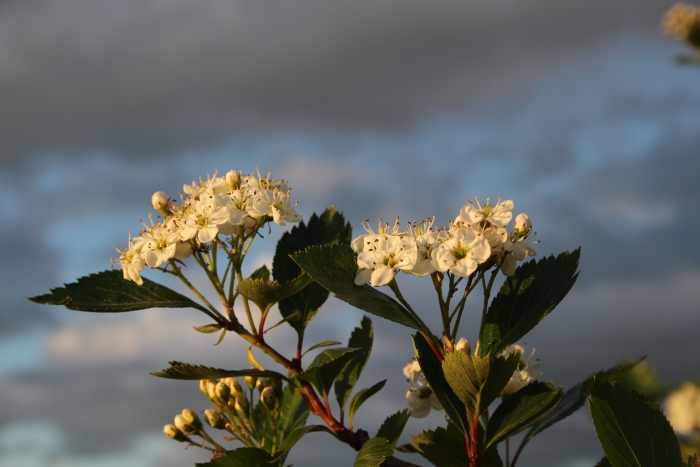 |
Sometimes, just a simple plant in a quiet pond makes for a dramatic shot;
also taken by my wife. 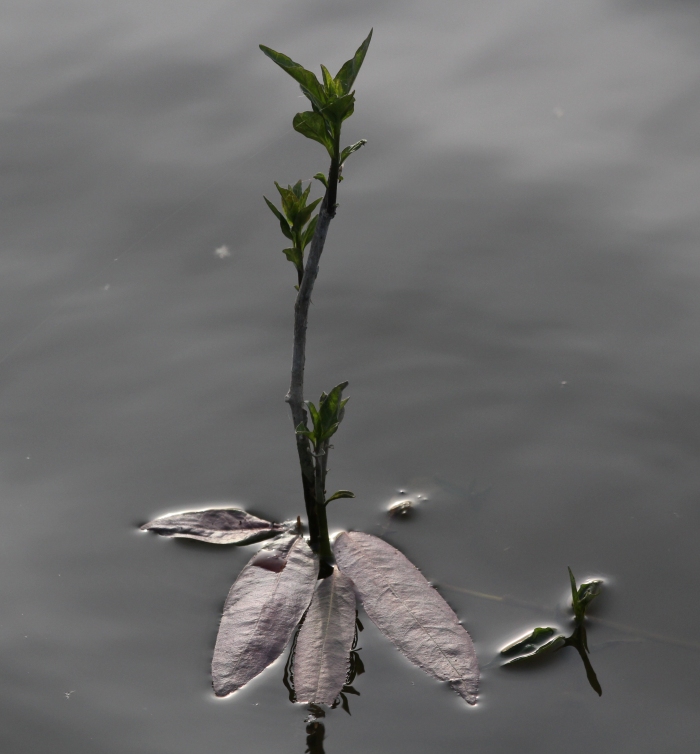 |
Copyright © 2022 J.A.