|
If you like gardening, and live in a cooler climate, you might try growing your own berries. Given the right soil, berries can be very easy to grow and maintain. Strawberries are the easiest and most prolific, but raspberries and blueberries are easy as well. This article is about blueberries.. |
|
|
You will likely find this more "doable" in a cooler climate. The water needs for most berries are a bit much for
hotter, drier climates like Texas. Berries tend to bear fruit at temperatures of 60 to 80 degrees. So If you live in
a state where summer days start in the upper 70s and go up from there, you would do best to buy your
berries instead! |
 |
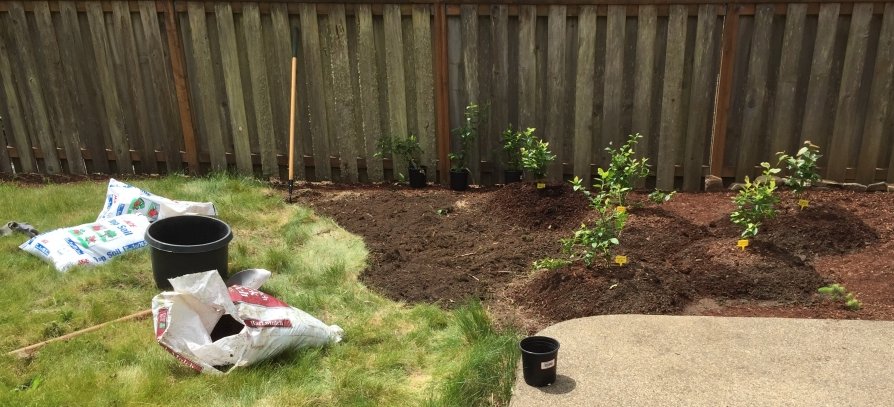 |
The first stage of a blueberry patch |
Planting
As you see in the image, the first thing I had to do was dig up the former owner's grass! (I have an article on this - "Digging Up Grass" - which you can reach from my "Home" page.)
The first requirement is good soil! Blueberry plants, as well as any plant, grow best in rich, friable soil with lots of organic matter, usually in raised beds. I will briefly summarize the basics of prepping your soil here, however you can find this discussed in great detail in my article "Gardening Made Easy" (also accessible from a link on my Home page).
Blueberries (and probably almost all plants, given the poor soil that surrounds most homes) like raised beds.
The easiest way to get a raised bed is to create mounds of a topsoil/mulch mixture. I used "Ace Potting Soil" from
Ace Hardware and "Filthy Rich Mulch" (Douglas Fir based), also from Ace; the bags can be seen in the image.
(We don't have Home Depot or Lowes out here on the Oregon coast!)
Before adding the topsoil/mulch mixture, you should dig up the underlying soil a bit first, and then mix that soil in with
the topsoil/mulch mixture. This way, the roots don't meet a sudden layer of hard clay soil as the plants grow.
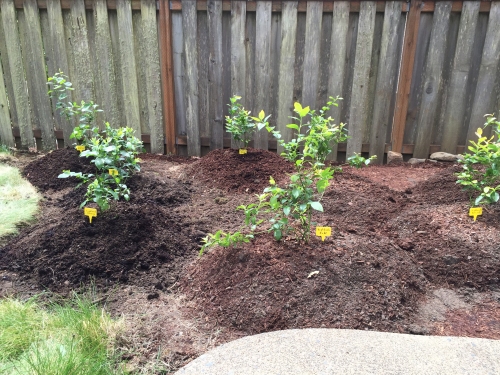
A close-up of the blueberry bushes. This is the simplest way to have "raised beds". Just plant the bushes in mounds of amended soil (mixed with some of the existing soil). This provides drainage and helps prevent soggy root systems, but the mounds might tend to dry out faster between waterings. |
So a better solution is to fill in between the mounds. Add some flagstones in between
some of the mounds for access. |
 |
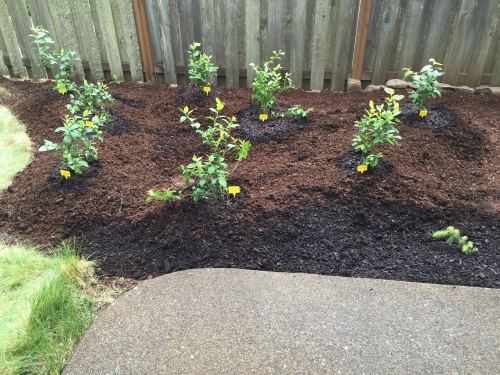 |
Well, I decided that a rock border would look much nicer. So here's a pile of rocks from the nearby mountains. |
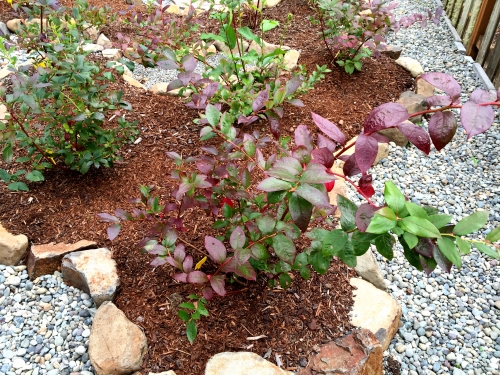
And this is the finished blueberry patch. It is well to top the beds with a layer of mulch. Always top your gardens with
mulch! It retains moisture and keeps the root system cool in hot weather or warm during cold winters. |
 |
 |
Some additional information:
Douglas Fir is the preferred mulch for blueberries.
The soil should be somewhat acidic: pH of 4.5 to 5.5. Using the method described above for creating raised beds should result in an appropriately acidic soil. If the new leaves are yellow on the edges, your soil may be too alkaline. Using "Dr Earth's Acid Lovers" organic fertilizer will help.
Once planted, it is well to add some organic "starter" solution, as discussed in the "Gardening Made Easy" link above. But as a very fine alternate, simply mix some of a "natural" fertilizer into the soil that you pack around the plants.
Don't forget to water your new bushes frequently! Every 3 or 4 days might be in order, or every 2 or 3 days if there is no rain. This helps new plants get over transplant shock more easily. A great percentage of planting failures is due to insufficient water right after planting!
Blueberries are self-pollinating, but planting several cultivars will result in larger blueberries.
During the first year after planting, I removed all but a few of the blueberries that sprouted. This allows all the energy to go into growth of the bush (but lets me get a sample of what the berry will be like).
Some cultivars for the Pacific Northwest (I used some of each one). These are all "Northern Highbush" types:
Duke
Bluecrop
Spartan
Patriot
Chandler
Some links to further information from the University of Oregon:
Growing Blueberries in Your Home Garden
Growing BlueberriesBlueberry Cultivars for the Pacific Northwest
Cultivars
I used to have a link to a hilarious version: "Redneck's Guide to Growing Blueberries".
But, alas it's gone. So I had to remove the link.
During the growing season
Watering:
Water thoroughly once a week during dry periods of the summer, particularly when the berries
are being produced. (In Oregon, there is almost no rain during the summer months!)
Updated 2022: Watering every 4 - 5 days is even better. And this seems to help produce
larger blueberries. Blueberries need anywhere from 1.5 to 3 inches of water per week during blueberry
production, according to the U of Oregon article.
Be sure to water fairly deep, and try not to wet the foliage very much. So watering by hand or
by drip irrigation is best. If possible, direct the water spray toward the base of the bushes, so the foliage doesn't get
wet. Preferably water in the morning or early afternoon, so that the bushes can dry out before nightfall.
More "during the growing season" info is discussed in the paragraphs associated with the images
below. This includes fertilizing, picking the berries, and the like.
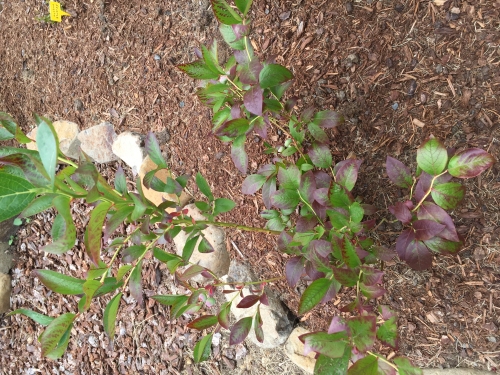
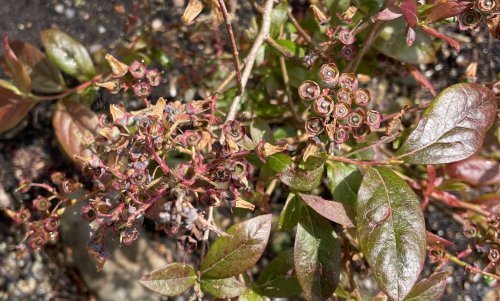
Purple leaves. Not quite enough nitrogen. I find it helpful to fertilize a couple times during the growing season. Once in the spring and once more during the summer. Some organic fertilizers I use for blueberries are Jobe "tomato-vegetable" fertilizer (for the extra potash), and Dr Earth "Acid-loving" fertilizer. |
Leaves will also turn purple after the first few autumn chills. |
 |
 |
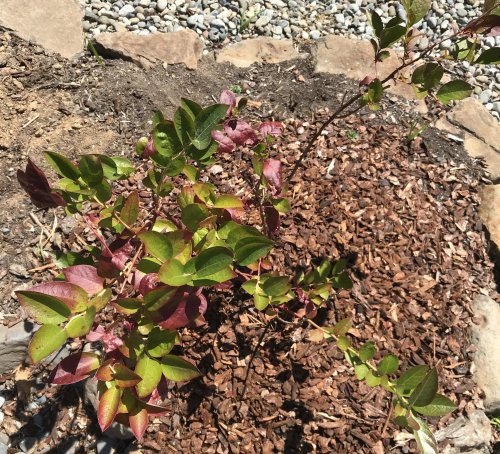
The "Chandler" variety can have purple leaves from time to time, and this is apparently normal for the variety. Here's a newly-purchased Chandler plant (which was a bit spindly when I bought it). |
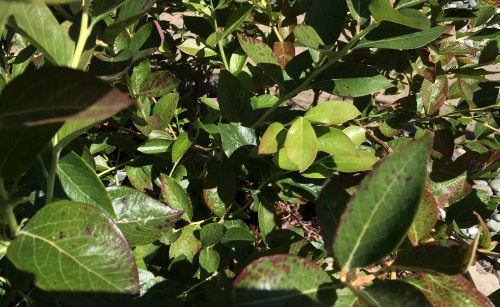
And here's my established Chandlers. In late July some of their leaves had purple splotches, and yet none of my other varieties did so. |
 |
 |
More On watering (!): |
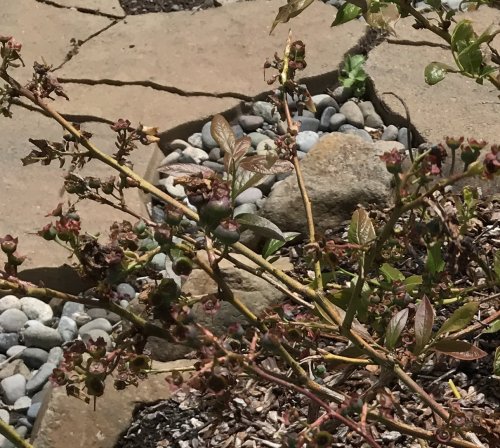 |
Here is a Chandler bush that I didn't water soon enough. The winter rains were tapering off, but had not yet stopped. I should have begun supplemental watering about a week or two before this picture was taken. Chandlers are particularly sensitive to absense of water when producing the berries in the early spring. Thus, many of the berries shriveled up! |
As a corollary to this, make SURE you add mulch in the early spring, to help keep the soil moist. |
 |
 |
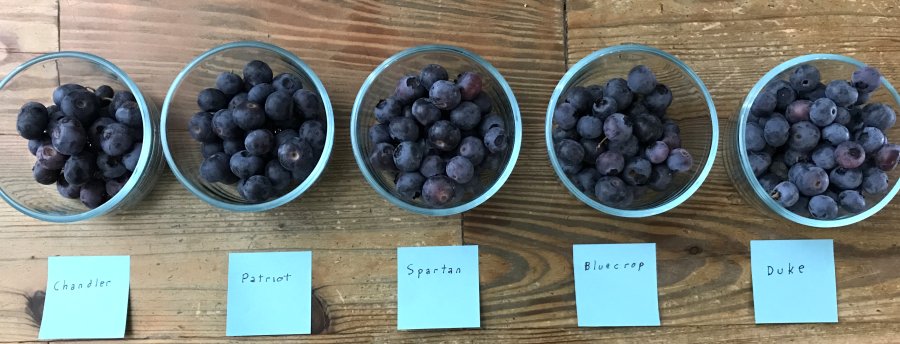
The following sets of images show the differences, though slight, among the individual
varieties of blueberries. For some, I have pictures for "year 1" and "year 3". By "year 1" and "year 3" I mean the first year after
transplant, not the first year of growth from seed. All these bushes were purchased as container plants, usually
2 or 3 gallon size.
These pictures aren't the best, and do not necessarily capture the differences in the berries. Some better
ones, taken in 2020, are below the first four sets of pictures.
Dukes 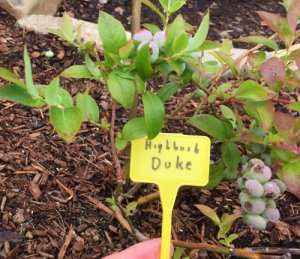 |
Here are the Dukes in early July of the third year. 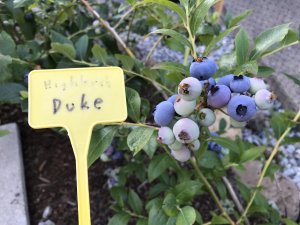 |
And here's the Dukes in late July of the third year. Dukes are by far the most prolific of the varieties, and in general the smallest. (But, regarding prolific, please see "Comments Update 2024" - the Chandlers can be prolific also after 3 or 4 years.) 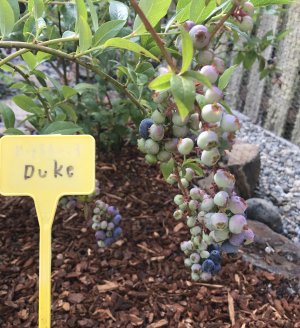 |
Bluecrops 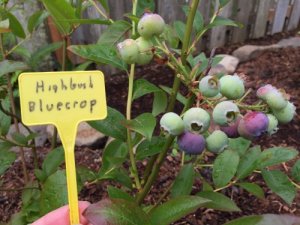 |
And in early July of the third year. 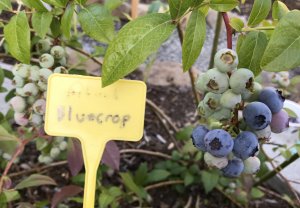 |
And here's the Bluecrops in late July of the third year. 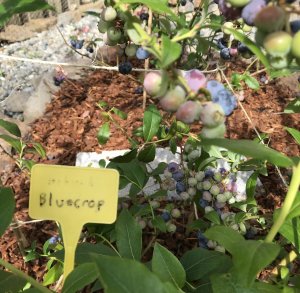 |
Patriots 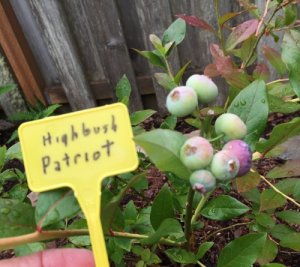 |
Some Patriots in late July 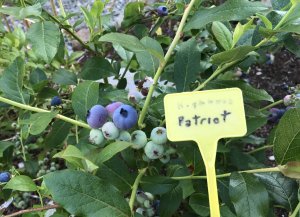 |
Spartans 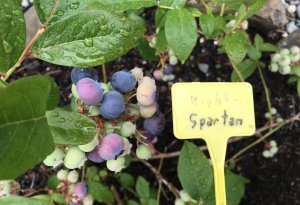 |
Chandlers 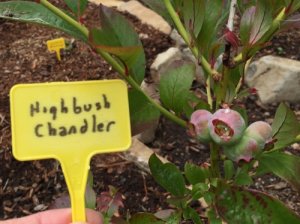 |
Here is a picture of some Chandlers in late July. I forgot to get any pix when they were in full bloom. There were actually around 15-20 Chandlers in a typical grouping at full bloom 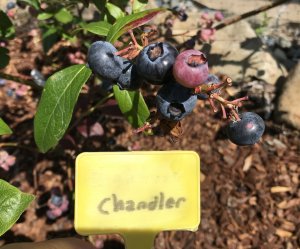 |
Another picture of Chandlers 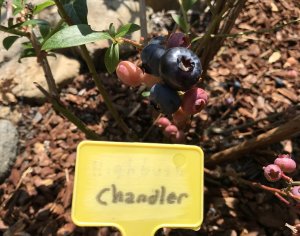 |
And here are some Dukes in July of the fourth year. Some Dukes can get as big as Bluecrops if you give 'em sufficient water. 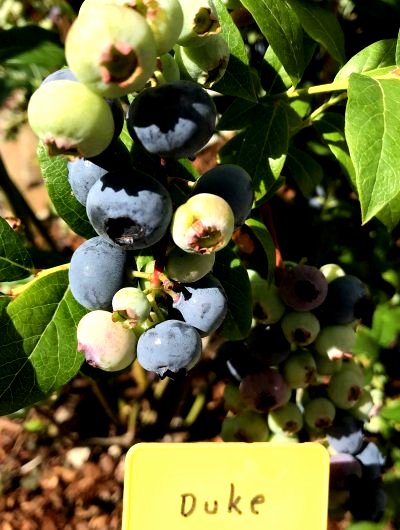 |
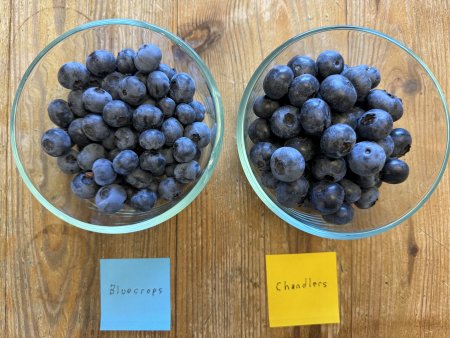
Some Bluecrops in July of the fourth year. Most Bluecrops can get pretty big as well, with good watering (say every 4 - 5 days) 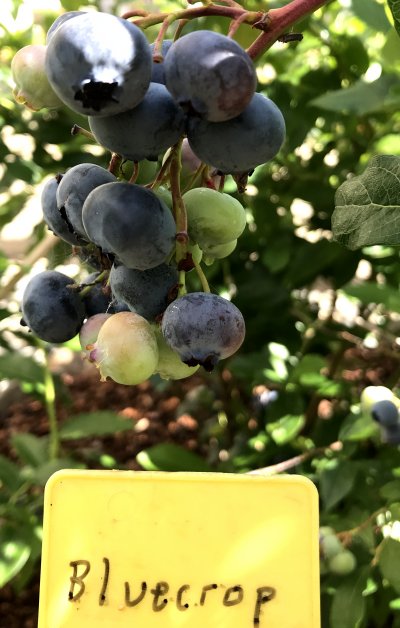 |
And some Patriots in July of the fourth year. 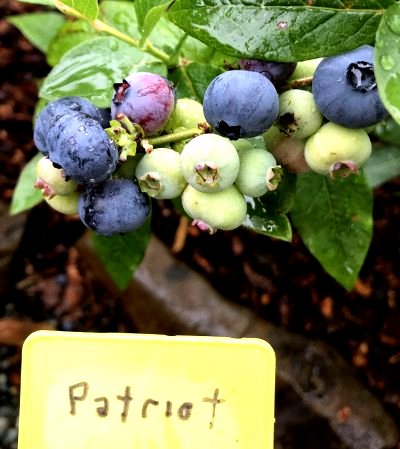 |
Some Spartans in July of the fourth year. 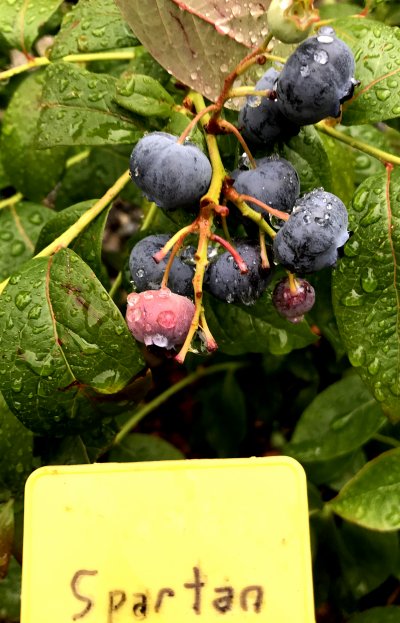 |
 |
Samples of the Five Types of Blueberries So here's my take of these five varieties, based on my experience, as well as my "taste panel" of my wife, my kids, and my grandkids: Duke The most prolific in quantity (First year:) Usually smaller than other types. (Subsequent years:) Size ranges from small to medium) (First year:) Not quite as tasty as the other types. (Subsequent years:) Given enough, water, can be every bit as tasty as the others) Produce berries longer in the season than any of the others Bluecrop The second most prolific in quantity Size ranges from small to medium (First year:) Not quite as tasty as the other types. (Subsequent years:) Given enough, water, can be every bit as tasty as the others) Produce berries somewhat longer in the season, but not as long as the Dukes Spartan First to produce blueberries in a given season. Larger in size than Bluecrops and Dukes Better tasting and sweeter than Bluecrops and Dukes Patriot (First year:) Larger in size than Bluecrops and Dukes. (Subsequent years:) Size ranges from small to medium. Better tasting and sweeter than Bluecrops and Dukes Chandler Largest size of all. Many are as big as grapes Tastiest of them all Produce berries somewhat longer in the season Chandlers MUST have extra water in the Spring when the rains taper off. |
|
|
 |
 |
General Comments:
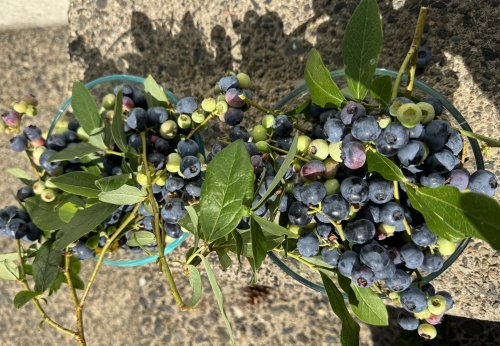
On the Oregon Coast, blueberries are available for harvesting from early July to mid/late August
(probably a bit longer in the interior.)
In general, the larger the blueberry, the better tasting and sweeter it is. All five types produce
some larger ones, but the Spartans and Patriots have many more large berries. However almost all
the Chandlers are large.
Tips on getting bigger blueberries:
Prune large blueberry clusters for freezing or giving to neighbors. Prune clusters with lots of new blueberries.
Both of these methods encourage growth of bigger blueberries. SEE the images right below.
If you have planted too many blueberry plants - as I certainly have - consider pruning a bit more
heavily during the winter.
On the other hand, many articles suggest that having several varieties does tend to help in producing
bigger blueberries.
And, don't forget to water every four or five days. You might keep a "water log" to remind yourself
on which days you watered.
Comments Update 2022
The above comments were made after the first year of growth. I may have prematurely dissed the Dukes
and the Bluecrops on their taste and size. In 2022, the Spring was unusually cool and rainy, and it appears that
weather and moisture just might have a bigger influence on berry quality than I first might have thought.
After the cool and rainy Spring, the blueberries did not come out until early July - as might be expected.
But their characteristics were different than described above:
The Patriots were smaller this year, but still as tasty as the others.
Both the Dukes and the Bluecrops (and the Spartans) were among the larger of the berries produced, and their taste was actually right up there with the Spartans and Patriots.
Nonetheless the Chandlers were still big as watermelons and still tasted a bit better than all the others. (OK, big as grapes at least. . .)
Comments Update 2024
Chandlers: This variety might seem a bit finicky during the first 2 or 3 years. And, as mentioned several times
before, they need a good supply of water, particularly in the Spring if the winter rains taper off. But the Chandler really
comes into its own by the fourth year onward.They produce lots of blueberries, many of which are quite large.
All are very tasty. Further, they produce berries throughout the whole season - from June through September.
|
|
 |
 |
During the other seasons
Curious what blueberries look like in the non-growing season? Here's some pix of what they look like on the Oregon coast. We are above the 45th parallel, right up there with Montana, Maine, and the like. But the winters are moderated by the Pacific Ocean and usually stay above freezing, with occasional drops to 28 F or so.
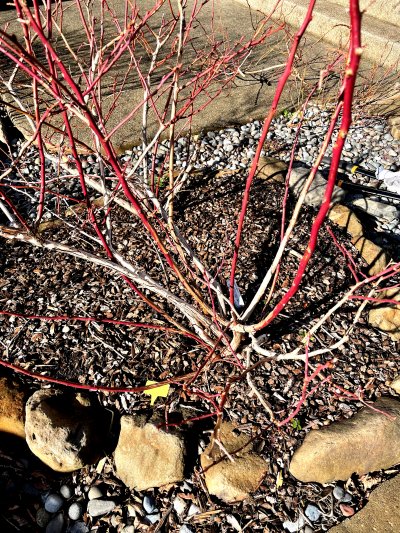
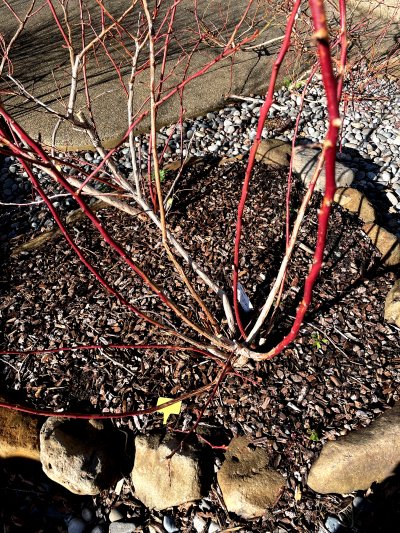
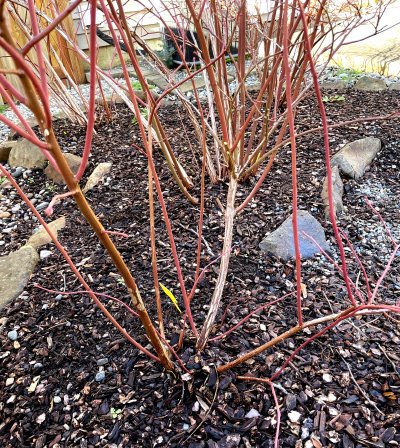
Winter 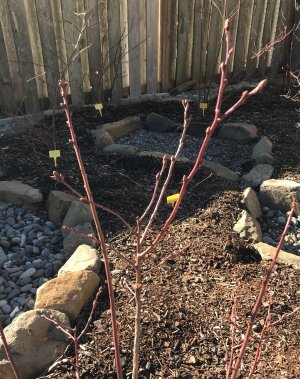 |
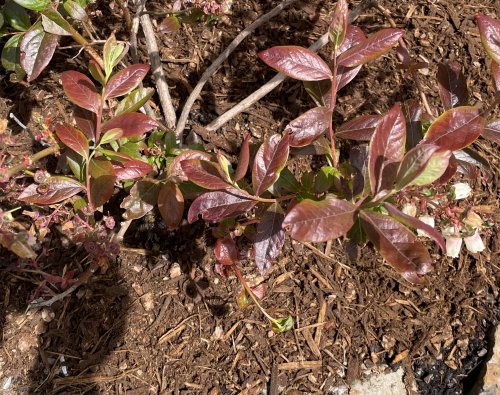
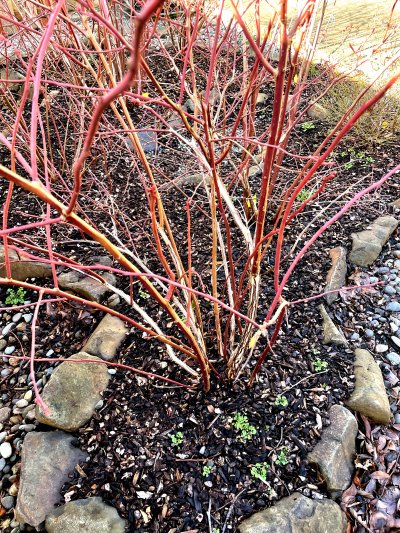
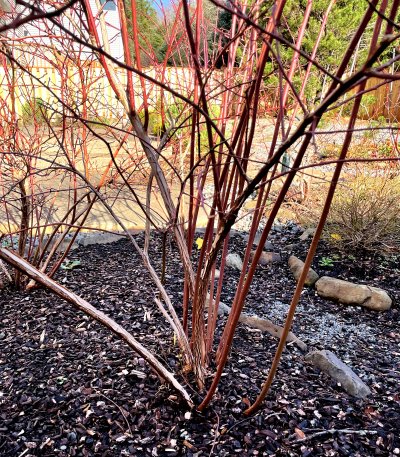
Early Spring 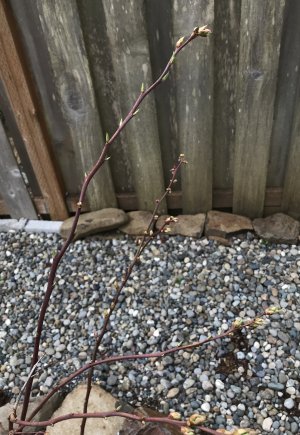 |
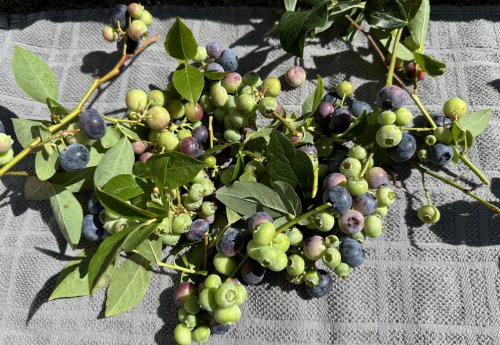
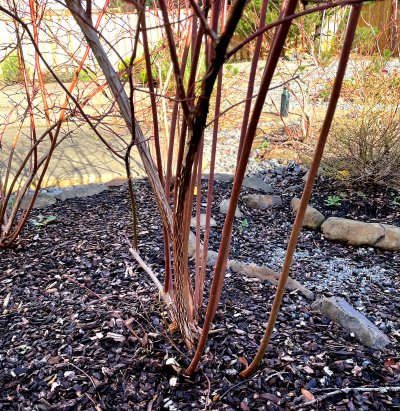
Late Spring 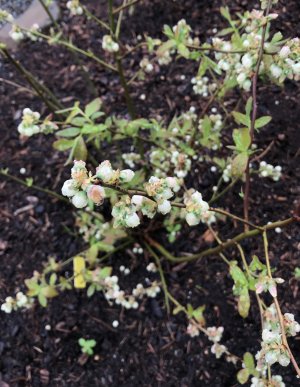 |
Pruning
I'm usually not too fond of pruning plants, preferring to let them grow naturally.
But pruning is a necessity for blueberries. If blueberries remain unpruned for several years, the
blueberry production is drastically reduced, and - in the case of Chandlers at least - may in fact stop
altogether!
Blueberry plants put out new shoots each summer. So we want to encourage this by removing
stalks that have produced blueberries for several seasons. So how do you tell which is which,
especially in the winter when all the leaves are gone?
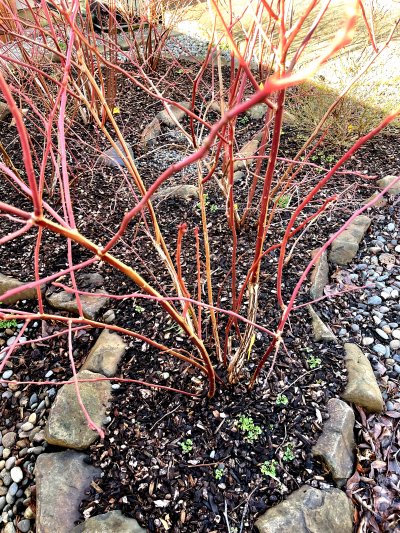
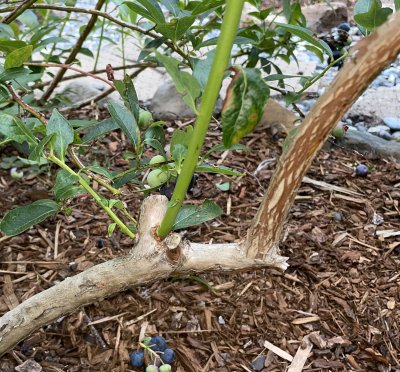
The new shoots are smooth and reddish. They will also have lots of small buds which grow larger as Spring approaches.
The older stalks have become "woody", and look like plain ol' tree branches. The goal is to remove some but not all of these stalks (unless some new shoots have emerged along the length of the stalk). I show this in the images below, using "Before" and "After" pictures.
 |
So we can see that the new growth is red (maybe not
as red as these pictures show - I have enhanced them for better contrast.) The older growth looks like
tree branches. Some agricultural extension articles use the term "twiggy" to describe them. As seen here, two stalks on the left have been removed. Apparently it is not desireable to remove all of the older stalks, just one or two main ones. Two smaller stalks on the lower right have been removed. We are also cleaning up some of the smaller growth (not new shoots!) as well. |
 |
 |
Here's another bush with some older stalks. A couple of the older stalks have been removed as seen here. |
 |
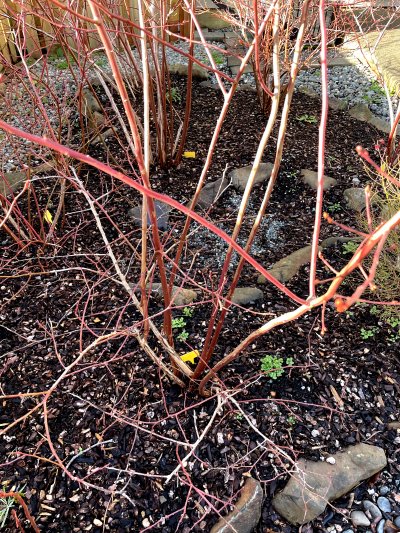 |
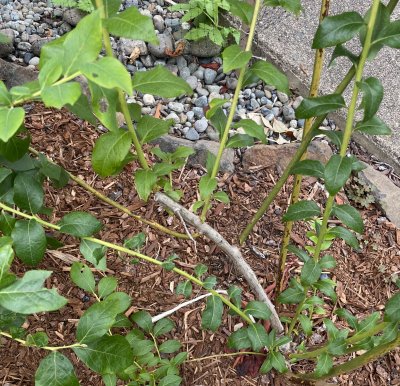
Here's another bush. This one has quite a bit of smaller growth near the bottom that can be removed. We have removed one of the older "woody" branches, but retained two others because
new shoot have emerged from them. |
 |
 |
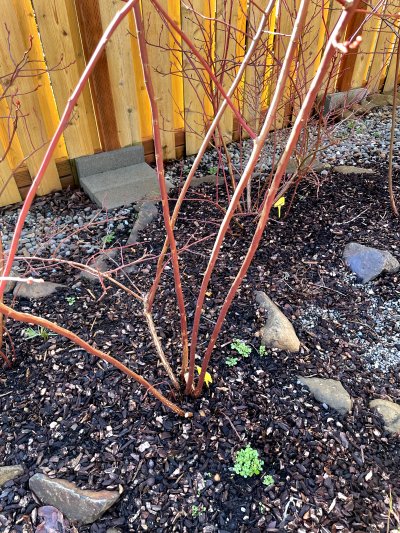
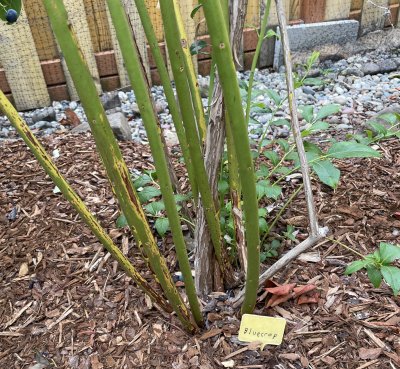
Another "Before", with two larger woody stalks. Here it is after pruning. Note again that the goal is not to remove ALL of the woody growth branches. |
 |
 |
Another example We removed a large woody branch as well as a smaller one, but retained a large woody branch. Also, the short woody branch on the back side was left because it actually has two new red shoots emerging from it. |
 |
Here's some pictures of the results of pruning (taken during the following summer).
There are a couple of ways that new shoots may appear in the Spring after pruning:
Several new shoots will emerge from the base of the plant in the spring. There can actually be quite a few of these!
New shoots may emerge from the remaining woody branches particularly if you have only cut off part of one.
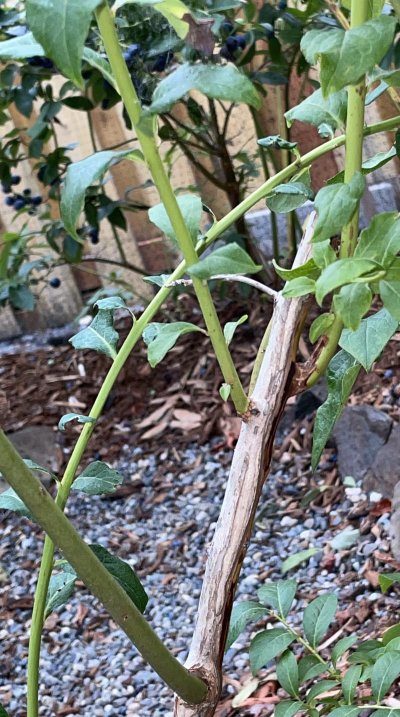 |
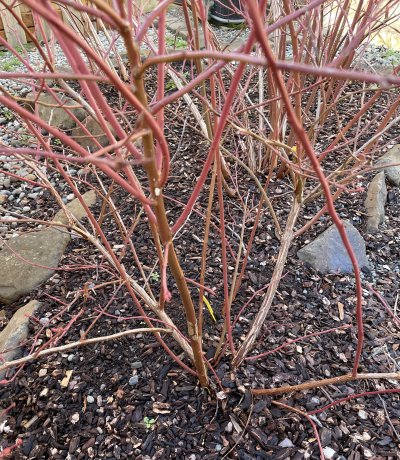
This picture shows two new green shoots emerging from a partially cut woody branch. One of the new shoots is near the bottom of the woody branch, and another emerges on the left side of the branch toward the middle of the picture. And here is a large green stalk and a smaller one growing out of a pruned branch. |
 |
 |
Here's three or four young shoots emerging from a cut branch, along with some new shoots coming out of the base of the bush. And this Bluecrop bush is sporting 7 or 8 new green shoots, which produced boatloads of berries during the summer immediately following the pruning. Note that these bushes are 4 years old, and are very prolific! |
 |
And Finally, a Reality Check
Well, should you decide to grow your own blueberry plants, you and your family
will be treated to delightful blueberries the likes of which you won't find in stores. You will really like
your blueberries!
And so will the birds.
And so will the rabbits and chipmunks.
Sigh. Reality's a B, ain't it?
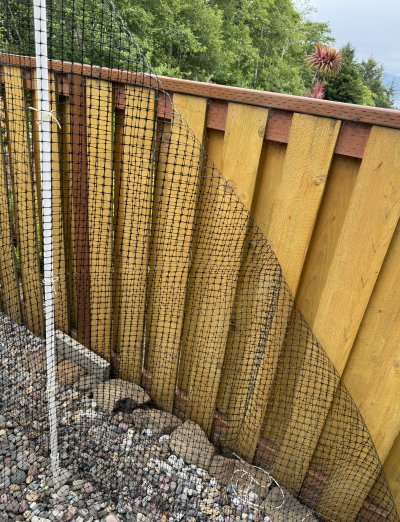
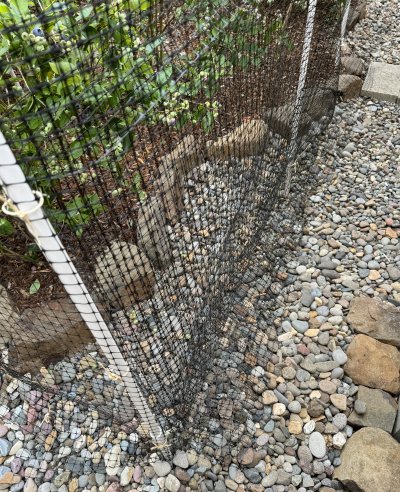
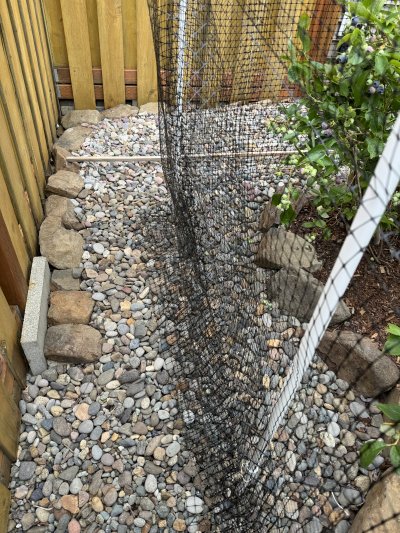
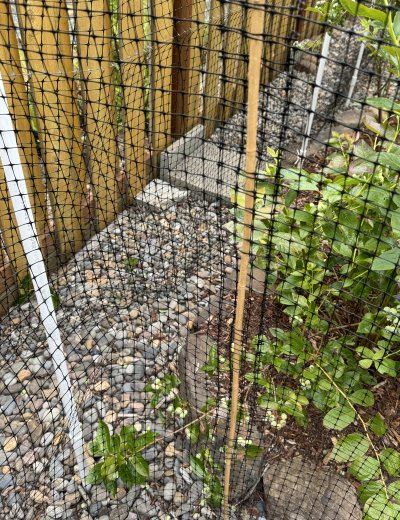
So if you want to eat the blueberries yourself, you'll have to secure the perimeter! If your yard
is fenced, and if the fence is continuous wood slats (not alternating), and if you put blocks or rocks on
the ground to fill the space between the soil and the fence, you can keep out the rabbits (but not the
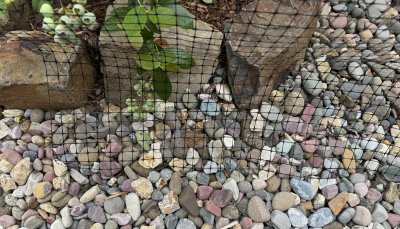
chipmunks). For the chipmucks, you could try to staple a wire mesh along the bottom. I tried a mesh with
approximately 1 inch openings - but the chipmunks could glide through the mesh as if it wasn't even there!
Then there's the aerial squadron. Can't stop that with a fence.
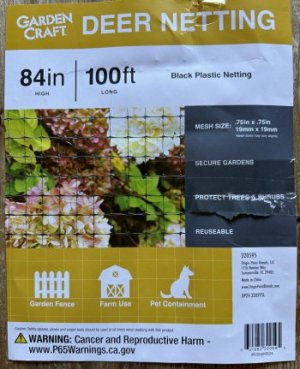
But what you can do is put a net over the blueberry plants.
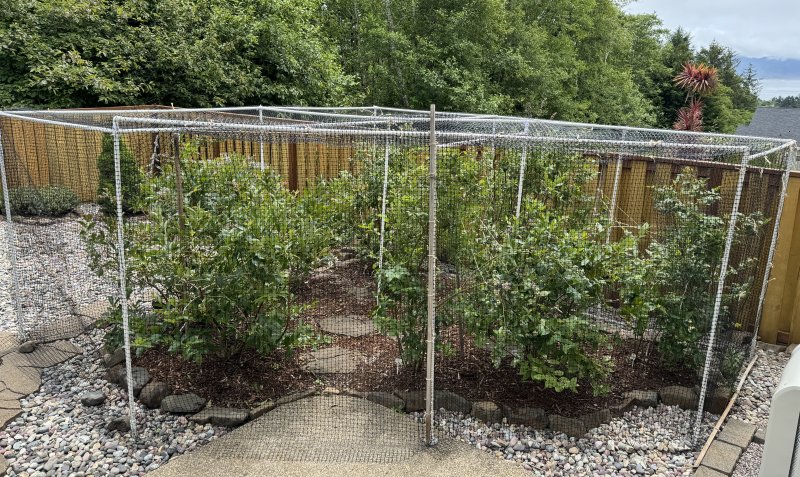
Securing the Blueberry Perimeter.
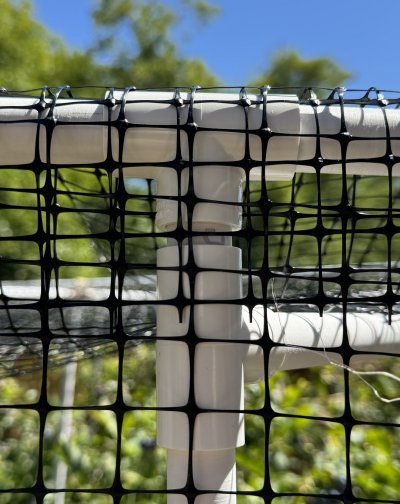
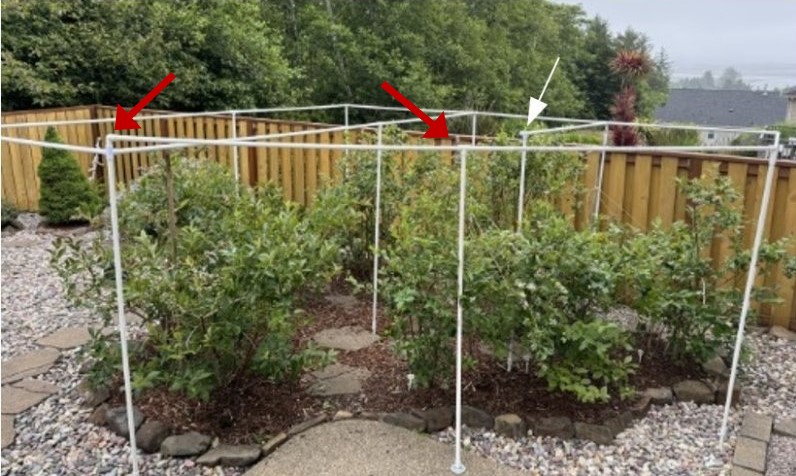
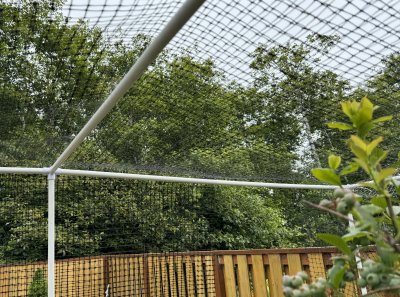
So here is a good and relatively easy way to surround your blueberry patch.You construct
a frame with PVC pipe and cover it with plastic mesh.
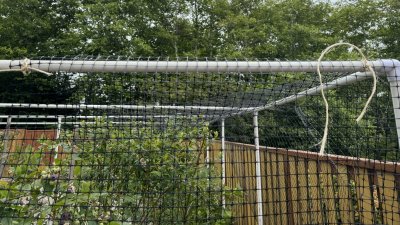
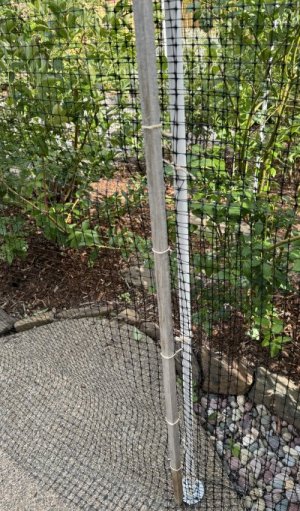
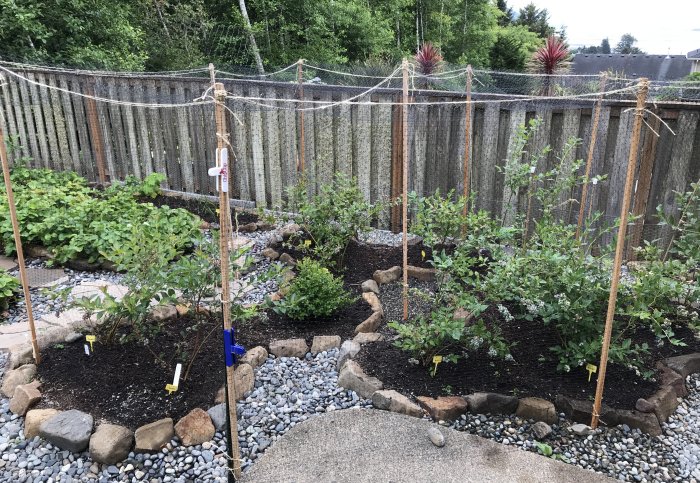
NOTE: My blueberry article used to show an entirely different method of building an enclosure. It
consisted of upright garden stakes, with twine stretched between them for support of the mesh. Also, I discussed
a finer mesh material. All of this does not work! I have a picture of this system at the very bottom, explaining
why it is deeply flawed.
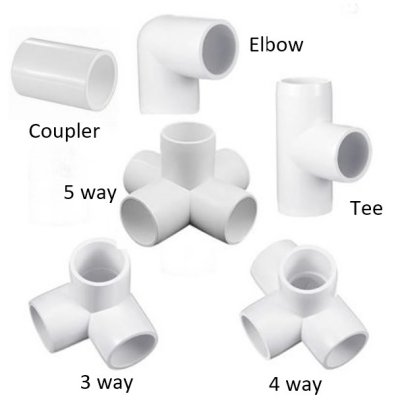
MATERIALS NEEDED. |
You'll need some or all of these PVC connecters Note that this is 1/2 inch PVC pipe: coupler right angle Tee three, four, and five way. |
 |
 |
|
|
 |
 |
|
|
 |
 |
How to do it
Cut the upright pieces 5 feet. That way, you can get two per 10 ft pipe
Cut the smaller pieces (to be driven into the ground) 16 inches long. This provides a little extra height.
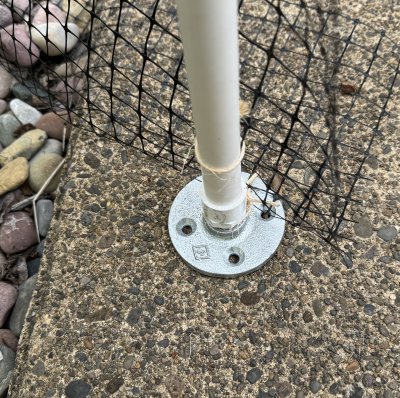
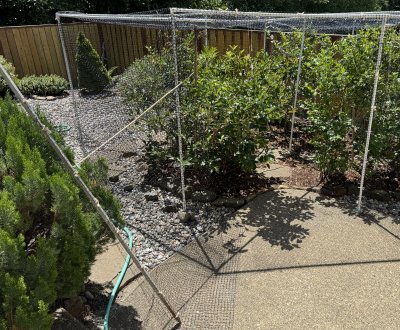
Decide on locations to place the smaller pieces. I spaced them 5 feet apart. This allows you to also get two horizontal sections from one 10 ft pipe. Drive them partly into the ground - it helps to do this with wet ground for easier working. Before driving further, use a level to ensure they are upright and plumb. Or just eyeball them by comparing them to a nearby house or fence wall. Then drive them deeper. If the area is level, you can drive them all about 10 inches deep. If the ground is irregular, drive them such that the tops are at the same height. Mine varied from 10 inches to 14 inches. The 14 inch depth was inside the actual raised blueberry bed itself (the image just above).
If your blueberry patch is larger - say 8 ft by 8 ft - put a couple of "ground supports" in the middle of the garden. This way, you can have some uprights there, to support the netting.
If necessary, some of the horizontal sections can certainly be shorter or longer than 5 feet.
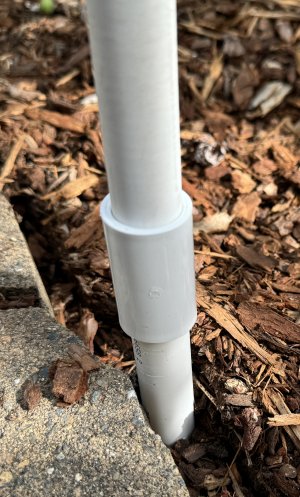
Now cut some 5 foot vertical sections to be used as the uprights. Use the couplers to attach them to the ground pieces. Push the uprights into the couplers, but not too firmly - you want to be able to remove them at the end of the summer. Sand the ends again if they won't fit into the couplers.
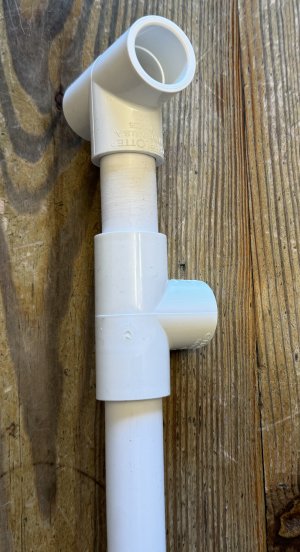
Now add the horizontal sections.
You will probably use the 3 way connector in the corners, and the 4 or 5 way connecter in the middle.
|
|
 |
 |
|
|
 |
 |
|  |
Adding the mesh
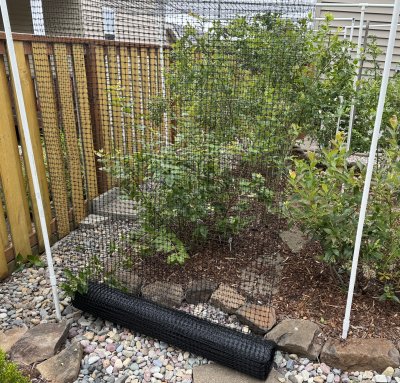
Place the roll in one corner. This product is supplied doubled up. So it's actually
84 inches wide, but it is folded in half, to a 42 inch width. Place the roll such that the fold is toward the corner.
Thus the fold is on the left side of the roll in this picture. |
Make sure the mesh on all three sides sticks out about 10 - 12 inches. That is, don't cut the edges flush to the soil line. You need some of the mesh to lie flat so you can put some rocks on it to keep out the chipmucks/squirrels! |
 |
 |
|
|
 |
 |
It's about $75 bucks a roll, for starters! Also, if you don't cut it, you can reuse it next year without trying to figure which section went where. The cut would leave the corners open, you would have to tie them to the upright with many pieces of twine to keep the chipmucks or the birds out!. |
|
 |
 |
|
|
 |
 |
|
|
 |
 |
|
|
 |
 |
|
 |
A final note:. It's too hard to pull the mesh over the stakes. (I just strung twine between the stakes in an attempt to support the mesh) Fine mesh is indescribably difficult to use! It catches in any shirt buttons that you happen to be wearing. It catches on the blueberry plants. It's hard to re-use. |
 |
Copyright © 2025 J.A.