Jimmie's Guide to Setting up a TP-Link Router

This article shows how to perform the Initial Setup for TP-Link routers. The setup for other brands of routers should be similar.
 Unlike some other internet articles, and especially unlike the sketchy "Quick Setup" documents that you get with the router and/or on the manufacturer's internet manuals, I will provide tips on what to do when things don't work like the article/manual says!
 I have also provided some information on how to understand some of the settings:

If the router immediately does a "firmware update" when first turned on, nothing will work right until you do a "reset". Nobody tells you this!

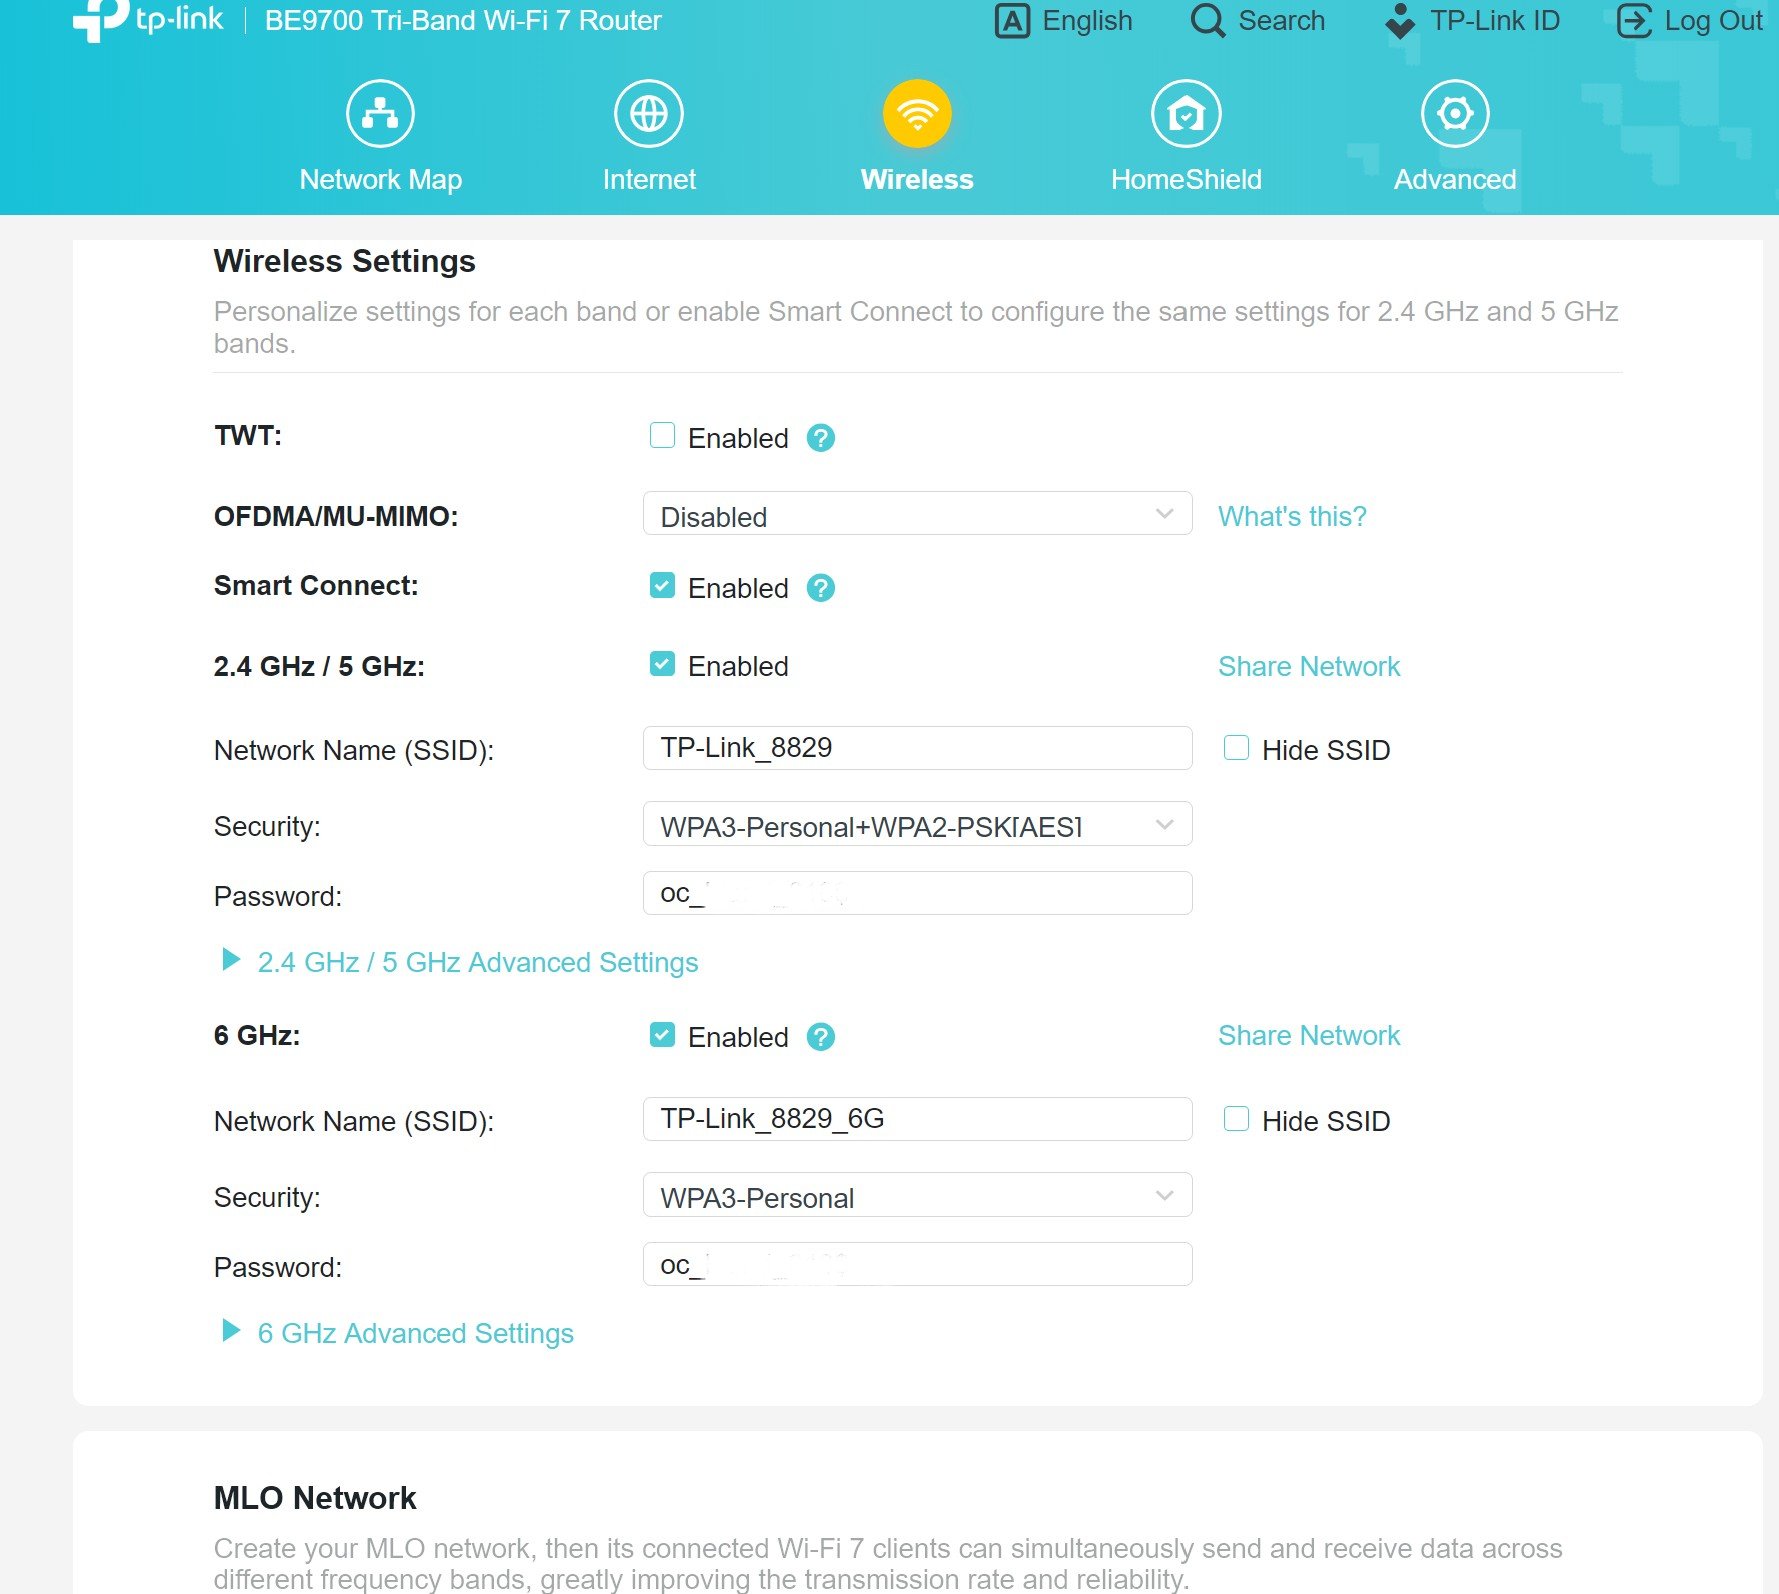
Should you combine some of the separate bands, or not?

What are those archane Security Protocol names?

Router

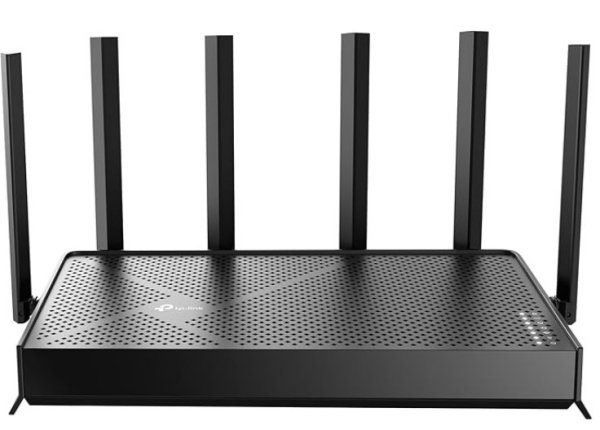
Here is one model of TP_Link routers, the TP-Link BE9700.
It's a tri-band, WiFi 7 compatible unit.
The package contains:

The router (Covers up to 2600 sq ft home)

A Power adapter/supply

Connecting cable for router-to-modem, cat 6

A (minimal) Quick setup Guide


Here is the ordering link on buying the router.


 As noted on my Home page, Amazon may pay a small commission to a referring web site. But the product price remains the same.

router

IMPORTANT NOTE: When the router is started, it may immediately tell you that a firmware update is available. This may be changes that the factory has implemented after the unit has been manufactured.
 It is HIGHLY recommended that you do this update.
 And it is even more highly recommended that you RESET the unit after the update, before trying to do the Initial Setup. You do this by inserting a pin/paper clip into the tiny hole on the back, marked "Reset". Give it a few minutes to fully restart. THEN you can perform the Initial Setup.
 Why? Because the Setup WILL FAIL, in any of several ways if you do not reset. I show three images of these failures below. ("Been there, done that!")
 Note that unplugging and re-plugging the unit is NOT a Reset. It will just restart in the same state.

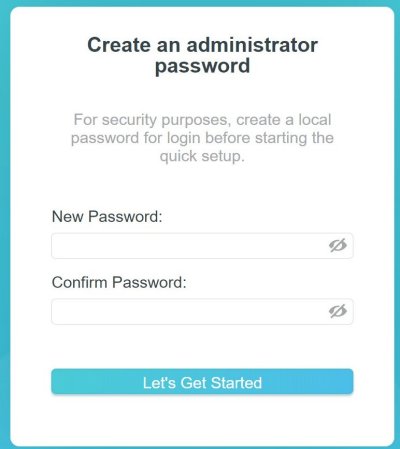
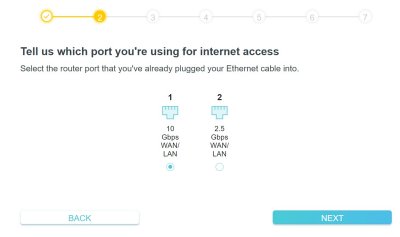
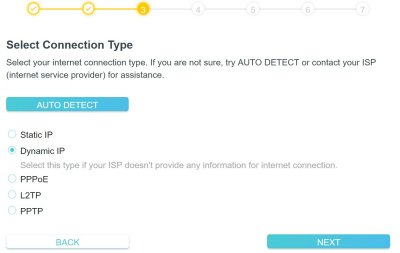
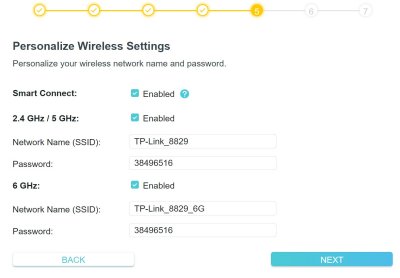
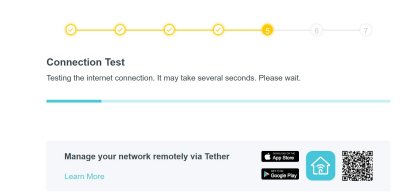
Details on the Initial Setup of Your Router


1 Create a password for managing the router. NOTE: Write it down in a known location. I forgot my password for my existing router. The only way I could access my router was to factory reset it. Routers do NOT have a "password recovery" feature.


2 Set your time zone. It's referenced to "UTC". So the zones are not in alphabetical order.

Router Router


3 Select the "port". This is confusing! "Select the port that you've already plugged your Ethernet cable to."
 Uh, which Ethernet cable?!? There's one going from the router to the modem (the 10GBps), and there's one going from the computer to the router (the 2.5 Gbps).
 I found some documentation elsewhere which indicated that you want the 10GBps port.


4 Select connection type. "Dynamic IP" is the default, and is a good choice. Dynamic IP means that the router changes your "IP address" from time to time. This is considered more secure. Usually only large servers or web sites use "Static".
 "IP", as you probably know, is "Internet Protocol".

Router Router


5 Use the Default MAC address, Mac
 Changing it might cause the router to not receive valid IP addresses from your Internet provider. Further, there are no significant security advantages conferred by changing it.


6 Here is where you set the Network Name and password. These show up on your iPhone/Android/Computer when you connect to the wireless. I used "TP_link_XXX", where "XXX" was part of my name. Using "Smith_home" or "Mikes_house" is probably not a good idea. (You have probably seen all the different names of adjacent houses when you connect to the wireless network).
 Enter your password. Probably should be a fairly "Strong" one.
 I turned on "Smart Connect" in this step. This way, I can use the same password and Network name for the 2.5GHz and the 5GHz connections.

Router Router


7 The router software then did a "Connection Test" at this point.
 You should now be set up.

Some Info About Combining the 2.4, 5, and 6GHz bands and Also about Security Protocol

Router

Combining Bands:
 In Step 6 above, we set "Smart Connect" so that we could use the same name for the 2.4 GHz and 5GHz bands. This allows (newer) routers to use "Band Steering" to connect your wifi devices to the fastest band. Also, the router will automatically use 2.4 GHz for devices that are further away from the router, and switch to 5GHz for nearer devices. (Also called "Band Steering").
 Note that this assumes you have mostly newer devices and don't have a house full of "Smart" devices - doorbells, electrical outlets, lights. (Many of these Smart devices need to have direct access to 2.4 GHz. In this case, use different names for the 2.4 GHz and 5 GHz bands.)
 You can use the same name/password for all bands (2.4, 5, and 6 GHz). But this might be problematic, because of Security Protocols. (See the next paragraphs).

 Security Protocols: (See the image in 9 below)
 The latest and most secure home security protocol is "WPA3-Personal". A previous security protocol is "WPA-2" - not as secure. Note the two protocol types shown for the combined 2.4 and 5 GHz bands in the image below, as well as the single WPA-3 protocol for the 6 GHz band. The combined 2.4 GHz/5 GHz bands should switch between the two protocols as necessary for older and newer devices.
 You can combine the 2.4, 5, and 6 GHz bands, but in some cases, it might cause problems with some newer devices in identifying/using the newer WPA-3 protocol.

You're finished!

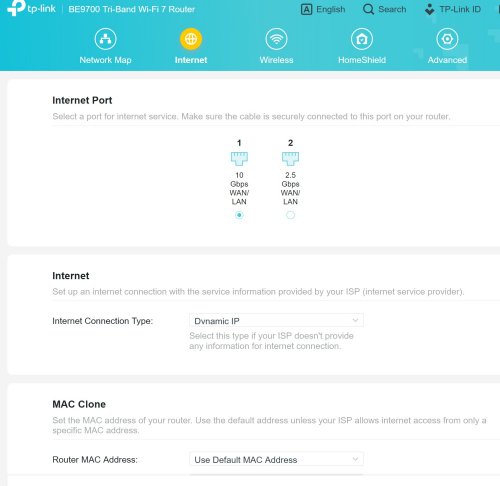
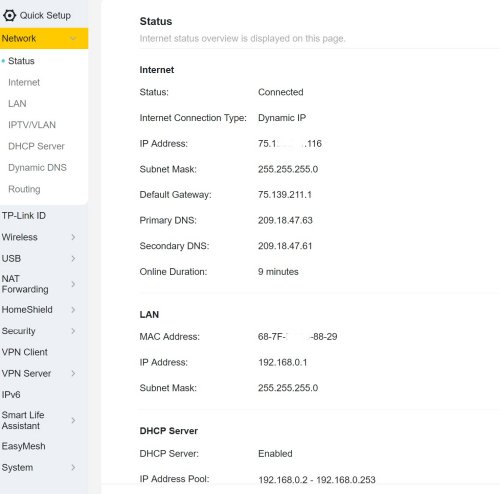
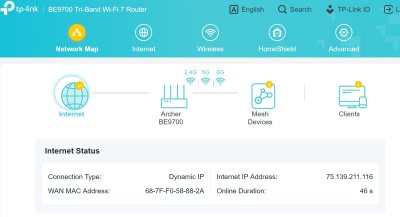
Checking Your Settings After Installation


8 If you logged out after the initial setup, log in to your router. This window should show up. You can check all your settings. The first category is "Internet"
 Note that the "10 GBps" button should be checked. The description on this page says "Select the port for internet service". So this description makes it more clear that this is the port where you plugged in the cable from the router to the internet modem (or the Ethernet jack in the wall if the modem is elsewhere).
 Note that some routers may have a different port speed, say "5GBps".


9 The second category is "Wireless". You can check.change your Network Names and passwords here.
Note that this screenshot was taken before I had changed my Network Names and passwords.

Router Router


10 And this is the "Advanced" tab. There is a list of available choices on the left side. At the very bottom is "System". There are several choices inside this category.


Some extra notes

Router

I started by connecting our iPhone 15 Pro Max and our iPhone 16 Pro to the 2.4/5 GHz Network. But later I changed to the 6GHz Network, and found that it was noticably faster.
 To do this, you disconnect the 2.4/5 GHz network on the iPhone. This is "Forget this Network". Then you connect to the 6GHz Network. The iPhone may ask if you want to add the 2.4/5 GHz network at the same time, for improved connectivity. Select Yes if desired. Newer iPhones like the ones above may give the message "Limited Compatibility" when the 6 GHz network is selected. But this message "should" only be displayed at the time of the first connection.

Antenna Orientation.
 There are many subjects for which there is absolutely NO agreement among internet sites! This is one of them!
 But here are the main points:

The RF signal propagates perpendicular (i.e., sideways) from the antenna. So if the antenna is vertical, the signal will emit horizontally.

So, for a single story house, orient all the antennas straight up.

But for a multistory house, orient some of the antennas about 45 degrees. This directs the signal on the 45 degree antennas partially downward/upward, to improve the signal on the floor above or below the router.
  My router is on a stair landing that is between floors. So I oriented two of the rear 4 antennas backwards 45 degrees. This should improve the signal on the upper floor. I also oriented the two side antennas forwards about 45 degrees, to service the lower floor.
 Some routers support "Beamforming", which is a method to "focus" the signal to a given device. Some sites indicate that if your router offers Beamforming, all antennas should be vertical. Other sites say to set some antennas at angles, just like you would if Beamforming is not used. So. . .

Want the best, strongest signal of all? Skip the wireless and hard wire the device! For our Samsung TV in the living room, I managed to route a cable from one of the four router ports to the TV. (Had to go into the crawl space to do it, but I can stand up in most sections of our crawl space, since the house was built on a slope.) Now, when I select a streaming service, many times the "Who's Watching" screen comes up almost instantly.
 You can buy a 50 or 100 ft ethernet cable with the connectors already attached.

Things That May Happen if You did NOT Reset After Firmware Update


11 The "Quick Setup" may hang. I got to this section after completing the second step. Note that there is NOTHING here.


12 The Router may appear to have "finished" the Quick Setup. It didn't!

Router Router


13 If you attempt to change the Network Names and Passwords, they are not saved. If you try to sign in to Wireless on one of your devices, the default Names and Passwords still show up.

Router

Copyright © 2026 J.A.