Ever since I heard rumors about the iPhone 15 having a 5x Zoom, I figured that I would
pretty much have to buy it. I managed to wait until a few months after the release, and then did so.
After using the device for a few weeks, I find that it is an extraordinary piece of software and hardware
engineering. This prompted me to do some research on how to understand and use all the features and
write this article.
Here's some tidbits:
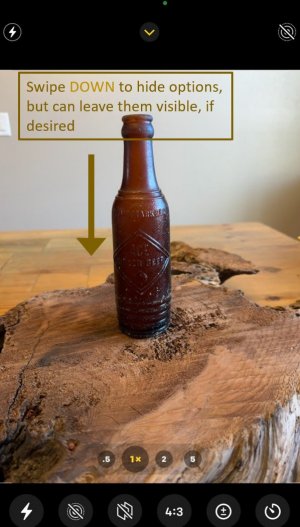
You can access the camera quickly by briefly pressing and holding the camera icon on the bottom right or by simply swiping left from the right side.
While in the "Photo" mode, holding the shutter button takes a video for as long as you hold it.
While in the "Photo" mode, swiping the shutter button to the left takes a burst of shots.
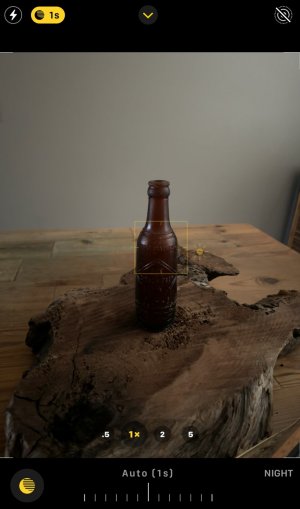
The little yellow rectangle is the focus point. You can touch any area of the screen to change this focus point.
The little image of the sun next to the yellow rectangle can be swiped up or down to lighten or darken the image. (This means you can quickly "stop down" like you would on an SLR camera.)
You can select a Live Photo picture and turn it into a "Long Exposure" shot!
The iPhone 15 will take pictures in ridiculously low light situations.
You can take pictures from 0.5x to 5x. The 35mm equivalent is 13mm to 120mm!
It'll do 10x "Digital Zoom" all day long, with almost the clarity of the Optical Zoom.
Most of the pictures and screenshots taken in this article were made on the iPhone 15,
(iOS version 17.1) unless otherwise specified.
Many of these tips will work with any iPhone using iOS 17 or later. My iPhone 12 can do most of the
things shown in this article, except "Camera Customization". (But it can't touch the Low light mode or the clarity of the
zoom of the iPhone 15!)
Accessing the Camera
I have always placed the camera icon on the upper right of my "Home" screen. I could access the camera only after I had opened the phone from the "Lock" screen. But I have discovered (only recently!) that the camera can be accessed directly from the Lock screen. Yes. The camera icon has been there since day one. But maybe I'm a little slow. . .
Press and briefly hold the camera icon on the lower right. Release after you feel the slight "haptic" vibration. NOTE: This also works for the Flashlight symbol on the lower left. You won't get the haptic feedback if you have turned haptics off in Settings.
Place your finger on the right edge and swipe left.
And, no, this does not bypass the Unlock settings. Once you are through with the camera, the iPhone returns to the Lock Screen. That's probably why you can't add other shourtcut icons to the Lock Screen.
Some Camera Settings to Consider before Using
Here are some camera settings to consider when using an iPhone camera. This is under
Settings. . .Camera. (For whatever reason, Apple has chosen to not put Settings in alphabetical order! You'll find
"Camera" in a group of 4 items about 2/3 the way down in "Settings": Music/Photos/Camera/Game Center.)
Selected Camera Settings:
Record Video
First entry: 1080p HD at 30 fps
(This is the default). For videos of high action, 1080p HD at 60 fps (Frames per second) might be better. 4K choices might be a bit of overkill.
Enhanced Stabilization: ON
HDR video: Your Call
Some say that OFF might be better, because not everybody has an HDR display.
NOTE:You can't toggle HDR on or off for photos.
Lock White Balance: ON
This applies to videos. When OFF, the iPhone tends to change the Color Balance ("Warm", "Neutral", "Cool") as the scene changes while panning, resulting in sudden change in appearance.
I just took the defaults for "Record Slo-mo", and "Record Cinematic").
Formats
Camera Capture: High Efficiency
This is considered to be best. Actually, when I look at the iPhone "folders" by ways of a connected Windows PC, they still show as "JPG" files, even though "Most Compatible" was not checked.
Photo Mode: 24 MP
Might as well milk the incredible resolution the iPhome 15 has!
ProRAW and Resolution Control and Apple ProRes": Your call.
These settings, along with a 48MP resolution, are for the pros who want to do a lot of post process edits.
Preserve Settings
Under this category, you can select whether or not to keep certain settings when you close and reopen the Camera app. NOTE: When you change the exposure level (described below), this seems to stay whether or not you have toggled it on of off, in "Preserve Settings"
Level
Your Call
But, this is a new feature. It has a broken horizontal line in the middle of the picture. It lines up and turns yellow when the iPhone is level.
Photographic Styles
You can set these while using the Camera itself. This is described below.
Main Camera
The "Main Camera" is the 1x lens. While using the camera, if you repeatedly press the 1x lens, it will change to 24 mm (1x), 28 mm (1.2x), or 35 mm (1.5x). This setting allows you to decide which of these you what to be available. You can also choose which of these focal lengths to use as the default lens.
Prioritize Faster Shooting
OFF
When ON, it can "adapt" image quality when the shutter is rapidly pressed. But apparently this slightly degrades all other pictures.
Macro Control
If on, you can choose to not have the camera go to "Macro" mode when you get close to a subject. This is explained below.
Using the Camera ("Photo" mode)
Shutter button:
Just tapping the button takes a picture, as expected. Note that you can use either of the two left volume buttons on the phone's left side as an alternate shutter button!
Video option: Pressing and holding the shutter button takes a video for as long as you hold it! Release the shutter button to stop. (That is, you don't have to switch to "Video".)
Burst option: Swiping shutter button to left takes a "burst" set of pictures for as long as you hold your finger down. This takes a bit of practice. If you press too long before you start moving to the left, you will just start a video. If you swipe and release too fast, it will just take a very short burst. The key is to press and swipe "fast" but then you can hold your finger down while it is to the left of the shutter, then release when desired.
Lens Selection
The available lenses are shown at the bottom of the viewing screen.
iPhone 15 PRO MAX has 0.5x, 1x, 2x, and 5x lenses
The "SLR camera" equivalent is:
0.5x: 13mm
1x: 24mm (can also be 28mm and 35mm - Just tap the "1x" to change)
2x: 48mm
5x: 120mm
You can select any of these lenses for a true "optical" zoom.
Press and hold any of these lens numbers: A semicircle appears above the numbers. Swipe this
semicircle to change the zoom factor smoothly from 0.5x upward.
According to an Apple expert, changing between 0.5x to 5x is a true "optical" zoom. 3.5x on the scale is said to be as sharp
as any of the discrete numbers like 0,5x, 1x, 2x, or 5x. However going past 5x is said to be a "Digital" zoom. The semicircular
scale will allow up to 25x! Digital zoom has always been considered to be inferior to optical zoom.
But Digital zoom ain't what it used to be on prior iPhones! I have some pictures below
taken at 10x, and they are remarkably sharp!
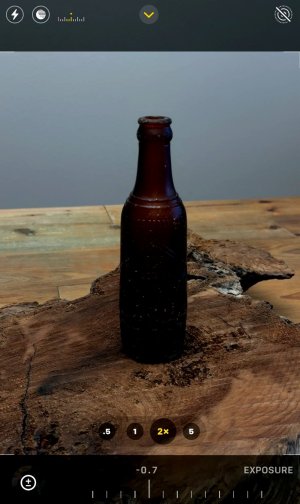
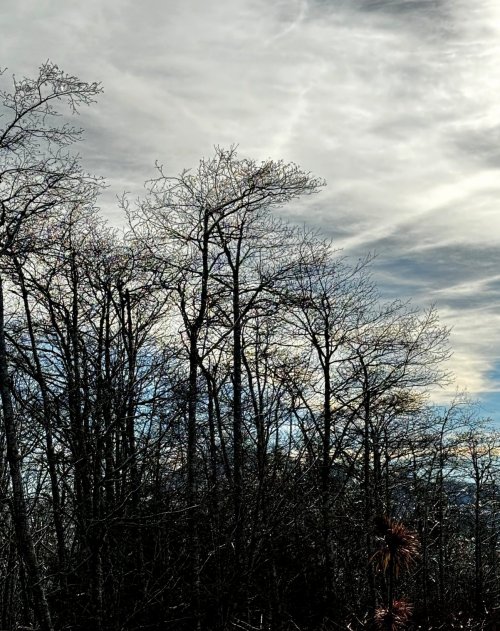
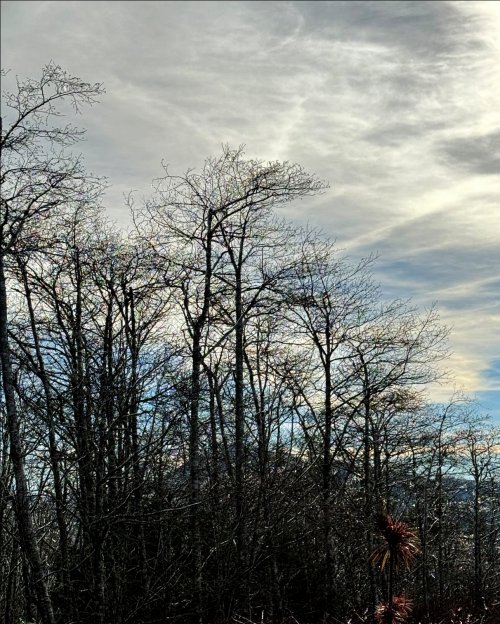
Here's a sample of four zoom levels, shown here mainly
to give you an idea about the available lenses. Shown here is 1x, 2x, and 5x - the standard zooms available on
the iPhone 15 (except for the wide angle 0.5x). The last picture is 10x. As you can see it is just as sharp as the 3 "optical"
zooms. |
|
 |
 |
 |
 |
The (amazing) Zoom Capability of iPhone 15: |
 |
 |
Using the Camera (cont'd)
Focus Region and Brightness Adjust |
||
 |
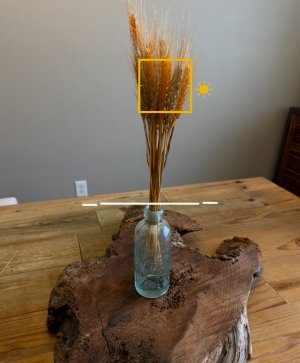
While using the camera (both for photos or videos), you will notice
that a little yellow rectangle appears briefly. This rectangle is showing you which portion of the image the iPhone
has selected to focus on; This will be the focus "distance". If, for example, the selected portion of the image is about
5 feet away, then all objects approximately 5 feet away will be in the sharpest focus. People or objects that are closer
or further than this may not necessarily be in as sharp. This yellow rectangle also has a brightness/darkness adjust. It's the side with the "sun" in the
middle. Simply touch to the right of this line (or above the line if you have the phone turned sideways) and slide your
finger up or down to lighten or darken the exposure. |
 |
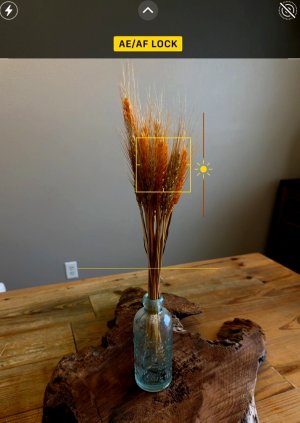
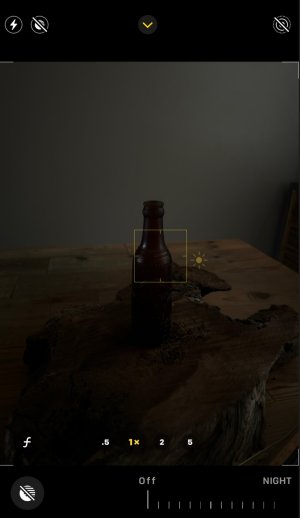
The iPhone "Camera Level" option.
The yellow line in the above image on the left is the optional "Level". It helps to prevent "Tilted Horizon" photos. The level
line turns yellow when the iPhone is level, and at other times it is a broken white line, as shown in the above image
on the right. Note: These lines are usually very faint. I have enhanced them in these images.
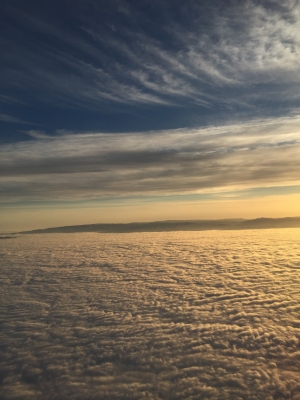
Stopping Down with the iPhone |
||
 |
Here are two pictures taken from a flight in October 2018
(with an iPhone 7!) In the picture on the right, I have darkened the image by sliding the "sun" down on the
brightness/darkness line. Using the "sliding sun on the yellow rectangle" method does not let you control how much you
can "stop down" (darken) like you do with an SLR camera, where you can select "stop down -1/3", or "stop down -2/3"
and the like. (But there is a camera option where you CAN adjust the "stopping down" actual value, discussed later
under "Quick Access to camera Options" below) |
 |
Why all this business about "Stopping Down"? |
|
 |
This picture was taken "stopped down 2/3". That is, two "notches".
Note that this gives you almost the same effect as using a polarizing filter! 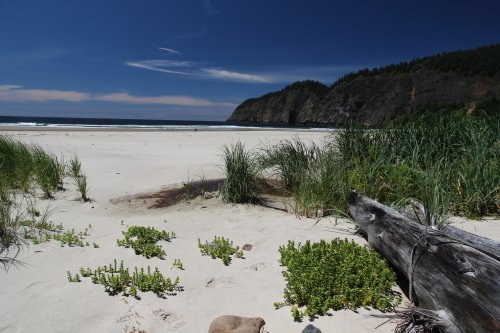 |
"Locking" the Exposure and the Focus |
|
 |
If you touch a given area and perhaps brightened or darkened
the image a bit, the iPhone will use these settings as long as you hold it relatively still. But if you move the
iPhone around, it will soon select another area - the yellow rectangle will briefly re-appear, and the device
will change the focus distance and/or the brightness level. |
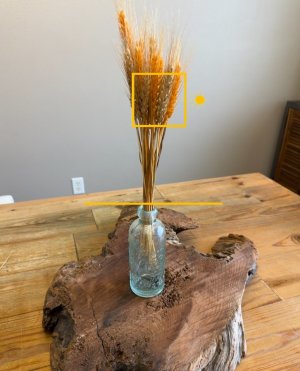
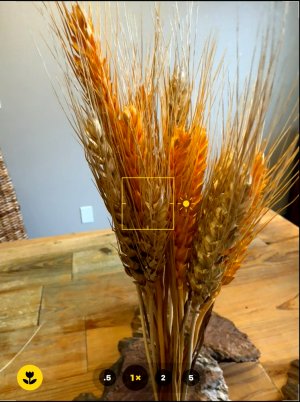
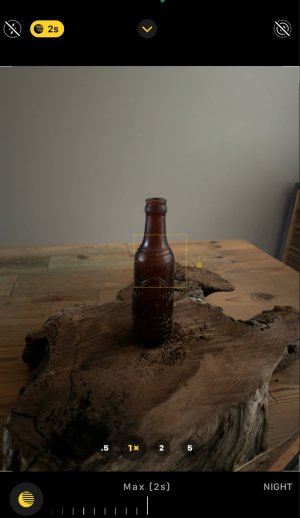
Night Mode Icon The iPhone 15 can take pictures inside a darkroom! Well, OK, maybe
not, but it will take excellent pictures in low light. However, when the light gets even lower, the device switches to
"Night Mode". At this time, a yellow icon appears on the upper left. It will indicate the number of seconds the shutter
will remain on once pressed. |
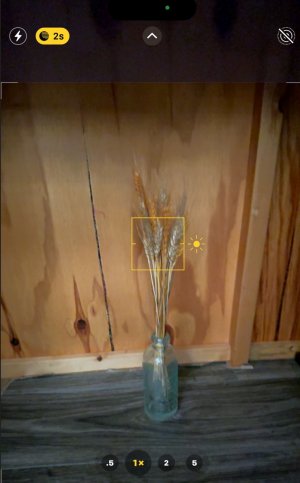 |
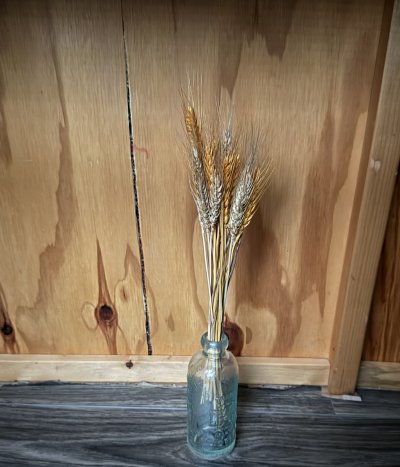
Below, on the left side, is the actual picture taken of the dried flowers shown in the screenshot
above. This picture was indeed taken in "night mode" with a 2 second shutter opening, handheld (no tripod). There was
no flash used! |
|
 |
 |
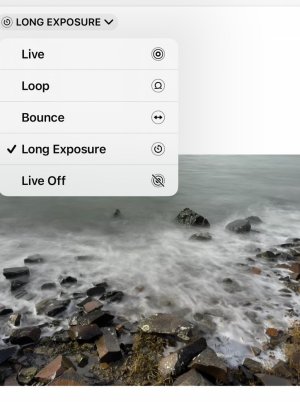
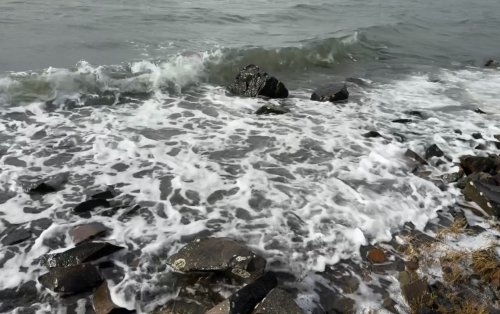
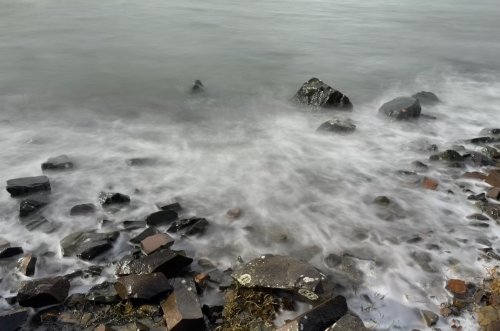
Using "Live Photo" to Achieve a Long Exposure Blur You have probably seen photos of waterfalls, creeks, or waves that have
been taken with a long exposure time. The gentle blurring effect is quite pleasing. To achieve this effect with an
SLR camera, you would have to set it up with a tripod and hold the shutter down for a few seconds. The steps: Take a Live Photo of a scene with motion. Then open up the Live Photo in your Photos album. Touch "Live" on the image. You will see 5 choices. Select "Long Exposure". The device will combine all the individual images in the Live Photo sequence. |
 |
Here is one of the still pictures that were in the 3 second "Live photo movie". |
And here is the result of selecting "Long Exposure" on the Live Photo. |
 |
 |
The Macro Feature |
|
 |
When you are composing a picture, you may have noticed a little
yellow flower on the lower left when you get closer to the subject. This is iPhone Macro Mode. The device has switched
to the 0.5 lens, which doubles as its Macro lens. |
Quick Access Camera Options
After one of the most recent iOS releases, I whined that it required extra steps
to toggle the flash "on" (from "auto"). Prior to the new release, I could simply tap the Flash Icon (lightning bolt on
upper left). After the update, I had to tap the Up Arrow, and then the Flash Options icon appeared below the photo subject
area. Only then could I toggle the flash behavior, by tapping the Flash Icon. There's a LOT of other options that become available when you tap the Up Arrow! You can simply swipe up (rather than tap the Up Arrow) to access the Camera Options below the picture. |
||
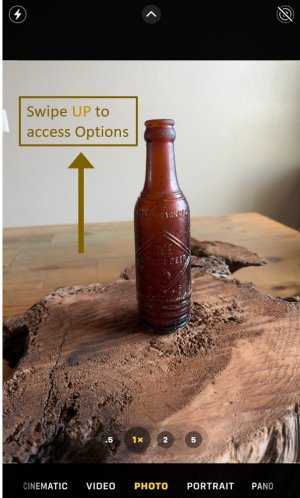 |
While composing a picture, you can tap the Up Arrow on the top,
or simply swipe up to access the Quick Camera Options. Here's what they look like after swiping up. There are seven sets of options: Flash on/off/auto Night duration (only displays during low light) Live on/off/auto Camera Customization (Standard, High Contrast, etc). iPhone 13 or newer only. Aspect Ratio Exposure +/- Filters (Swipe the line of options left to see the Filters icon) |
 |
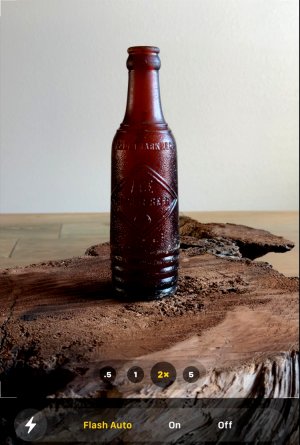
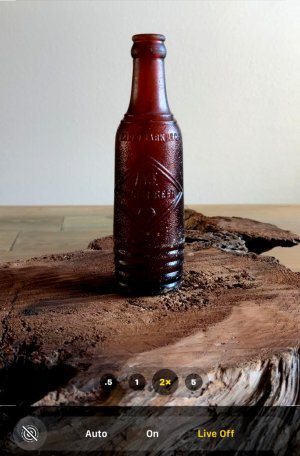
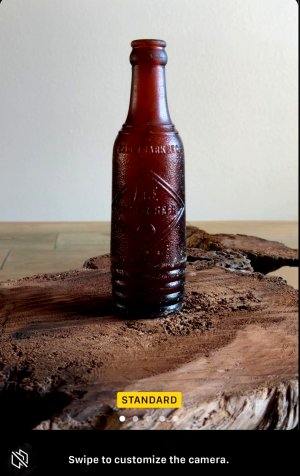
A note on these Options: Flash: The Flash lightning bolt turns yellow if you set Flash to ON. Night Mode: If you turn it off, its icon does not show (e.g.: "2s", "3s"), but the Flash lightning bolt may show yellow in low light. Live Photo: The circle on the right will show to be crossed out if it is OFF. Camera Customization: The icon shows on the upper right if you have selected something other than"Standard" Exposure +/-: The icon shows the choice on the upper left, as a line with a number above it, such as "-0.3" or "+0.3" Filters: If you have selected a filter, the 3 circle filter icon shows on the upper right. | ||
Flash |
Live |
Customize |
 |
 |
 |
Night Mode Slider |
Slider all the way to the right results in the maximum exposure time. |
OFF disables Night Mode. The flash will likely be used, it it is set to "Auto". |
 |
 |
 |
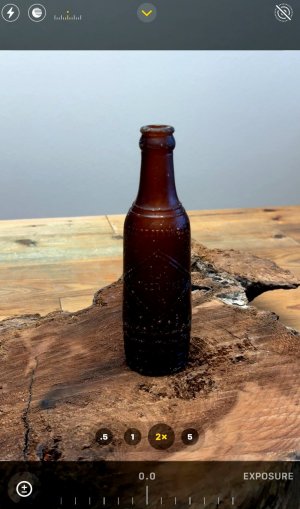
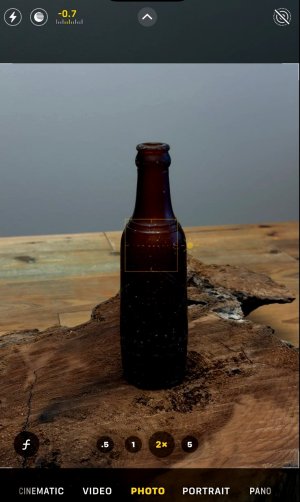
Exposure Slider |
Here we have darkened the exposure. We have "stopped down". A setting of -0.3 is the same as "Stopped down -1/3" on an SLR. This brings out the contrast on bright landscapes. A setting of -0.7 is the same as "Stopped down -2/3" on an SLR. This adds even more contrast - good for very bright days. And yes, darkening this image did NOT necessarily improve this shot! (I was just showing the darkening effect.) |
While the Quick Access Camera Controls are showing, you can see the amount of exposure adjustment on the slider. But if you dismiss the Controls, the iPhone displays the exposure change on the upper left of the image. This way, you won't forget to reset the exposure and suddenly begin to take a bunch of dark pictures later on. |
 |
 |
 |
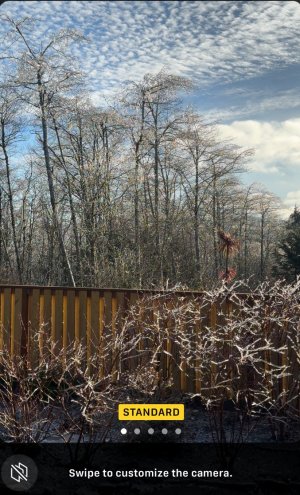
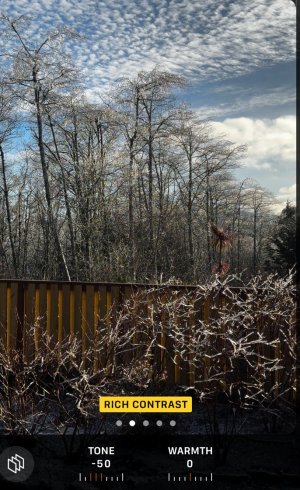
Camera Customization NOTE: These are low resolution and reduced in size. The differences between these choices are MUCH more pronounced at full resolution. |
||
Standard |
Rich Contrast |
Vibrant |
 |
 |
 |
Camera Customization (cont'd) |
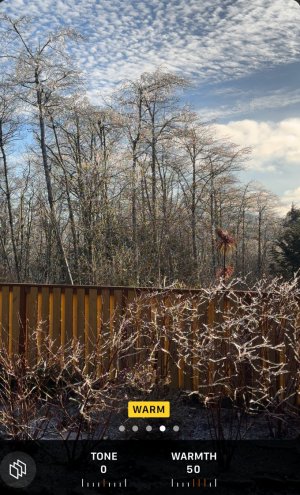
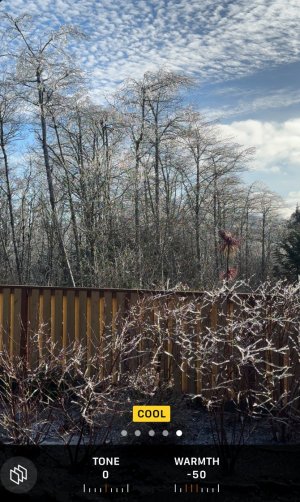
Cool |
 |
 |
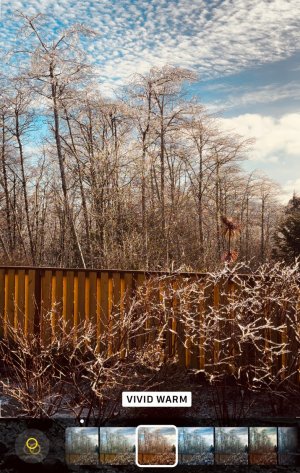
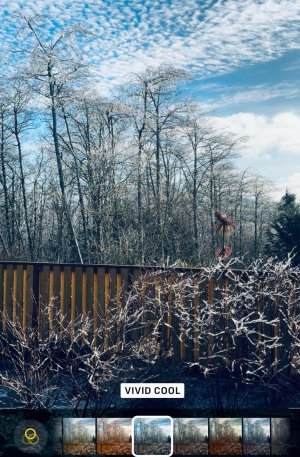
Camera Filters |
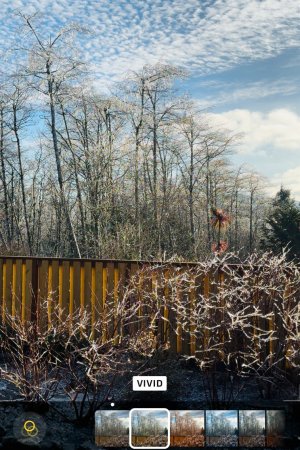
Vivid |
Vivid Warm |
 |
 |
 |
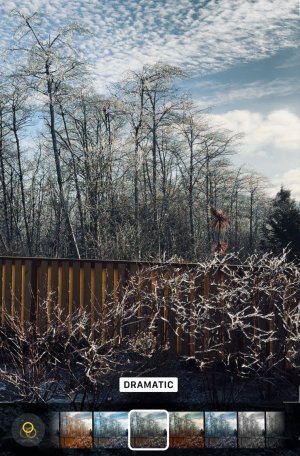
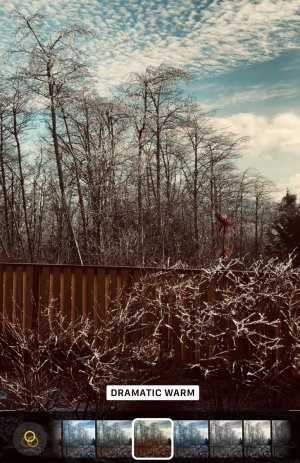
Camera Filters (cont'd) |
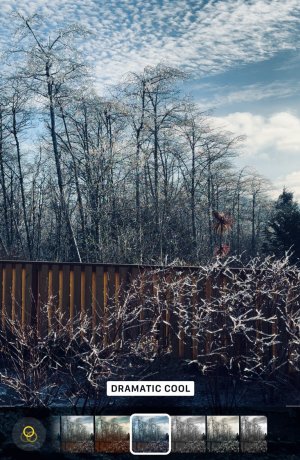
Dramatic |
Dramatic Warm |
 |
 |
 |
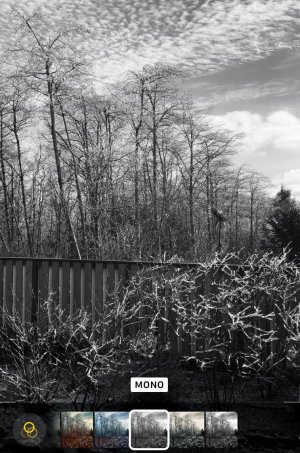
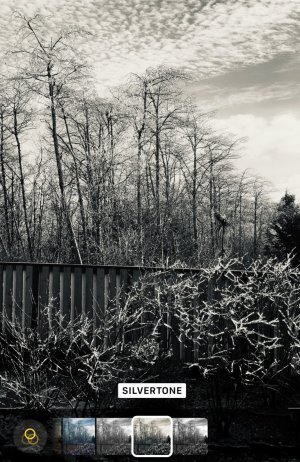
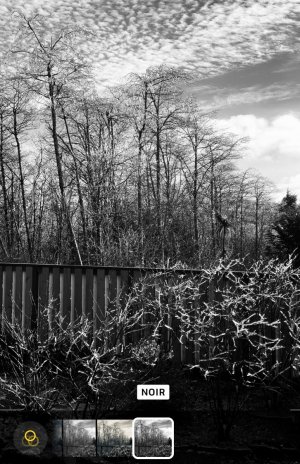
Camera Filters (cont'd) |
Mono |
Silvertone |
 |
 |
 |
Camera Filters (cont'd) |
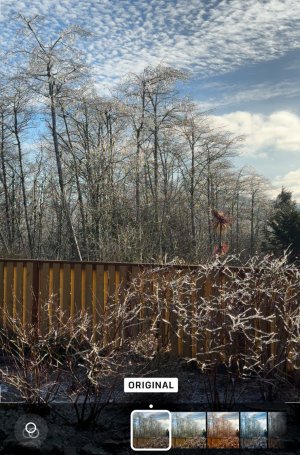
Difference between Camera Customization and Camera Filters The Camera Customization choices ("Standard", "Rich Contrast", etc) change the way the picture is actually taken. The customization cannot be undone if you attempt to edit the picture later (although of course you can partially change the effect, perhaps by lightening or darkening the image.) The Filter choices ("Original", "Vivid", etc) can actually be removed when you select the photo after it has been taken. You simply select "Edit", go the Filters section, and change the picture to "Original". As a matter of fact, the Filters are all available when you select any photo and select "Edit". You can add or remove any of the filters at any time. |
 |
For "Camera Customization": |
|
 |
 |
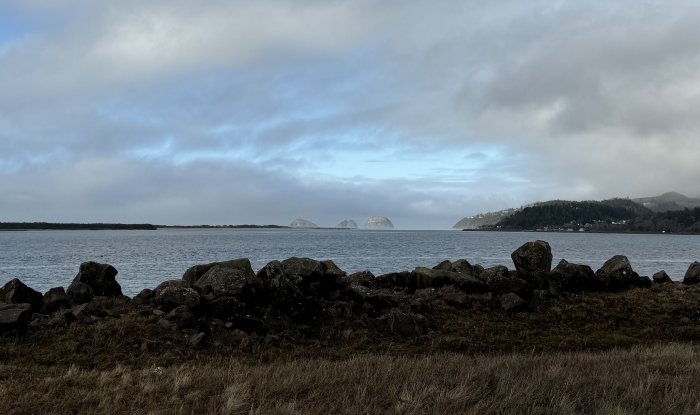
Another Example of the Incredible iPhone 15 10x Zoom
|
Here is a shot of the "Three Capes Rocks" seen from the other side of Netarts Bay here on the Oregon Coast. It was taken at 2x. |
 |
|
And here are the same rocks taken at 10x. Handheld. No tripod! |
 |
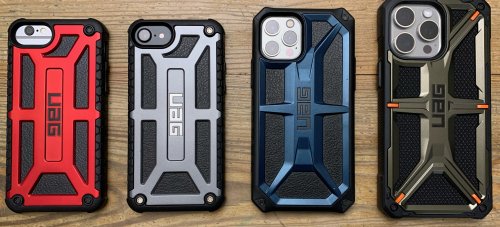
Your iPhone Needs an Appropriate Case!
|
We all know that an unadorned iPhone is incredibly slick; holding one is much like trying to hold an
oiled ice cube! So I typically buy some sort of case that I can GRIP. The iPhone 6 is red, and the iPhone 7 is Silver. The iPhone 12 case is "Mallard" color, and the iPhone 15 case sports their new color - "Kelvar Element Green". The backside has leather accents underneath metal trim, and the sides are rubber, while the four corners (along with the multilayer construction) provide excellent protection against drops. What I like also is that the extensions for the volume buttons and the sleep/wake button are very responsive; you feel like you are pressing the actual button itself. These cases makes the iPhone a substantial, easy-to-grip device that won't be as likely to be blown out of your hands by the shrieking Pacific winds while you are trying to shoot a video of the wave action! (And it looks cool, too). |
 |
Ordering links(As always, the Wracklineblog is completely ad-free! |
|
And here's the Urban Armor Gear iPhone case. I have used these cases since iPhone 7. |
And here's the Urban Armor Gear iPhone case for iPhone 15 PRO MAX. |
 |
 |
Copyright © 2024 J.A.