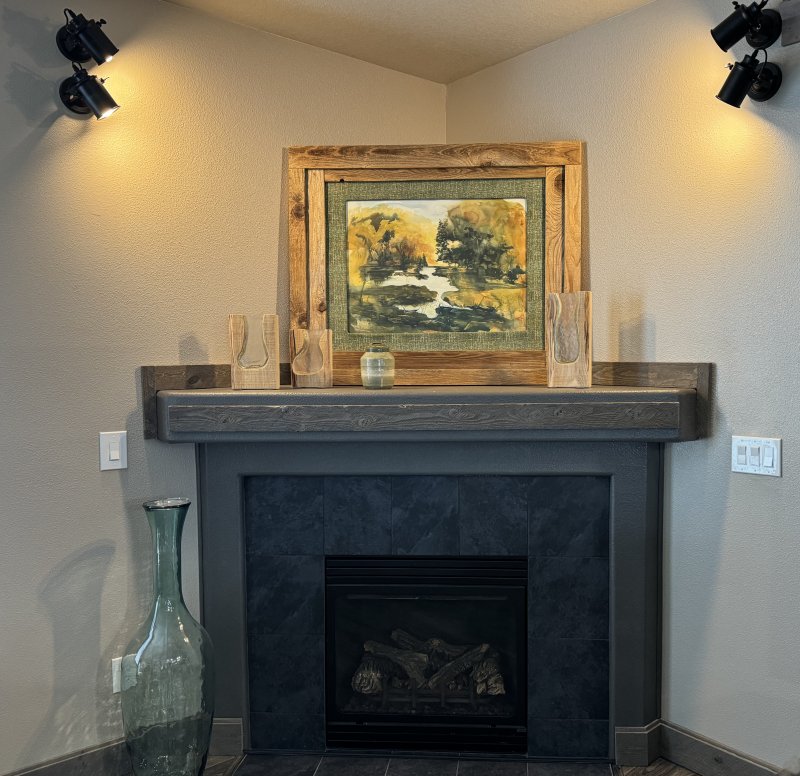
Perhaps you have a picture/painting on the fireplace mantel and you would like to add some
accent lights. Or maybe you have a home theater system and want to add wall lights on each side of the TV. This article
will show you how to do this.
How easy is this? Clearly it's a piece of cake if you use the wall sconce lights with their own electric cord. But if you
want to "hardwire" the lights by bringing romex wires behind the wall, well, let's say it requires somewhat above average D.I.Y. skills.
You will be cutting openings in the sheetrock and installing one or more "old work" boxes - usually one for a light switch
and a round one for the light.
And you definitely should be comfortable with wiring electrical boxes and be familar with the right connections to
be made for the black, white, and ground wires inside.
1) If you have an existing light switch below the place where you want to place the light, and it's an inside
wall, we'll give it about a 5 on a D.I.Y. scale of 1 - 10. You simply have to replace the single light switch box with a "2 gang" box (to
hold the extra switch), and then cut a hole where you want the light, add a round box, and pass romex from the switch to the
round box.
These are two lights on the right side of our fireplace mantel. In this case, the existing switch box held two
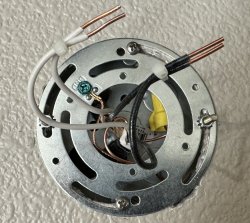
switches (for controlling the fireplace). So it was necessary to replace it with a "3-gang" box. |
 |
2) If you have an existing outlet below the place where you want to place the light, and it's an inside
wall, we'll give it about a 6 on a scale of 1 - 10. You will be adding a switch above the outlet and then adding the light above
the wall switch.
And these are two lights on the left side of our fireplace mantel. |
 |
3) If you have a light switch and want to mount the light over by one or two wall studs, we'll give this
an 8 to 10. You will have to remove the floor moulding, cut some holes in the sheetrock, and then drill through one or more studs. I
will show how below.
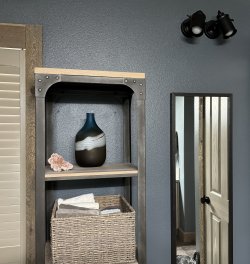
Here, in the master bath, the light switch is behind the stand with the decorative bottle. Also, it's on the other side of the wall,
inside the closet (louvered door). Note that this actually does not add to the complexity! All you want to do is bring up some romex
to a switch box, no matter what side of the wall it's on. |
 |
4) Another example where you might want to mount the light somewhere not right above
the switch. In this case, the light switch is on the right, beside the door. It was a "2 gang" - two switches. I converted it to a "3 gang".
I wanted the lights to be about 7 feet away (upper left in the picture), which required drilling through 5 studs. |
 |
If any of these scenarios is on an outside wall, add 1 or 2 difficulty points. Why? Because it's hard
to pass romex behind the wall when there is insulation behind the wall.
Skim over the steps shown below and you can decide. . .
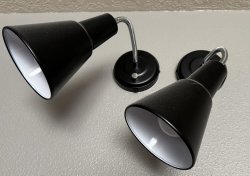
Here are the Two Light Products we are Going to Use For Samples
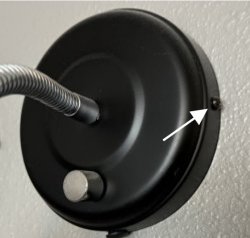
This one is a Globe Electric "Ramezay" Gooseneck Sconce. |
This fixture mounts by two small black screws, one on each side. This is
a bit difficult because the screws are right next to the wall. |
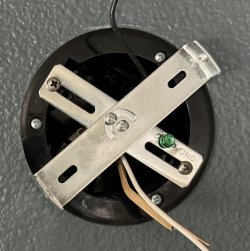
This is the mounting hardware (already attached to a round electrical box) |
 |
 |
 |
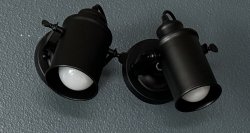
And this one is a Kylynly Industrial Vintage Wall Mount Light
|
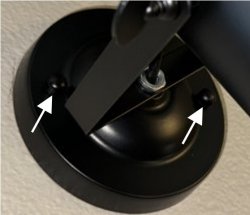
It mounts using two knurled nuts that screw on from the front (much easier)
|
And here is its mounting hardware (already mounted onto a smaller round box).
|
 |
 |
 |
Installing your wall lights
NOTE! Before proceeding:
Check the wall for possible pipes in the area where you are about to cut holes! If your home is a 2-story
and you are about to cut holes on the lower floor, take note if a bathroom is above the area. If so, have someone
flush the toilet while you stand near the wall. Also check for draining noises when the shower or the lavatory is in use.
Another scenario is attempting to install a light above the kitchen sink or bathroom lavatory. It is common
to have a "vent pipe" above these areas. And it's right in center of the sink - just where you probably want to
mount your light! You could drill a small hole in the sheetrock on either side of the circular opening you are about to cut.
Pass a long bit or cut-off coat hanger through the hole to see if a pipe is present. There has to be about 3 inches
on the other side of the sheetrock to mount a standard circular lighting box.
If a pipe is present where you want to mount your light, you can still do it. But you have to use a rather
primitive shallow bound box. The steps are shown below; you can decide whether or not you wish to proceed with
the project.
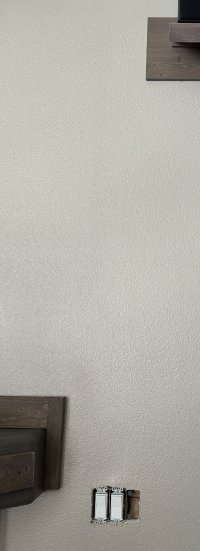
1 So, this is the first example shown above: there is an
existing light switch and I want to add a light above this switch.
You may ask, "But what's that wooden item on the upper right?" It's the shelf for my surround sound "Height"
speaker. It doesn't show in the example above because I air-brushed it out! |
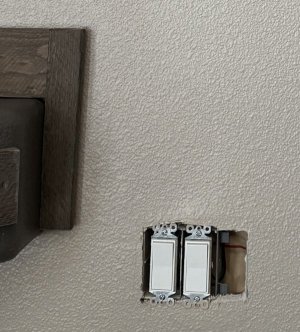
2 I have cut out the sheetrock on the right of the
existing switch, using a utility knife - best to have a fresh blade. Did I turn the power off yet? No. But I
definitely will when I remove and replace the two switches and add a third. |
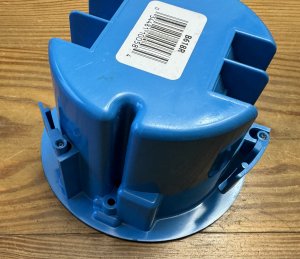
3 To mount an "old work" box, you have to cut
an opening smaller than the outer part of the box. So you place the front of the box against the wall and simply draw a
circle around its outer perimeter. Then you cut a hole about 3/8" inside of this circle. On these round boxes, there
are many parts and protuberances that are close to the outer edge! So the box might not fit inside your hole. Just
notch the sheetrock to allow these areas to pass.
Yes, your cutout will look terrible, but the light fixture's flange will cover it. |
 |
 |
 |
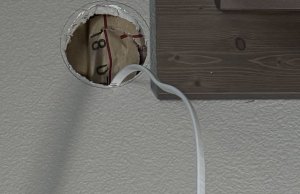
4 Now it's time to pass the romex behind
the wall down to the lignt switch opening. See #5 to the right for more information.
But what's wrong with this picture? You can see the paper covering of the insulation batts.
This is an exterior wall. So it won't be entirely easy to push the romex down to the other opening.
|
5 You will want to remove the
existing switches to give yourself a big opening. (Now the power is off.) Passing wires behind walls
is not as easy as it looks, so you want a big "target".
Since this an exterior wall, it's full of insulation, which will have either a paper or aluminum facing.
You will have to push the romex from the switch to the round opening. Easy, right? Nope, it's not.
Romex is stiff, but not stiff enough. In my experience, it hits something inside the wall, or just encounters
too much resistance. This is why I said "If any of these scenarios is on an outside wall, add 1 or 2 difficulty points"
above.
Make sure no wires are sticking out from the romex, so the end will be as smooth as possible.
Try pushing the romex from the switch opening up to the round hole.
If that doesn't work, try pushing the romex down from the round hole.
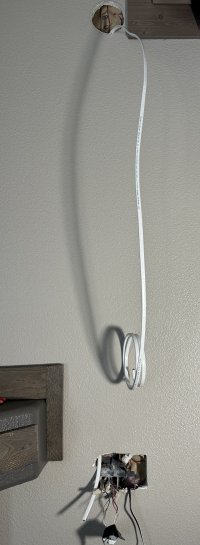
It may help to let the romex hang from the round hole and mark the distance to the switch. This way
yoiu can know when you "should" have reached the switch opening. You can then reach behind the wall to see
if you can grip the other end and pull it through.
You can try pushing something stiff through the switch hole until you see it in the round opening.
Then tape the romex to the end and pull the wire back through.
Leave about a foot of excess sticking out of both holes, as seen here in the switch hole.
|
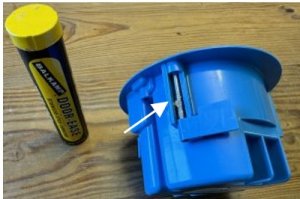
6 Important step. When you install the box,
you draw up the tabs against the back side of the sheet rock by tightening the screws. But the factory has not
fully threaded the plastic tabs. So the screws are very hard to turn, and you might strip the head of the screw. So I
recommend using some sort of screw lubricant. Apply with a small flat head screwdriver or Q-tip (you can see some of
the lubricant in the picture). Shown here is Balknap "Door Ease", available in automotive
stores or online. There are also beeswax-based lubricants available as well.
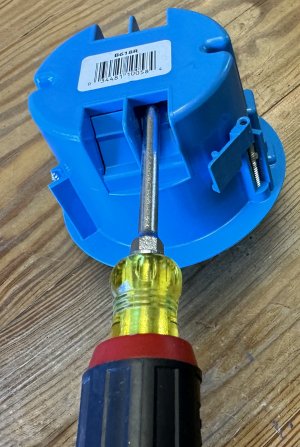
While the box is out in the open, tighten the screws partly, and then back them out. This "pre-threads"
the plastic on the tab. This is much easier to do out in the open.
|
 |
 |
 |
7 Use a flat blade screwdriver to knock out
the openings for the romex. In this example, we are going to install two lights (see next pix). So the top box will
need only hole, and the bottom box will need one hole on top and one on the bottom. (Step #10 explains why.)
Be sure that you pry the tab completely open. Otherwise you can't easily push the romex back through
the opening if you need to.
You are now ready to mount the box behind the wall by tightening the three mounting screws and
drawing the tabs up against the back side of the sheetrock. It is not necessary to tighten these screws
very tight.
|
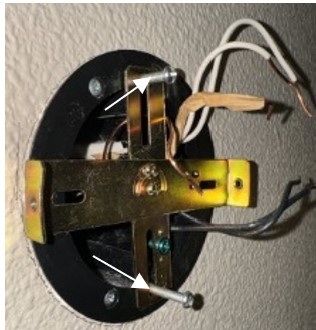
8 NOTE: supplied fasteners usually TOO LONG.
Now you attach the fixture mounting hardware. For whatever reason, the supplied mounting
screws are always much longer than necessary, such as the screws shown in this image. They are very
hard to screw into the box. My suggestion is to use shorter screws. 3/8 or 1/2 inch screws are ideal for this. These
screws are almost always #8 in size.
This is the mounting hardware for the Globe style lights. (These lights mount with the tiny screws
on each side of the light - right up against the wall.)
|
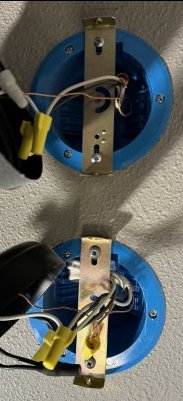
9 So don't do THIS
For a pair of lights, stacked vertically or horizontally, don't orient the mounting pieces directly in line
with other. And why not? Because you can't get a screwdriver in the tight space between the lights
in order to attach the small mounting screw on each side of the light.
|
 |
 |
 |
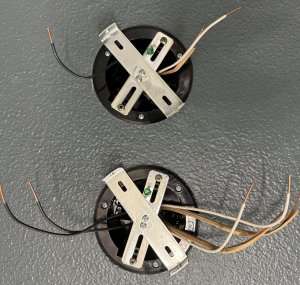
10 Instead, orient the
mounting pieces at an angle so you can access the side-mounted small screws.
Note: this image also shows how you route the romex cables for vertically (or horizontally) stacked
pairs of lights.
You have one set of romex wires in the top box. The other end of this romex cable goes to the lower box,
For the bottom box, you have the "supply" wire coming up from the switch box below, and romex that came from
the top box.
|
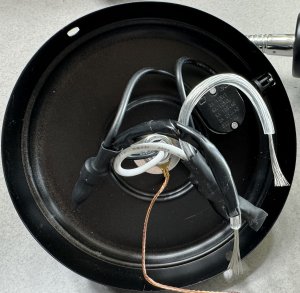
11 A helpful tip;
Some lights like these Globe brand have an attached cord, so you simply hang them on the
wall and just plug them in. If you want to "hardwire" them in, so that you can use a wall switch
and eliminate the hanging cord, you cut the cord and use just the remaining black and white
wires.
But in some cases, if you do cut the cord at the connector, the remaining black
and white wires are very short. So leave about 3 inches of the cord. It's much easier to
work with when attaching the wire nuts. The only problem is that both wires are clear (or at least
the same color). It is customary to tape black electrical tape over the black wire, which I did
in this image. This is perfectly acceptable to electrical codes, and is used in certain other (rare)
situations where the white (neutral) romex wire is used as the black ("hot") wire.
|
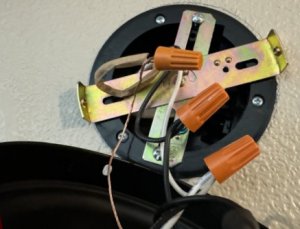
12 Where there is only
one set of romex black/white/ground wires, you can use the orange supplied wire nuts
to wire up the light fixture.
A helpful note: It's often hard to securely bind the little wires from the light fixture to the solid
romex wires. You'll tighten the wire nut, but with just a slight tug, the little wire will pull out. Strip the little
wires longer than you strip the romex wires. Wrap the little wire around the romex wire and
leave a tiny amount of the little wire sticking out. Now, when you screw the wire nut on, the
little wire has much more chance of being properly bound. I will show this in more detail in an upcoming
article - "Wireing Electrical Boxes".
|
 |
 |
 |
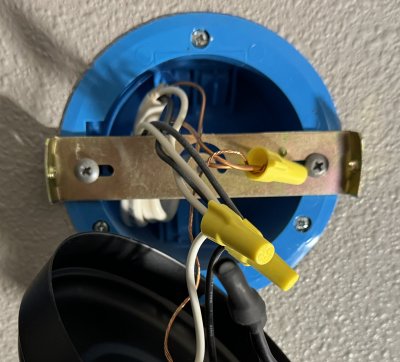
13 Where there are two
sets of romex black/white/ground wires, use some yellow wire nuts. (If you are going to be doing
these sort of electrical projects regularly, buy a package of yellow and red wire nuts.)
|
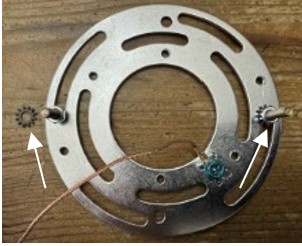
14 And here is the typical mounting
hardware for the Kylynly and similar front-mounted lights. It has plenty of rings to allow for mounting in
both standard round box sizes and for different lamp styles.
A tip: the screws on the left and right will go through the holes in the light cover, and you then
put the black cap nuts on them. When you mount them on the mounting hardware, add a lock washer
if you have any lying around. Why? So the screw won't turn while you are trying to tighten the cap nut from the
front. Make sure these Additionally, you might put a dab of WD-40 inside the mounting nut or on the tips of the screws.
This helps guarantee that the nut tightens rather than just turning the screw.
|
 |
 |
Got a PIPE? Here's how to use the "primitive" shallow box
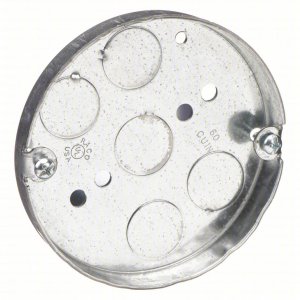
15 So here's the standard issue shallow box.
No tabs, no flange, no nuttin'. That's why I call it "primitive". I have seen a couple variations with
tabs, but these were online only. |
16 So you can attach tabs on the back side.
I just happened to have some angle pieces that I bent and attached on the back.
A piece of perforated strap would also work. |
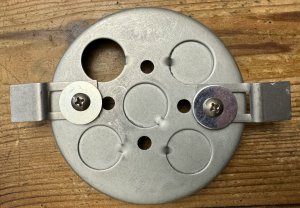
17 Here I have turned it over
and show a light mount hardware piece on the front. The tabs on the back will rest on the backside
of the sheetrock when mounted. |
 |
 |
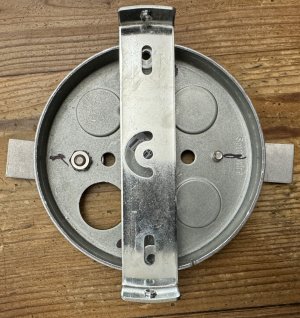 |
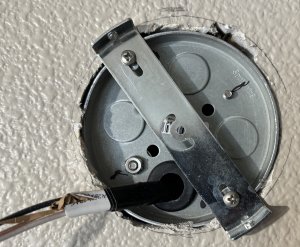
18 So this is what you use when
you have cut a hole in the sheetrock that is bigger than the circular shallow box.
When mounted, the tabs on the back keep the assembly from pulling through the hole, and the
light mounting hardware secures it on the front side.
Note that although this box is not supplied with any kind of clamp to secure and protect the romex
from the rough metal of the knockout hole, some sort of retaining clamp is apparently required by the
electrical code. Plus, it's just not "professional" looking to poke some romex through a bare knockout
hole. . . You can get push-in plastic clamps/grommets, or there is a metal romex clamp available.
|
19 Here are three kinds of romex cable
clamps/grommets. The two outer ones are plastic. The middle one is metal. They may be marked "3/8",
even through the knockout hole is actually 1/2 inch.
|
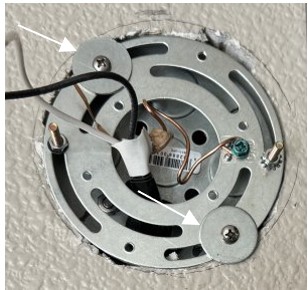
20 This image shows the same box
with tabs mounted on the back, and another type of light mounting hardware. This hardware does not
overlap the hole in the sheetrock, so we add large washers (called "Fender Washers") to the two screws
that attach the hardware to the box.
|
 |
 |
 |
21 And this is what you use when
you have cut a hole in the sheetrock that is smaller than the circular shallow box.
The box is larger than the hole in the sheetrock, and so it rests against the backside of the sheetrock.
The light mounting hardware overlaps the hole in the sheetrock.
You do in fact use longer mounting screws to attach the hardware to the box (despite what I
said in section #8).
|
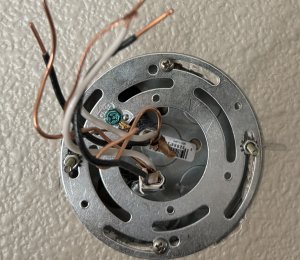
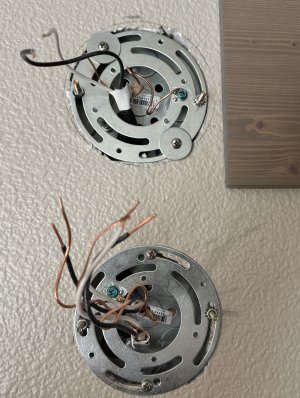
22 So we see both
scenarios in this picture. I cut out a larger hole on the top than I did on the bottom. Why? Because
I cut the top hole to accomodate the standard plastic round box. Only after I cut the hole did
I discover that there was a PIPE behind the wall!
After I found out about the pipe, I cut the lower hole smaller. This way I could simply place
the primitive shallow box behind the wall without having to add tabs.
|
 |
 |
How to add a light switch to an existing light switch box.
In this sequence I am working on scenario #3 in the introduction above. I am mounting
the lights on the wall inside the bathroom, but I am working in the adjacent closet. I show cutting holes in
the sheetrock and drilling through the studs inside this closet in sections S1 - S8 right below.
Here I show how to add an additional light switch in an existing light switch box.
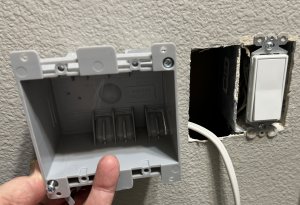
L1 I have cut a hole adjacent to the
existing single switch. I have pushed the romex up from below. It's sticking out of the hole. I am holding
a "two-gang" "old work" box right next to the existing box. "Old work" means you don't have access behind
the sheerock; the box has tabs that extend out behind the sheetrock to secure the box. |
L2I have turned off the power and removed
the existing light switch. It's a "builder grade" cheapie which has the romex wires pushed into holes in the
back of the switch. |
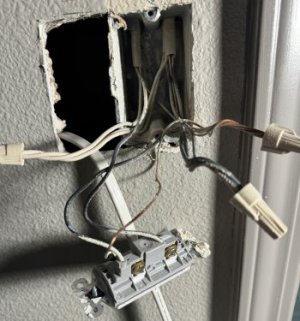
L3 Here I show that the existing light box has
been pried away from the stud with a big flat head screwdriver. Fortunately, existing boxes are relatively
easy to pry away from the stud.
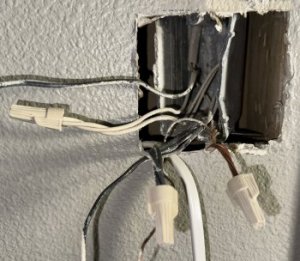
Take a picture of the wires in the existing box!! This way, you can be more likely to be able
to put it back together like it was, especially after you remove the old wire nuts. |
 |
 |
 |
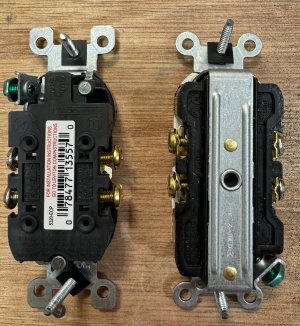
L4 Parts tip: Purchase the replacement
switch that looks like the one on the right. Note that it has tabs on the screws. For the standard light switch on the
left, you have to bend the wire into a loop to put under the screw. Most have the quick connect holes on the back
as well, but this makes an inferior connection, particularly when there is high current involved. (Although the
current for lights is very low.) With the switch on the right, you can leave the tip of the romex wire straight,
and just slip it under the tab. Here you have the superior tightness of the screw, but the convenience
of not having to bend the wire into a loop.
Part number for a light switch: Leviton 5601-2WM
Part number for a duplex outlet: Leviton CBR-15-WMP
|
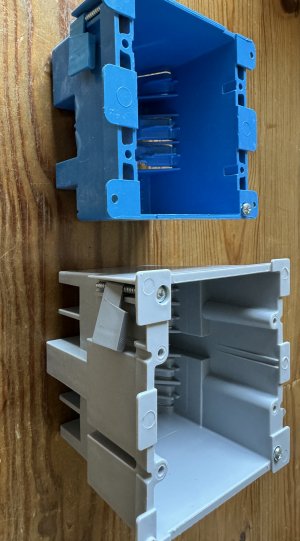
L5 Sometimes there are quite a few wires
inside a box. Electricians may bring several romex cables into the box and make junctions inside the box.
If this is the case, you can buy "extra deep" boxes, to give you more room to make connections. The grey
box here is about 3/4 inch deeper than the standard blue box.
|
|
 |
 |
Step number 6 above is a tip on prepping the electrical box by pre-tightening
and loosening the screws. Step number 7 above shows how to open the "knockouts" in the box.
Remove the existing wire nuts, remove the original box, and install the new box. Then make the
connections. Use the yellow wire nuts for 2 or 3 of the 14 guage romex wires. Use red wire nuts for more
than 3 wires.
Unfortunately, I did not take any pictures of this. But the instructions that come with the lights have
detail on the electrical connections. I am planning a separate article on "Wireing Electrical Boxes", which
should be out soon. |
Want to mount a light that is not above a switch or outlet? Here's the steps.
If you want to mount a light that is not right above an outlet or a switch, this can certainly
be done, but I might suggest that this is a solid 8, 9, or 10 on the D.I.Y. difficulty scale. The third example in the introduction
above shows a possible scenario: I wanted to mount lights above a mirror that was inside the master bath, right
next to the "toilet closet". The only "supply" source was a light switch about 4 feet to the left, inside a closet (described
in the third example above).
So, to do this you have to remove the floor moulding and cut holes in the sheetrock so that you can
drill holes in the studs. Note that this only works if you have 6 inch high moulding. The holes would end up behind
the moulding and will be covered by the moulding when you have finished. You can do it if you have the
standard 3 1/2 inch high moulding, but you would have to be real good with patching sheetrock, since you
would have to cut the holes in the exposed sheetrock.
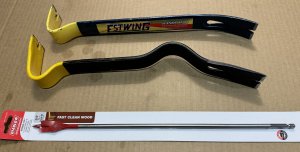
S1You will need a long bit to be able to drill
a hole in the middle of a stud from an angle. Also, one of the two pry bars will be very handy to pull the moulding
away from the wall. |
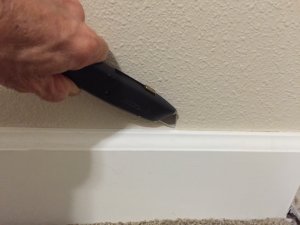
S2 Most builders/contractors caulk the moulding
to cover irregularities in the wall. This is NOT a good practice, since it makes the moulding very hard to remove.
Also caulking makes it almost impossible to paint a good seam between the wall and the moulding if the
moulding is a diferent color, since the caulk joint is somewhat uneven.
Score the caulk to help separate the moulding from the wall. |
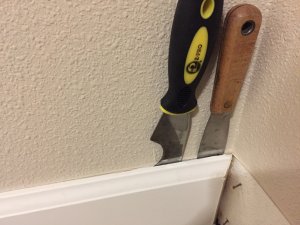
S3 Now insert a putty knife to begin to remve
the moulding. The second tool with the black/yellow handle is thicker than the putty knife and can halp pull the
moulding a little further from the wall. |
 |
 |
 |
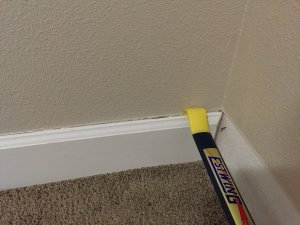
S4 Now you an insert the pry bar and pull the
moulding away from the wall. Note that pictures S2, S3, and S4 (showing how to remove moulding) are from
a separate project, where the floor was carpeted. |
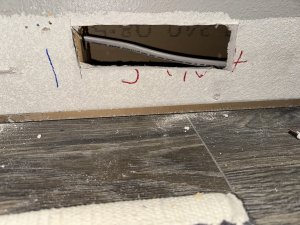
S5 Find the studs using a studfinder, or
simply drive a nail through the wall (below the moulding line) until you hit the stud. You can see my three
attempts right above the blue line that I used to mark the location of the stud. Studs are typically
16 inches apart, but can be more on interior walls. To help locate the first stud more easily, note that a stud
is always to the left or the right of a light switch or an electrical outlet.
Cut a rectangular hole in the sheetrock to allow access to the stud. You can see the stud partially on
on the left of the hole. This hole is towards the top of the moulding line. In other words, the bottom of the hole is
about 2 inches from the floor. Save the sheetrock pieces.
Using the long bit, drill a hole in the center of the stud. Make sure you are at a couple inches from
the bottom of the stud. If you look into the hole you cut in the sheetrock, you can see the "sill plate" - the board
on the bottom right next to the floor. You want to drill the hole at least 2 - 3 inches from this board. Otherwise
you will run into nails! These nails stick up from the bottom - where the sill plate was nailed to each stud when
the wall was built. |
 |
 |
S6 As already mentioned, I am working on example
3 in the introduction above. I am inside the closet and will use the closet light switch for "supply", by adding
an additional switch. I will be passing romex through two studs to reach the lights that will be mounted right above
the leftmost hole, on the other side. I will use the center and right hole to drill through the two studs. So why do I
need the left hole? I have to pass the romex down from the circular light box hole on the other side. I need to
grasp the romex and pass it through the stud near the left of the center hole. |
S7 I have passed thr romex down from the light
box hole and through the two studs. I have also pushed the romex up to the light switch box. Now I can
place the cutout sheetrock pieces back into the holes. I did use a bit of adhesive caulk to help keep them
in place, but this is not entirely necessary, |
 |
 |
S8 As you can see here, all this really rough looking
work will be covered by the moulding when you put it back. Note the nice clean paint edge between the moulding
and the wall, even though the moulding is a different color. To get this nice edge, sand the excess caulk off the moulding
and paint it before you put it back on the wall.
And don't caulk it! Caulking is bad. |
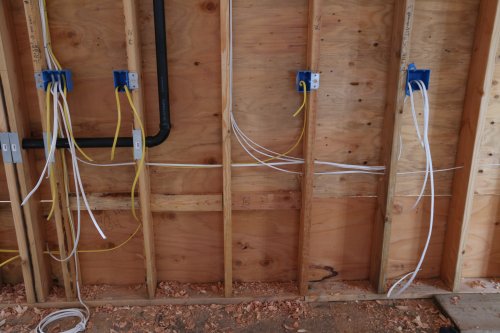
You may be saying, "But wait! You're telling me that it's OK to drill holes in studs and
just pass romex through the holes?"
Yep.
Your whole house is built that way!! Here is a pix I took of some new home construction (for another
blog article). This is likely going to be the kitchen area. The yellow romex is usually 12 guage. It's the heavier guage
to handle the high current kitchen appliances. The white romex is usually 14 guage, and is used for all the
"lighting" circuits in the house. Yes: higher numbers mean lighter guage wire. Remember, "professional" stuff
is purposefully named to maximally confuse D.I.Y.ers like you and me. Another example is the three
romex "clamps" shown in image 19. They are called "3/8" clamps even though they go in a 1/2 inch hole. |
 |
 |
Here's Some Finished Wall Light Projects
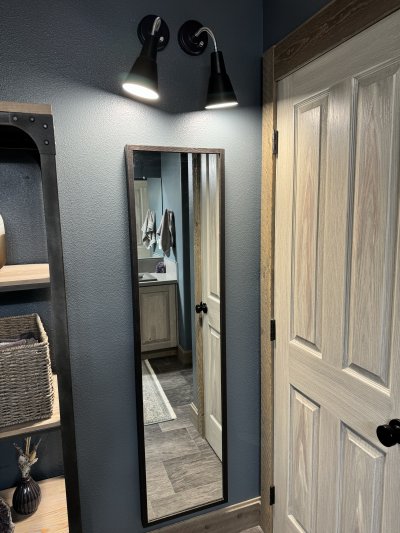
1 Here are the Globe lights
in the master bathroom. They look great, but nonetheless I replaced them with the Kylynly lights
(next image). Why? Because the toilet "closet" door would hit them when the door was opened!
I didn't notice that until they were already installed!
Plan Ahead! That's my motto!
|
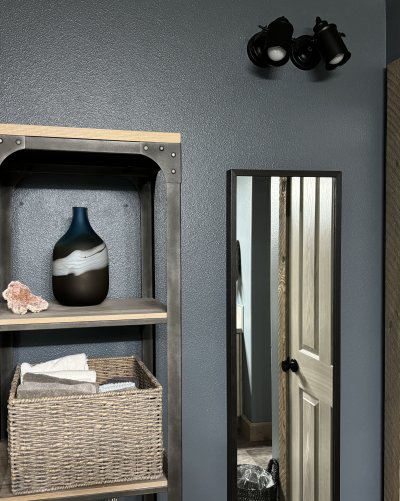
2 Here's the same area with
the Kylynly lights.
|
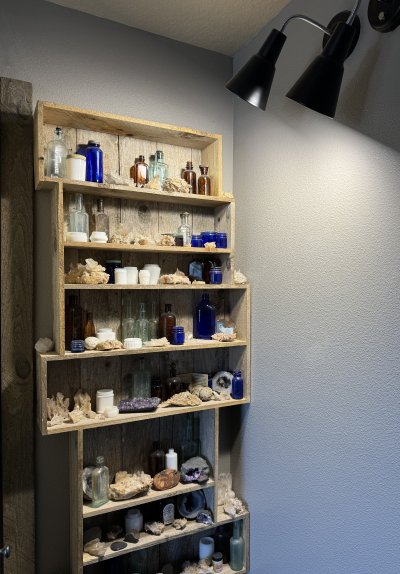
3 And here is an old bottle
and rock crystal display accented with the Globe lights.
|
 |
 |
 |
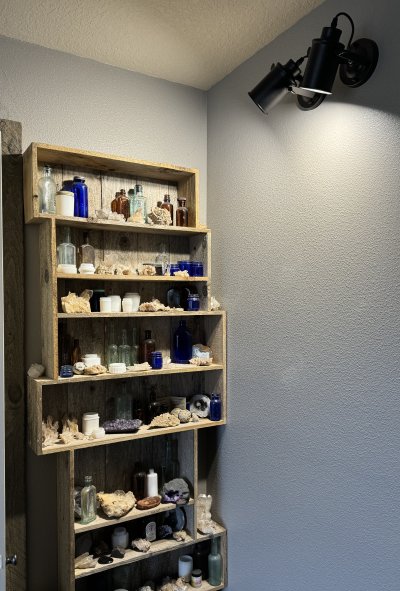
4 And here is the display light
with the Kylynly lights.
When I replaced the master bath lights with the Kylynly, we liked them so much that I
replaced the other two sets of accent lights - the crystal display and the Living Room Fireplace.
|
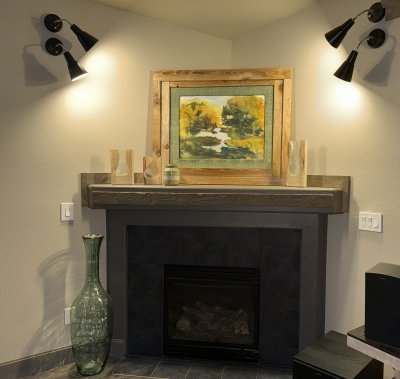
5 Here is the Living Room
Fireplace with the Globes. Note that I felt that the shellac-framed painting looked better with
"Warm White" lights. For the other two installations, I used Cool Whites, which are what we
used throughout the house.
|
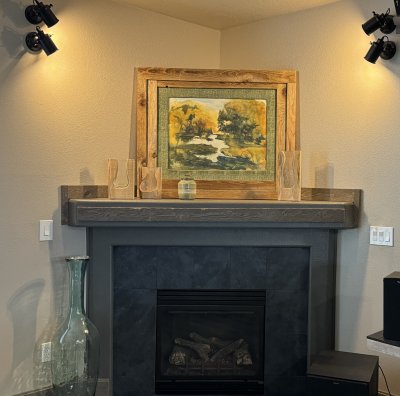
6 And here are the Kylynly
lights.
|
 |
 |
 |


