There are many articles and videos showing how to build your own fence. Most of them are pretty basic and most of them make it look easy. Why?
Usually they are on pancake-flat land.
Most show power tools for digging the post-holes. One even had the owner ride into the scene on the seat of his farm tractor with a PTO (Power Take-Off) post-hole digger! 30 seconds tops for digging a hole!
Some had air guns for nailing the support boards and air staplers for snapping the fence slats in place. Bam! Bam! There's the support post. Pfsst! Pfsst! Pfsst! Pfsst! There's another slat.
They all depict the simple fence with all the slats on one side.
What about provision for keeping the rabbits and chipmunks from sliding right under the fence? Not discussed.
They all show two or more people working on the project.
But what if you're just you, and you have the musculature of Hiccup in "How to Train
Your Dragon", and all you have is a shovel and a post-hole digger, and one side of your yard
is 4 feet higher than the other, and you have a blueberry or strawberry patch in your yard and would
like to eat the berries yourself rather than feed them to the rabbits and chipmunks?
Or what if you'd like to end up with a good-looking, straight, well-built fence and un-split boards and
fence slats without the staples buried 1/4 in deep?
Well, you've come to the right place.
I'll show you how to line up the top and bottom of your fence with your two "Calibration Strings".
I have several tips on easing the pain of digging the holes. (Or course if you have a Massey Fergusen with a $700 "DR Post Hole Digger" PTO, knock yourself out!)
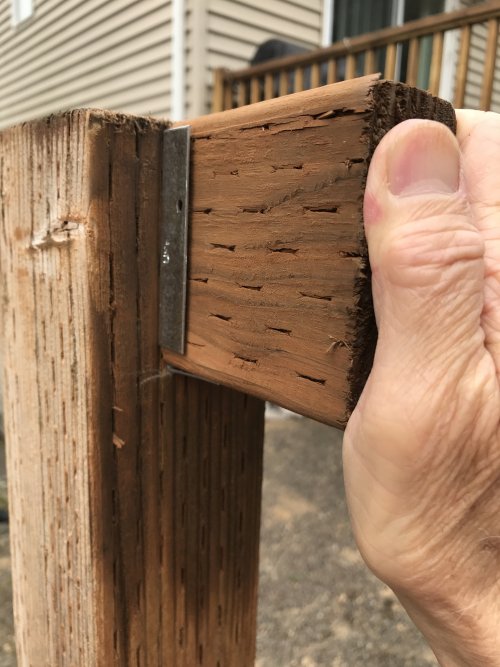
I'll show how to nail the ends of support boards without splitting them - resulting in a much stronger joint.
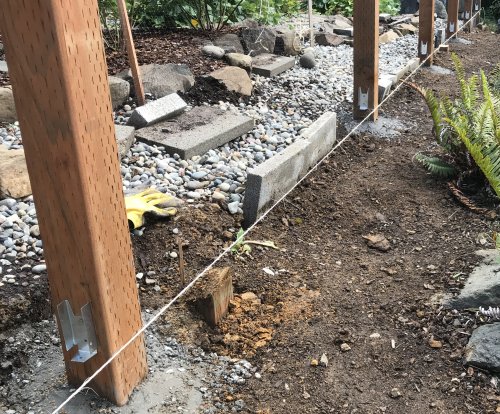
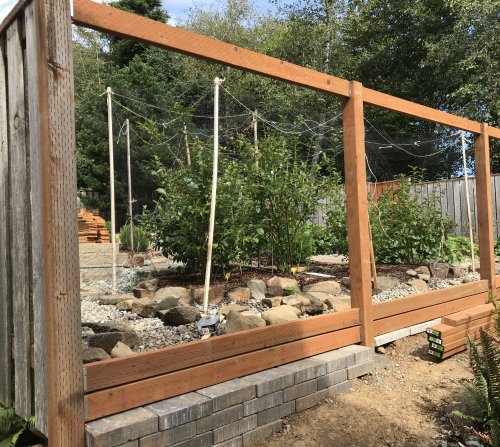
I will also show how to add a concrete block/brick base unter the bottom support board to help keep the critters on the other side, or your pets on this side.
I also have a unique method of adding concrete to the posts, resulting in a stronger installation and posts that are immediately ready for the support boards - no waiting for the concrete to set.
And I have a tip on attaching the top decorative board in a way that helps strengthen the fence - and helps keep it straight - at the post area.
Of course the main reason to attempt all this work is a huge cost savings.
I wanted to replace the existing fence on two sides of my back yard - about 80 linear feet total. The price ranged
from $4500 to $5000. To do it myself resulted in a cost of about $1900. And this is with nice cedar slats, ground-contact
rated pressure treated wood posts and cross pieces, and all stainless fasteners. Stainless fasteners are a must
if you live on the coast like I do. And they will make for a longer-lasting installation and better appearance a
few years from now.
How hard is all this? So, adding the horizontal boards and installing the fence slats is about a 5 or 6
on a scale of 10 in difficulty. Digging the holes and placing the heavy posts into the holes is, well, "greater than
5 or 6"! Actually digging the hole isn't too bad. Don't try to force it; just use the weight of the post-hole digger
to do the work. (Also see my additional tips below!)
Tools and Materials
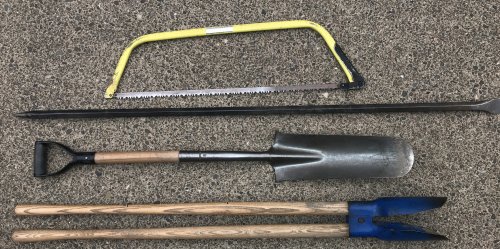
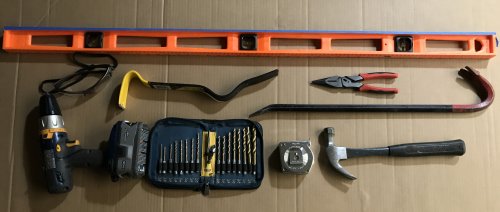
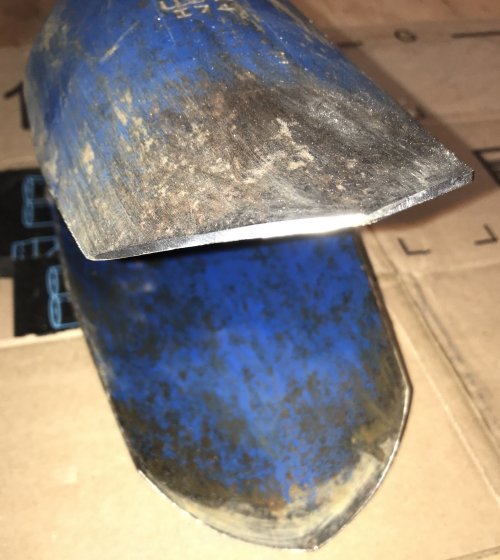
Tools. |
And here are the tools necessary for assembling the fence itself. The crowbar and the yellow pry bar are useful for disassembling the existing fence. The orange level helps you set the posts upright and the horizontal support members "horizontal". And the drill and bits? That's explained below. The needle nose pliers are for pulling the staples out of the old fence slats if you want to save a few of the slats. Why do that? Because cedar fence slats, if pressure washed, make great "reclaimed" wood for projects. |
 |
 |
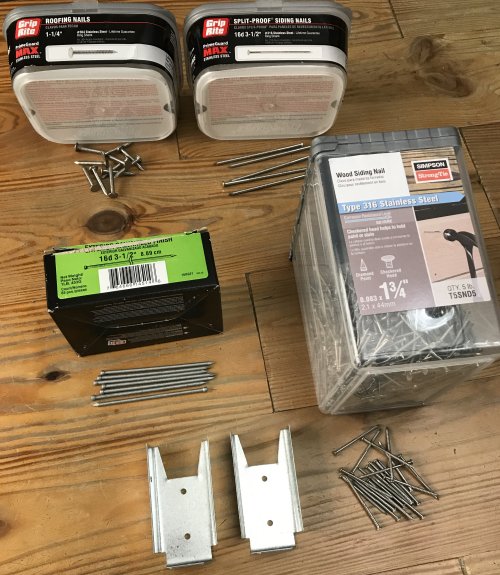 |
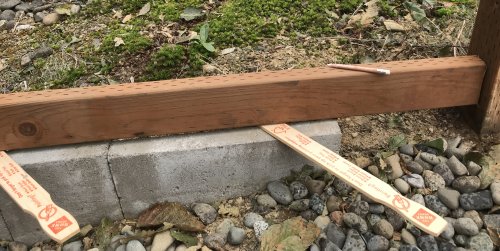
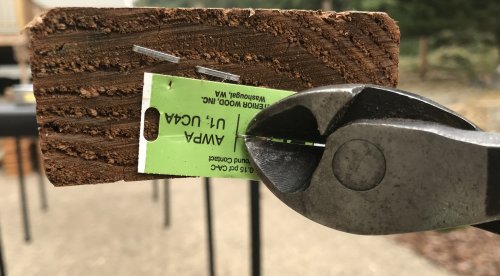
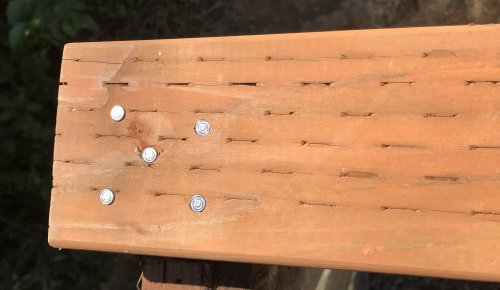
Fasteners. The roofing nails are for attaching the 2x4 fence brackets (shown at the bottom) to the posts and for securing the horizontal 2x4 pieces in the brackets. The longer "Split-proof siding nails" are 16d, and are used mainly for attaching
the top decorative piece and/or any nailing of larger pieces of wood. "16d" essentially means a nail that
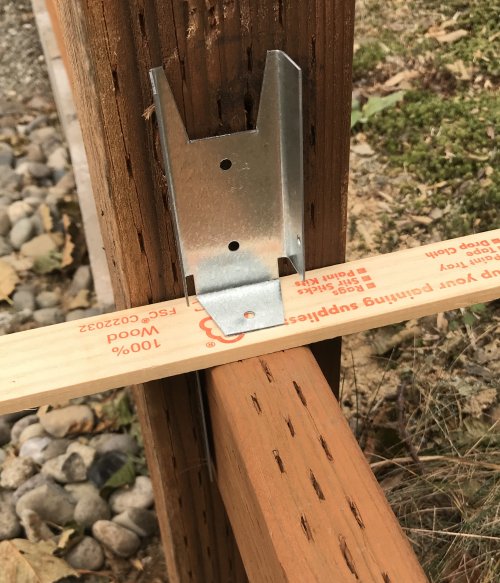
is 3 1/2 inches long. The "Wood Siding Nail", 1 3/4 in, is for nailing the fence slats. (unless, of course, you have a nail/staple gun). The metal items on the bottom are the metal brackets for the horizontal support boards. |
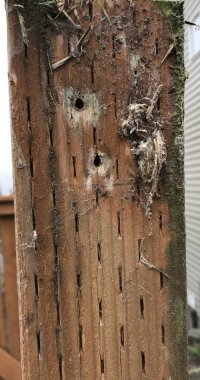
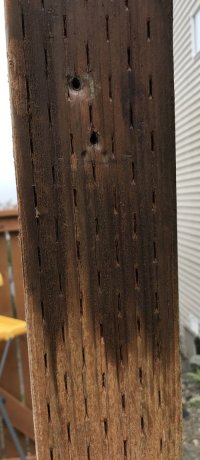
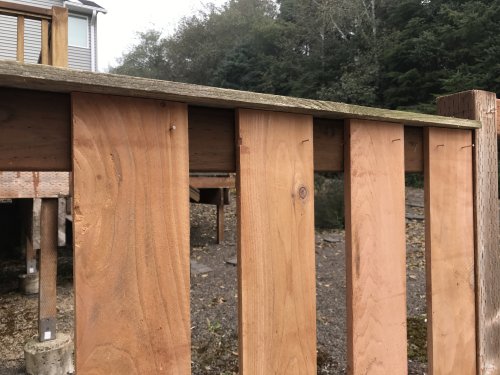
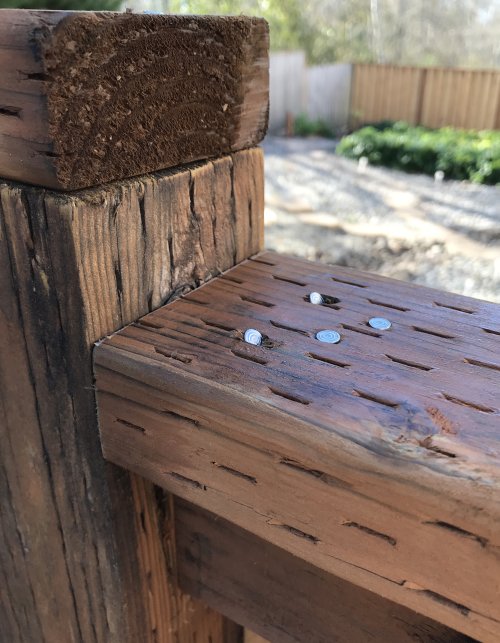
Wood. The posts. If you are replacing an existing fence, you might
be able to use the existing posts. Pressure treated "ground contact" wood will last a long time. This is usually
the wood with the rows of slots in the sides (see the images below).
Dig the dirt away from the existing posts and check if the wood is in good shape. If the posts are in good shape
and feel firm if you push against them, they can indeed be used. The horizontal cross pieces. These are 8 foot 2x4 pressure treated wood. Get the
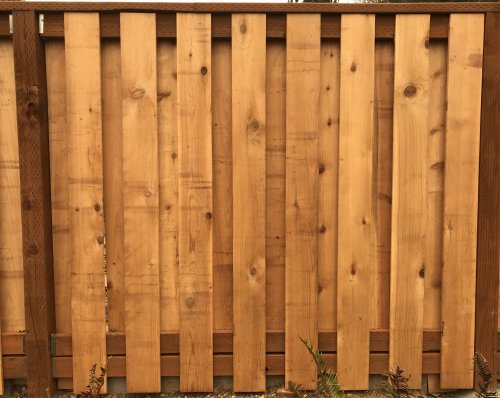
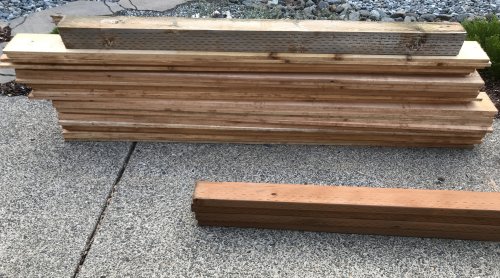
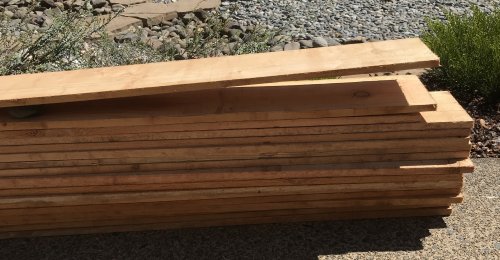
"ground contact" rated even though they're not going into the ground. They last much longer. The fence slats. Get 6 foot or 8 foot as appropriate. Cedar is by far the best wood.
It will promptly weather to a grey, but will last for years. Cedar is the standard for coastal areas. I had
a fence built when I lived in Texas. The fence slats were "treated" wood, and they promptly warped and split
after a few months. Spacing (So you can calculate how many posts you'll need). If you live in an area with occasional strong winds, the fence will be considerably stronger. You could use 5x5 posts and keep an 8 foot spacing, but 5x5 posts are very heavy, and would require you to enlarge the holes dug by a typical post hole digger. I used a 6 foot spacing on the "windward" side of my yard, and this resulted in 5 posts in the 80 foot span instead of the original 4 posts. That's about 25% stronger overall. The fence is less likely to sag as time passes. If you have an existing fence with 8 foot spacing, and the posts are in bad shape, if you change to 6 foot spacing for your replacement fence, you eliminate the (serious) problem of having to dig up the existing posts and trying to remove the concrete. The new posts won't co-incide with the location of the existing posts - you can simply cut off the existing posts at ground level. (But don't cut 'em just yet; they can help you line up the new posts.) |
 |
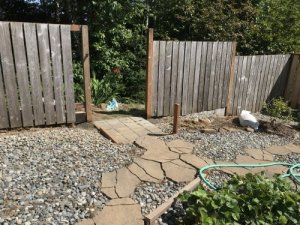
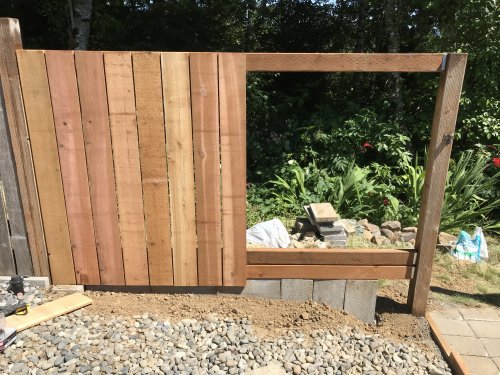
Building the Fence
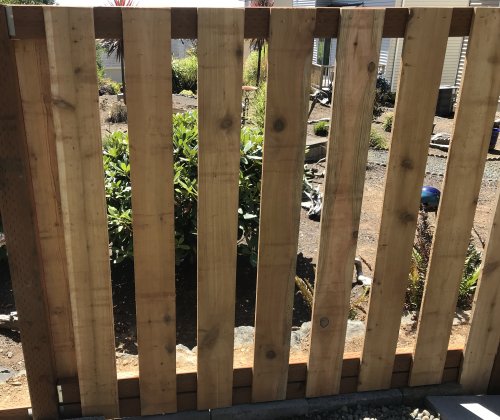
The two variations of fences I will be discussing are the "Straight Top" (Left) and the "Staggered Top" (Right) |
|
 |
 |
The Posts (New Post Scenario) |
|
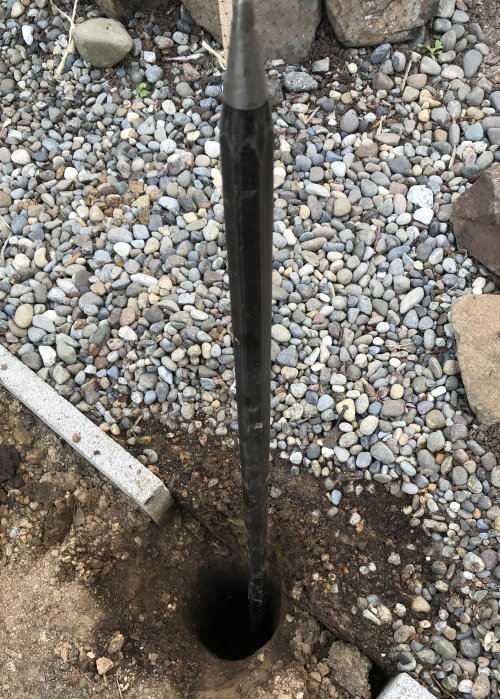
1 Some tips on digging the hole. |
2 Mark the sides of your post-hole digger.
Just 2 and 3 feet marks should suffice.
This helps you determine how deep you have gotten - and thus keep your spirits up! (Some fancier ones
have depth marks on the side already.) |
 |
 |
3 If you encounter harder soil or perhaps rocks, use the digging bar. |
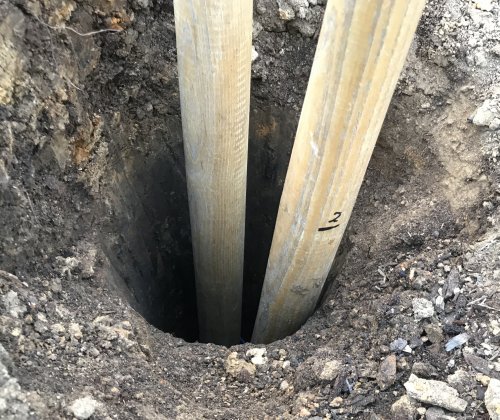
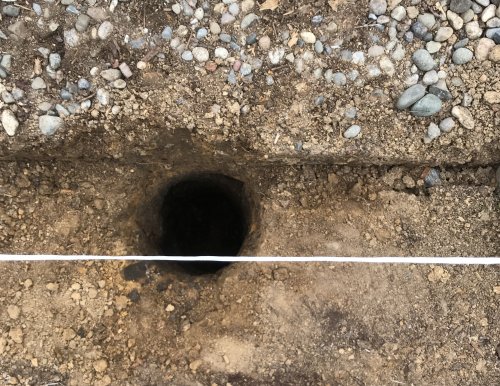
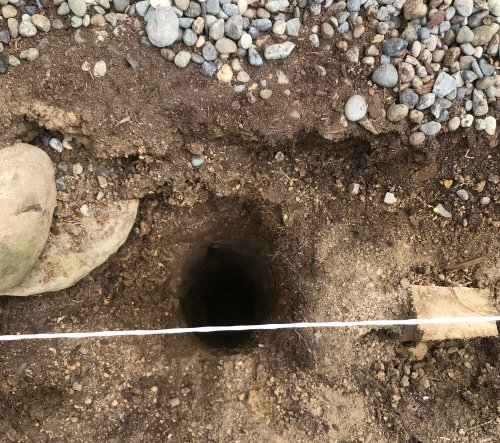
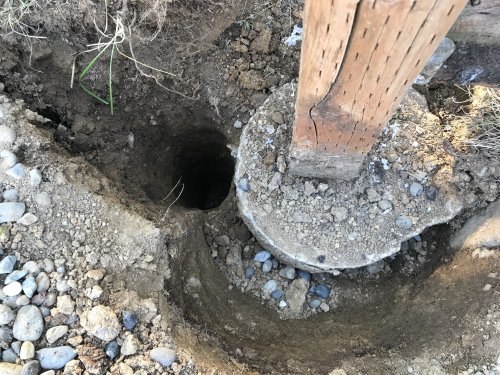
4 Stretch a line from the end posts, close to the ground.
This will help you line up the holes, so the bottoms of all your posts will line up. |
 |
 |
5 Use your lower string to make sure the holes are all lined up. I had
to use the "hole-shot" shovel to remove some soil on one side, for a couple of the holes. |
|
 |
 |
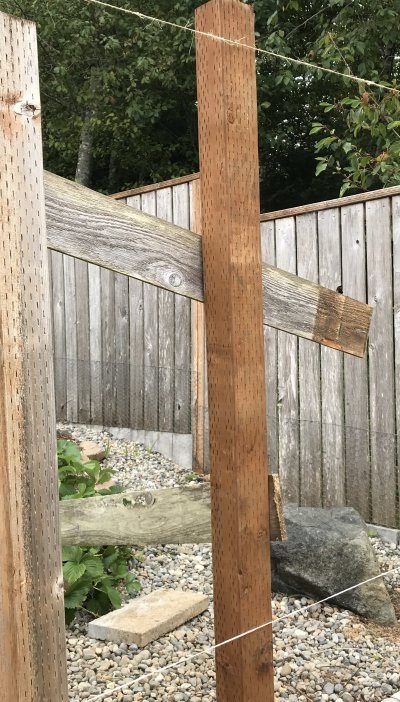
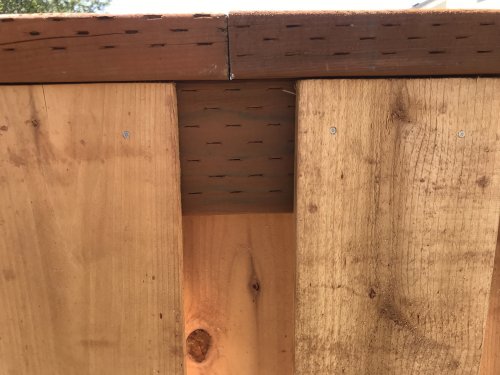
6 I used the original fence slats to temporarily secure the posts. The upper
slat shown here is attached to the existing post on the left and the new post on the right. Start by "tacking"
the slat to the existing post (i.e., don't drive the nails in fully). Then use a level to get the new post "plumb"
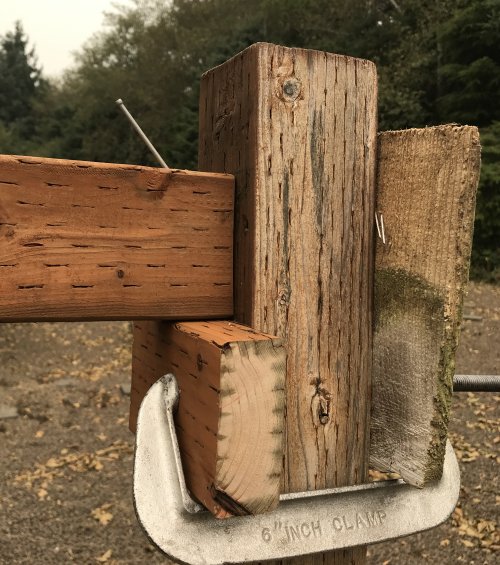
(upright) in the left or right direction - parallel to the fence's length - and then tack the slat to the new post. |
7 So the lower fence slat secures the post in the other direction (toward or away from the yard). Just move the post until it is just touching your "calibration strings" Then tighten a C clamp to secure the loose end of the slat to a stake in the ground. Why clamped instead of just nailed? Because it's easier to nudge the post a bit and then tighten the "C" clamp on the stake. |
 |
 |
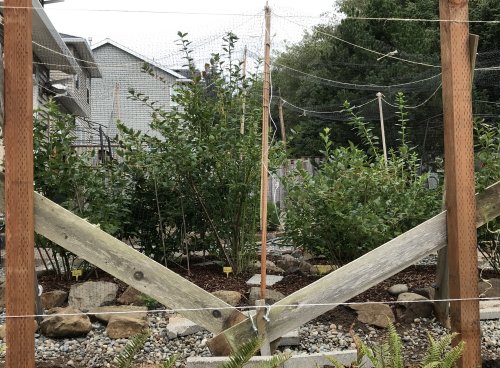
8 Here's two more posts. These posts are secured to one stake in
the ground. (I just broke off a piece of a slat using a chisel to make these stakes.) Use a level to
get the posts plumb in the direction parallel to the new fence's length (to the right and left in this image).
Straighten one of the posts and then use a C clamp to secure its temporary fence slat to the stake.
Then straighten the other post and then tighten its C clamp to the stake. |
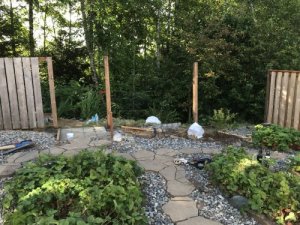
9 Here's a view of three of the posts all secured and ready for
the concrete. In this picture, the post in the foreground and the post in the middle are just tacked
to an existing post rather than to a stake in the ground. Use a level on each post for this direction. |
 |
 |
|
|
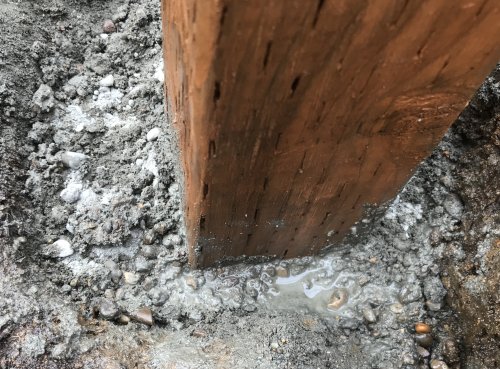 |
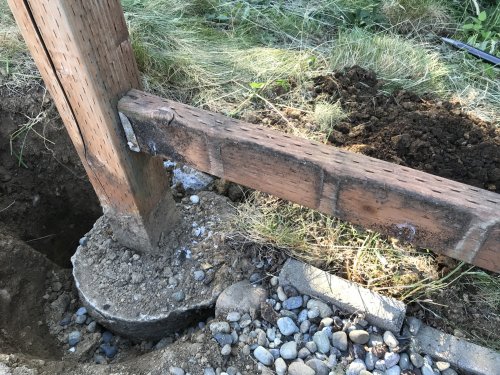
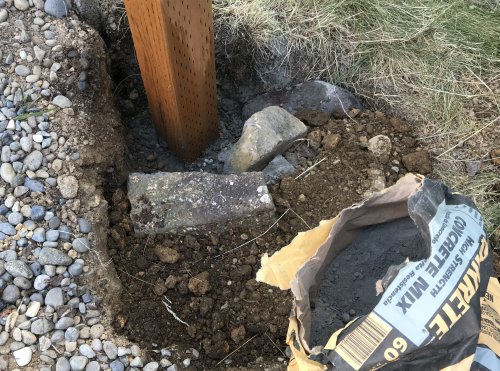
10 Adding concrete: Start by pouring some dry concrete into the hole. Have a garden hose and sprayer ready and just squirt a small amount of water into the hole. Tamp the moist concrete down with a small board - I used a 1x2 about 4 feet long. Continue to add dry concrete and a small amount of water and tamp. You are adding only about 1 - 2 inches of concrete each time. If you get the mixture too watery, just pour a bit more dry concrete. Tamp some more. If too dry, just squirt in some more water. You don't want the mix to be as wet as you might if you were mixing concrete to pour out of a wheelbarrow or bucket. The mix should be just moist. In the adjoining image, I have worked my way up to almost the top. Note that the mix on the left side of the post is a bit too dry - you can see some dry concrete. So spritz in a bit more water. The mix on the bottom is slightly too moist - some water has pooled up. So just sprinkle in a bit more dry concrete. Tamp some more. Make sure the post has not moved! Using this process, once you get about halfway up the hole depth, you won't be able to move the post! Wear safety goggles! If you get too much water, the mix will splash out of the hole, and the manufacturer indicates on the bag that concrete mixture is apparently not the safest thing around! |
|
12 Then I add just enough water to make the mix have the consistency of thick biscuit dough. |
 |
 |
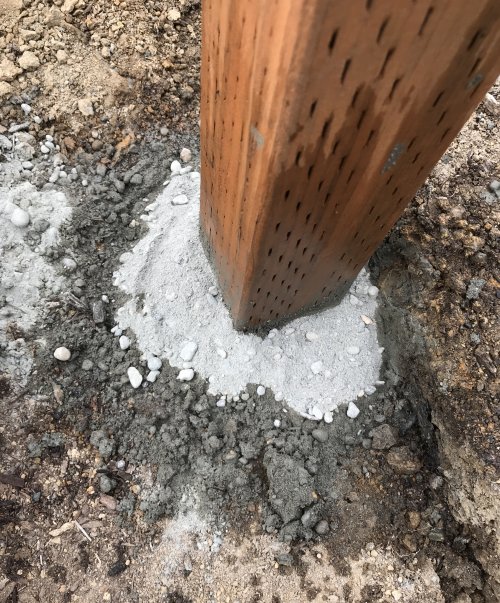
13 Finally I add some more dry concrete and then add a bit more water
than usual, so that I can smooth out the top with a wide putty knife. The concrete is tapered - highest
next to the post and lowest at the edges. |
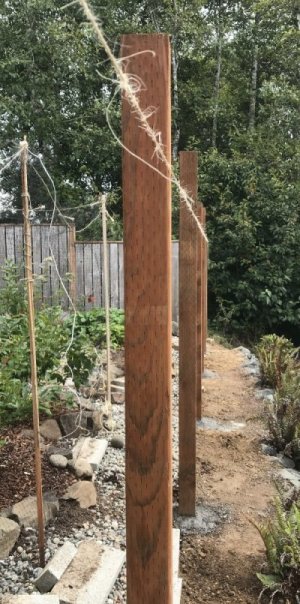
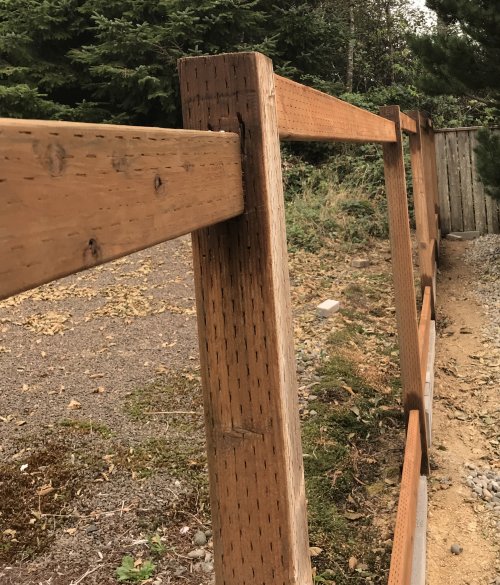
14 So here's all the posts nicely lined up, thanks to the two Calibration
Strings. Now it's time to cut the tops of all the posts. If you thought "well, I'll just dig each of the holes
such that the tops of the posts all line up without needing to be cut", by now you have seen the
reality of post hole digging! |
 |
 |
The Posts (Use Existing Posts Scenario) |
|
Here's some information on building a new fence but using the existing posts. |
16 Once you have removed the existing horizontal support pieces, you want to clean up the original attaching spots. This one is at the top of the post. (If you live on the coast like I do, the area will be covered in spider webs!) |
 |
 |
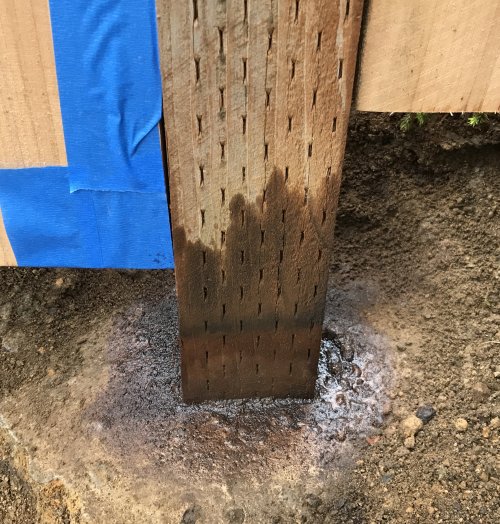
17 So I have wire brushed the area and sprayed with a wood preservative. (See #21 for name) |
18 On the bottom of the post, I have removed the soil down to the existing concrete, which or some reason was unusually flat. |
 |
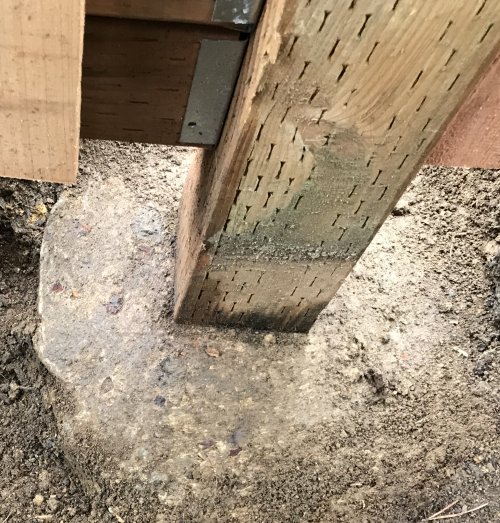 |
19 So I wire brushed the area and sprayed with the preservative. I used the blue "painter's tape" to keep the spray off the new fence slat. (I didn't tend to the bottom of the posts until I finished the fence!) |
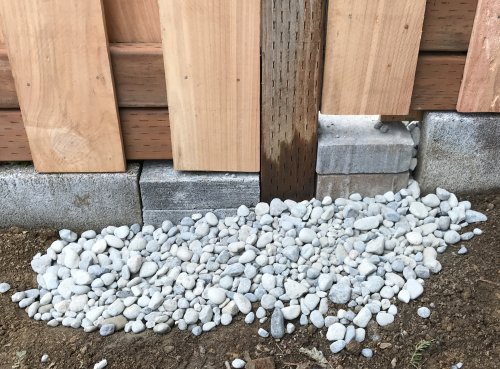
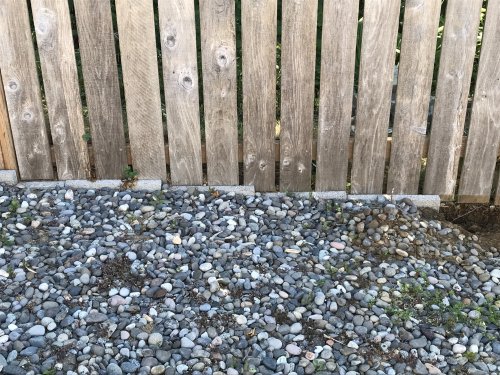
20 I replaced the soil with "3/4 inch drain rock", but any kind or
gravel or pea pebbles will be fine. Notice that I have also dug out the area to the left of the post, which
is lower, and filled it with the gravel. This provides drainage, since it is lower than the post. If I had simply
filled the cavity around the post with gravel, the surrounding soil would trap water and never drain. |
 |
 |
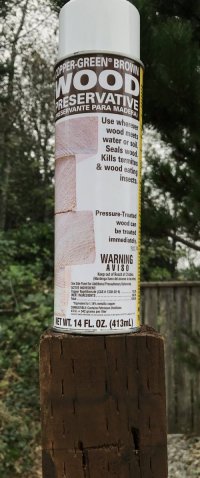
21 And here's the preservative compound I used. |
|
 |
|
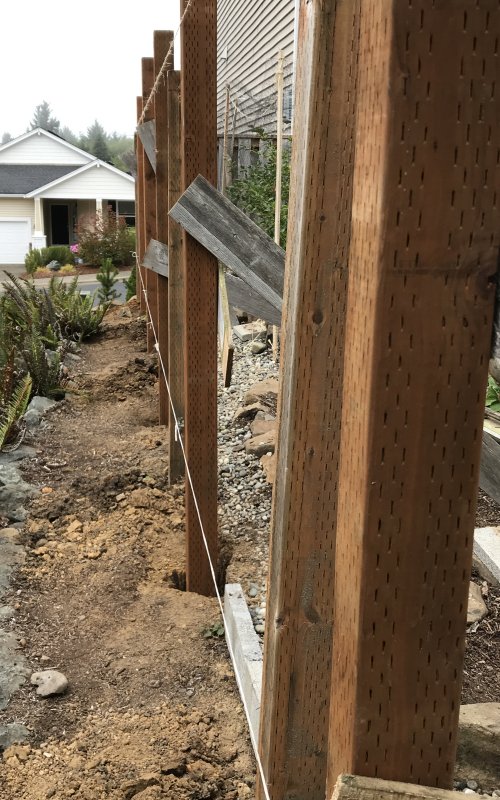
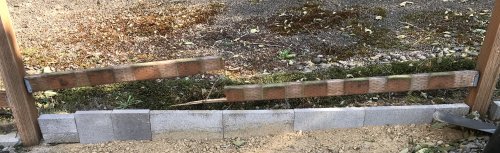
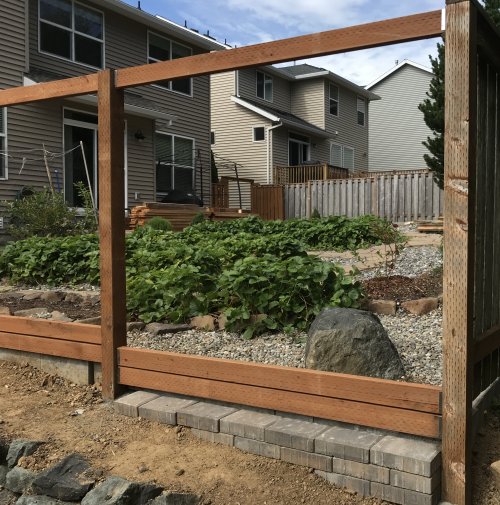
The Horizontal Supports (Straight-Top fence) |
|
22 Here I am adding the metal brackets for the
bottom 2x4 support boards. I have moved the bottom "Calibration String" to line up with the desired height of the
bottom of these boards. |
23 Now I am at the top side of the posts,
adding the metal brackets for the top crosspiece (support) boards. Take a piece of a 2x4 and use it to judge
where to add the brackets. The top of the 2x4 needs to be even with the top of the post. Mark the bottom of the bracket. |
 |
 |
24 Back to the bottom again.
I have already placed all the bottom boards
into their brackets. Now I want to add a second horizontal crosspiece right on top of the first one.
This helps create a barrier to help in animal control. If you aren't interested in animal control, you don't
need a second board. |
25 Adding a nail to secure the crosspiece
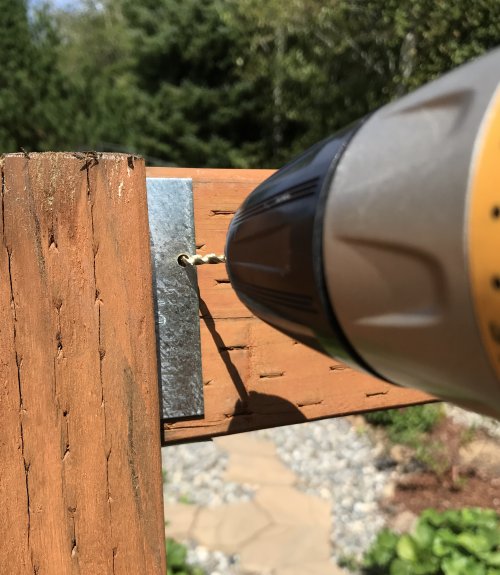
to the bracket. |
 |
 |
26 Here's a shot of the corner of the new
fence, with all the horizontal crosspieces in place. (This is the South side of my yard.) I have added a block
retaining wall/animal keepout in this area due to a sharp drop-off in the grade. |
27 So here's the South side, ready for the fence slats. For this side, I added the bottom crosspieces first. Then I placed the "animal control" blocks next, bringing them up to almost touching the bottom of the lower crosspiece (two sections are fininished in this pix). On the North side, I decided it might be easier to construct the animal control blocks first - discussed below. |
 |
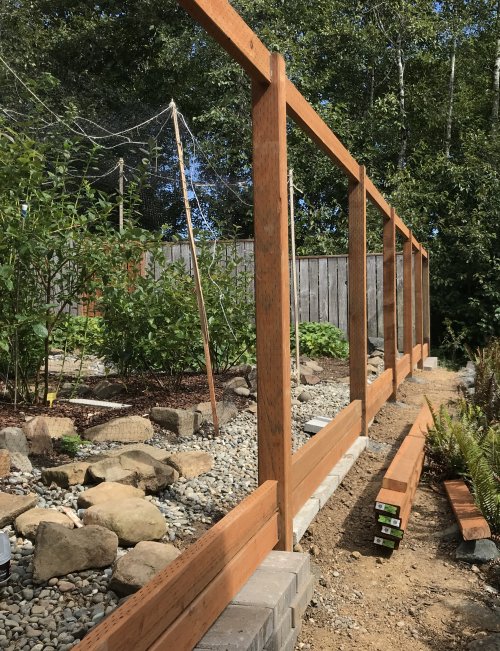 |
28 On the other end, I build another block wall. You can see the animal control blocks also in the adjacent section. Before installing slats I actually added a third horizontal support in this section, above the two support crosspieces seen here. |
|
 |
|
The Horizontal Supports (Staggered Top fence) |
|
29 On the North side, I decided to construct
the animal control blocks first. They are cinder rectangles, 16 x 8 x 2 inches. I used a level to keep all the top edges
straight. |
30 Here's a pix of the first row of bottom boards.
As you see, there is a gap on both sides of the posts, since I couldn't bury the cinder blocks due to the post
concrete. Also, in most cases, the 16 inch long blocks would not fit. See picture #20 for what the completed
post area will eventually look like. |
 |
 |
31 As shown in picture #23 above, I use a 2x4 piece to mark the position of the bracket. This is the "Staggered Top" type, so I do this procedure on the side where the crosspiece is even with the top of the post. |
32 For the opposite side of the crosspiece, I
support the board with a 2x4 scrap secured with a C-clamp. The scrap piece of the old fence slats is on the other side
of the post - to keep the C-clamp from scarring the post. Place a level on the board and tighten the C-clamp when
you determine it is level. |
|
 |
33 So I am now ready for fence slats on this Staggered top fence. Note that there are two bottom crosspieces as well. |
Pet Peeve Time: |
 |
 |
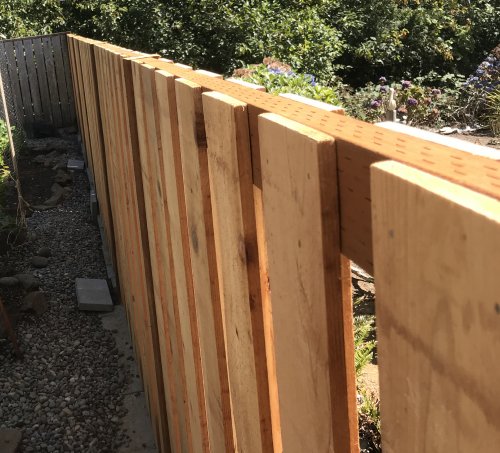
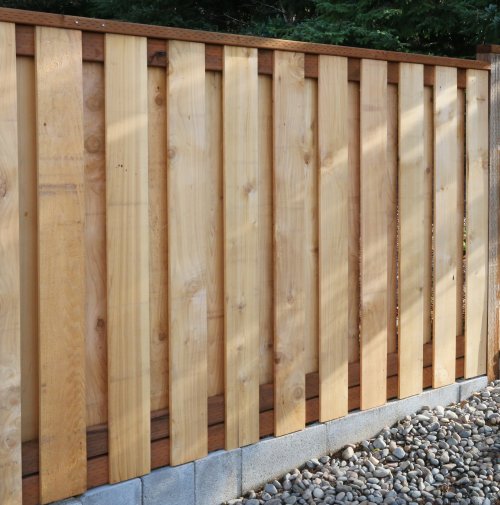
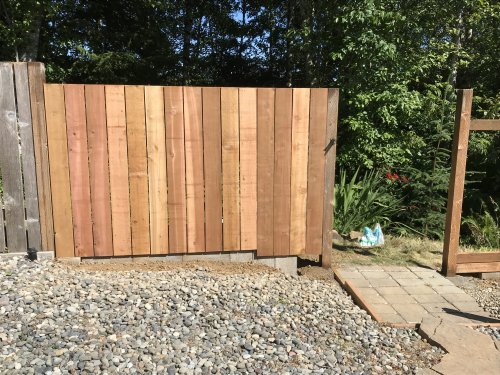
The Fence Slats |
|
35 Place some weight on top of the fence slats you haven't used yet! This is true whether it is sunny or if it rains. Why? See next pix. |
36 The slats will bend in the
sun or the rain! Actually, if you expect rain, cover all the wood with a tarp! Wet wood is hard to work with! |
 |
 |
37 Slat spacing. |
38 For the bottom, notice the nail is on opposite side. This helps prevent warping, since the slats will be exposed to the sun for the first time. |
 |
 |
39 Nail the slats on one side first. As
mentioned above, start with one slat almost next to a pole. In this picture, I started on the right side of this
section, so the first slat is not seen. |
40 Every home improvement
project is a learning experience! I placed all the fence slats on the South side of the yard by holding
them up so that their tops were even with the top horizontal crosspiece. So when I got to the
North side I said "Duh!" |
 |
 |
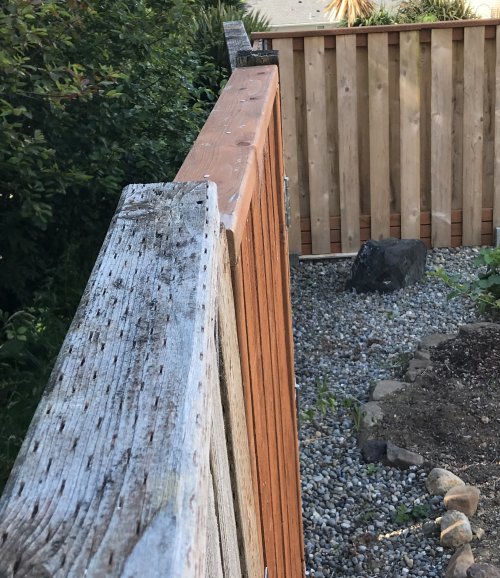
41 So here I am, ready to place the decorative top piece on top of all this. (Of course, as discussed in the prior panel, just put the top piece on first, before the fence slats!) The "decorative top piece" is simply another 8 foot 2x4 placed on its side. |
42 One more picture showing how
straight your new fence can be. Your Calibration Strings will have. paid off. |
 |
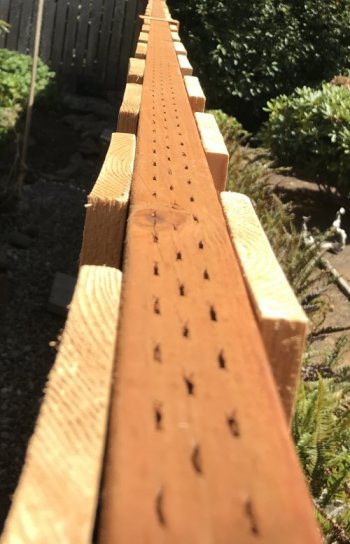 |
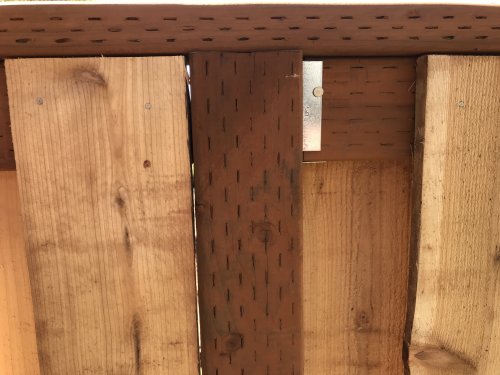
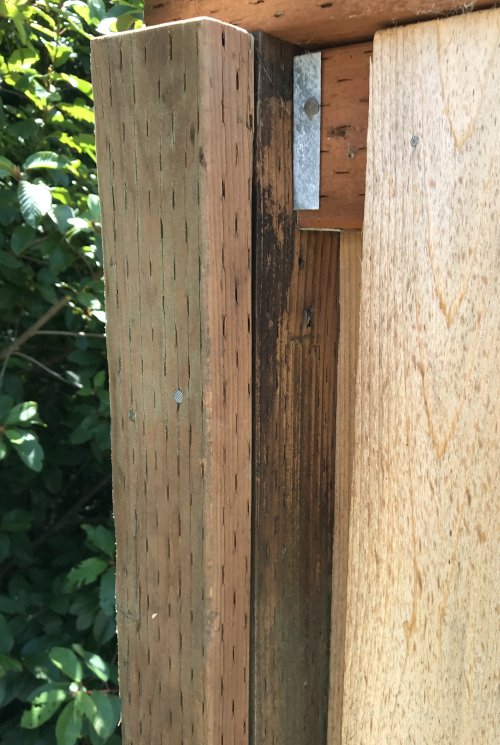
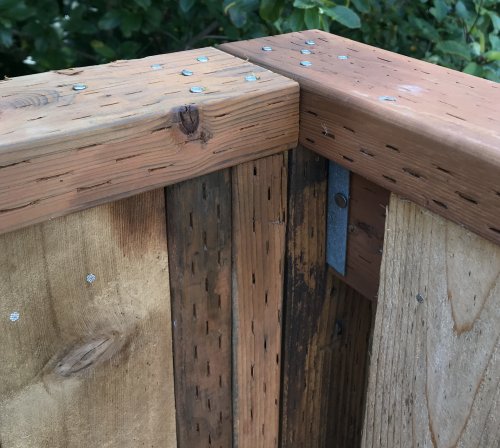
43 The top decorative piece: |
44 Here's the butt joint somewhere in the middle of a fence section. This technique is similiar to staggering bricks or blocks so that each brick/block rests on the junction of the bricks/blocks below them. |
 |
 |
45 Back on the side with the Staggered
Top. I show the lower decorative board secured to the post with "toe-nailing". The two nails whose heads
are slanted are driven through pre-drilled holes. Use a round punch or something similiar to drive them
in so that the nail head is just even with the surface. |
46 Use 4 or 5 nails at the edges of the top pieces (through pre-drilled holes naturally). Why? This helps prevent the edge from curling up in the summer sun. |
 |
 |
YOU'RE FINISHED! Go pour yourself a cold craft beer in a frosted mug, or a glass of wine. |
|
Some Additional Tips
I came up with all the above tips/suggestions while replacing the fence sections on either side of my
back yard. This summer (2021), I replaced the back side sections.
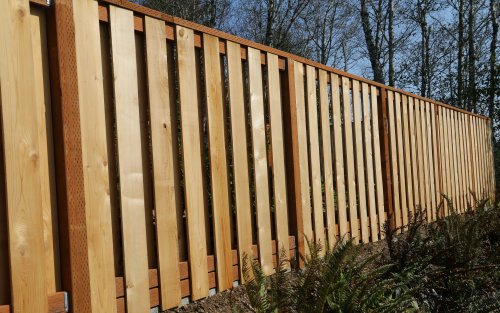
It's a different type of fence, having all the slats placed closely together and on one side rather than staggered on
either side. Also, I came up with a few more tricks while working on the back sections.
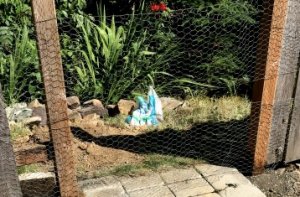
Animal Control and The "Perimeter"
As you can see from some of the sections/pictures above, I have been very dilligent in "keeping
the perimeter secure". I have 3 rows of strawberries and about 10 blueberry plants, so the "perimeter" -
with all its animal control cinder blocks - guards against attacks by the local chipmunks. |
So when I quit for the evening, I tacked on some mesh - you can just barely see it in this picture. Note that this will NOT keep the chipmunks out, but at least it will keep the deer out. |
But NOW I have a big problem: The Perimeter has been COMPROMISED indeed! |
So I was forced to rent one of these! A 50 caliber tripod mounted weapon. NOW I can fight off the chipmunks! |
 |
 |
 |
 |
1A While on the subject of "perimeter"
and animal control (keeping the critters out or your pets in), here's how I arranged the cinder blocks on the
existing back fence. |
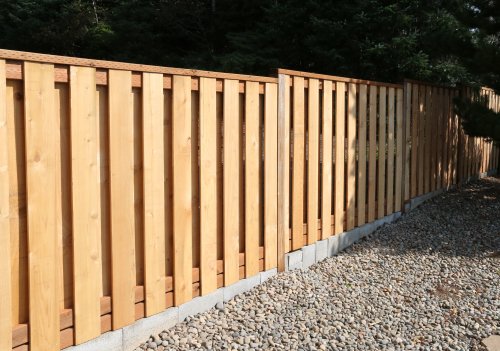
2A On my new side sections (last year), I placed the cinder blocks in a straight line (that is, not following the slope). The bottom 2x4 support pieces and the slats rest on their tops. |
 |
 |
3A But the back fence has
all the slats on one side, and the spacing between them is only about 1/4 inch. This is sufficiently close
to prevent a chipmunk from squeezing through. So I put the tops of the cinder blocks up close to the
2x4 support pieces, like I had done on the side sections. But this time the blocks are flush with the
front of the 2x4 pieces. |
4A Here is the finished section.
On a sloping section, you can either have each slat slightly longer than the adjacent one (so they will follow
the slope of the ground), or have some number of slats all even, and then lower the next set of slats,
for a staggered look. |
 |
 |
Fixing, Straightening, and/or Replacing Posts NOTE: This adds some additional information on dealing with posts. I already have two sections on posts above: The Posts - New Post Scenario (images 1 - 14 above) The Posts - Use Existing Posts Scenario (images 15 - 21 above) |
|
5A This is a shot of the right
side of the existing back fence. The camera was held just above the top piece in the foreground,
sighting along the top of the fence. The reddish section is the gate (replaced several years ago). |
6A Well, removing existing posts is
a job for either more people or more muscle, neither of which I have at hand. Last year I used new posts
on the windward side of the yard, but I solved the post removal issue by changing to 6 foot spacing. I could
dig new holes between the 8 foot existing posts and simply cut them off. This is discussed above in the
"Tools and Materials" section. There is a "Spacing" section under "Wood". |
 |
 |
7A Solution: |
8A Here I have inserted the new 4x4 post and brought concrete up close to the surface. I have cut off the existing post and placed dirt and rocks to take up the empty space. I could then bring the concrete up and taper the top as discussed in the "Concrete" section above - images 10 thru 13. |
 |
 |
9A By placing the new post
to one side of the existing one, I have made the last fence section right at 8 foot spacing. (The
existing fence was about 7 to 7 1/2 foot spacing.) |
10A Note that the top decorative
board is nailed to the two 2x4 pieces and now joins the back section to the side section at
the corner post. |
 |
 |
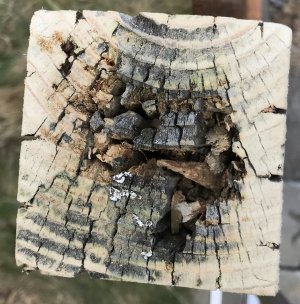
11A Got a rotten post top? |
12A First, dig out any loose wood. I just used a large needle-nosed pliers. Then spray some of the preservative into the cavity and allow to dry while you finish other things. |
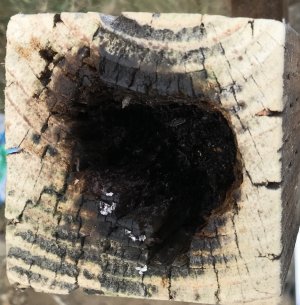
13A Fill the cavity with any exterior caulk you have laying around. Allow to dry overnight - it will probably shrink. |
 |
 |
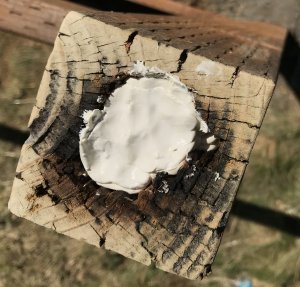 |
14A Apply chocolate cake frosting on top.
OK, how about an exterior caulk with a desired color. Use a wide spatula if you have one to
smooth it out a bit. |
15A Here's a simple metal post cap. |
 |
 |
The finished back fence! |
 |
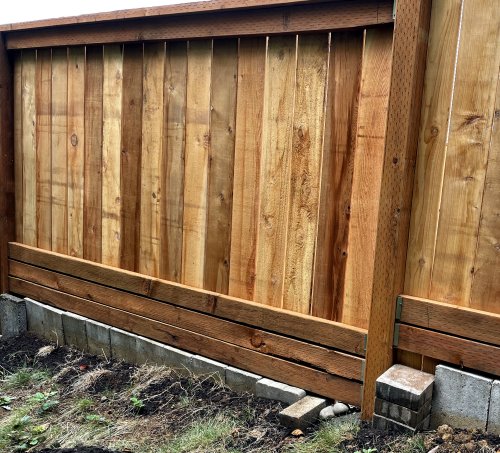
Here's the back side, to show the double support boards on the bottom, as well as the cinder block "animal perimeter". These blocks are lined up right underneath the lower support board, with a little spacing. The fence slats on the inward side overlap these cinder blocks and cover the spacing. This works (keeps the chipmunks out) for the type of fence with the slats on one side, due to the close spacing of the slats - about 1/4 inch. |
And this picture shows the section that is longer due to adding a
new post to the side of the existing one (pictures 9A and 10A above) Since the section is right at 8
feet, I used three support boards on the bottom - to help prevent sagging. |
 |
 |
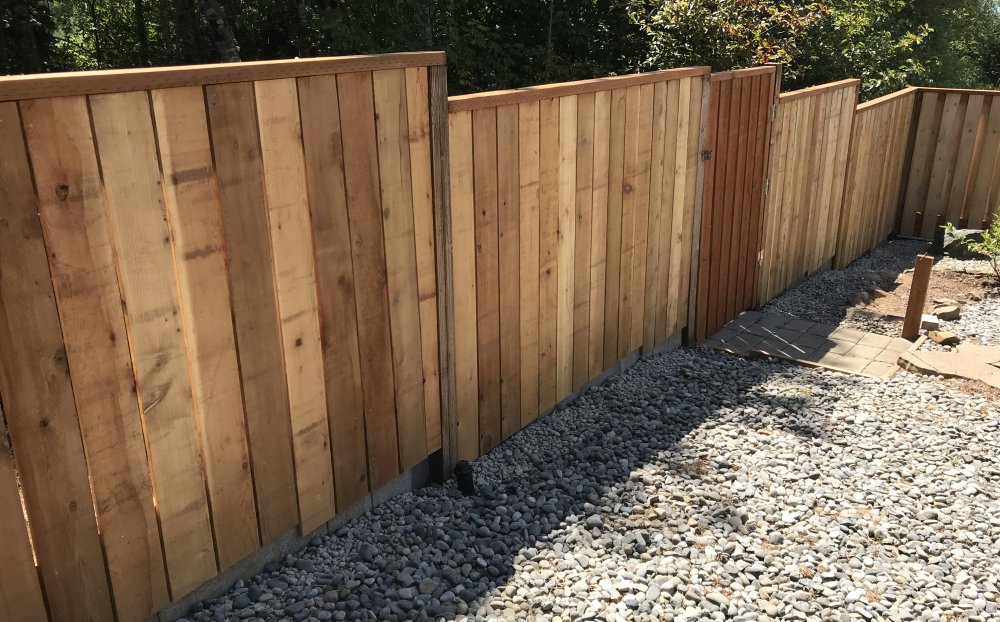
Preserving the NEW FENCE look
Having done all the work to build your own fence, you might be thinking "I sure would
like to preserve this new wood look, instead of helplessly watching my new fence turn ocean driftwood grey."
Well, you can preserve the new wood look! How? Read on.
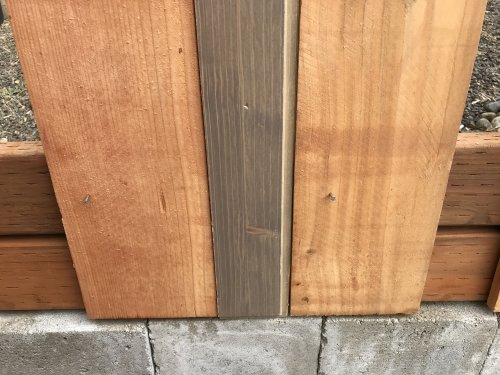
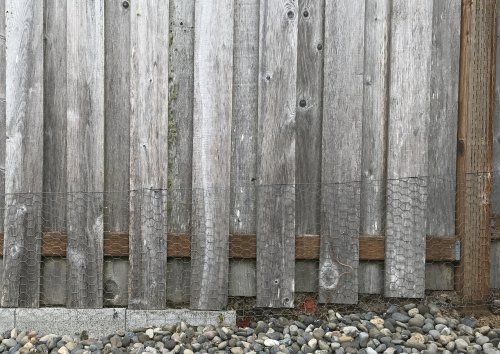
Here is the typical appearance of a fence that has turned grey. (This is a picture of my
original fence.) The pressure treated cross piece is still brown, but the slats are all driftwood grey. |
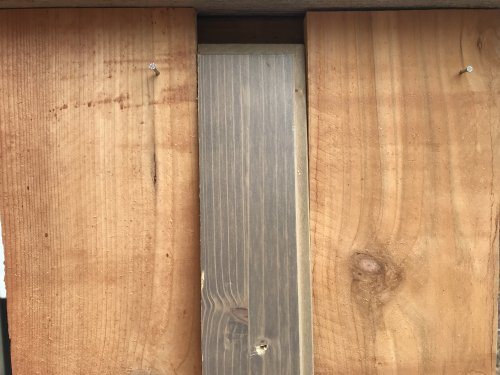
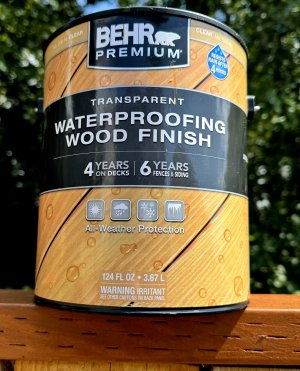
Here is the compound I used to preserve my fence. It's Behr "Transparent Waterproofing Wood Finish",
part number "Clear 500-N". I applied it about a month or two after the fence was finished. The delay allows the
cedar's natural oils to evaporate, so the wood preservative can be absorbed. |
 |
 |
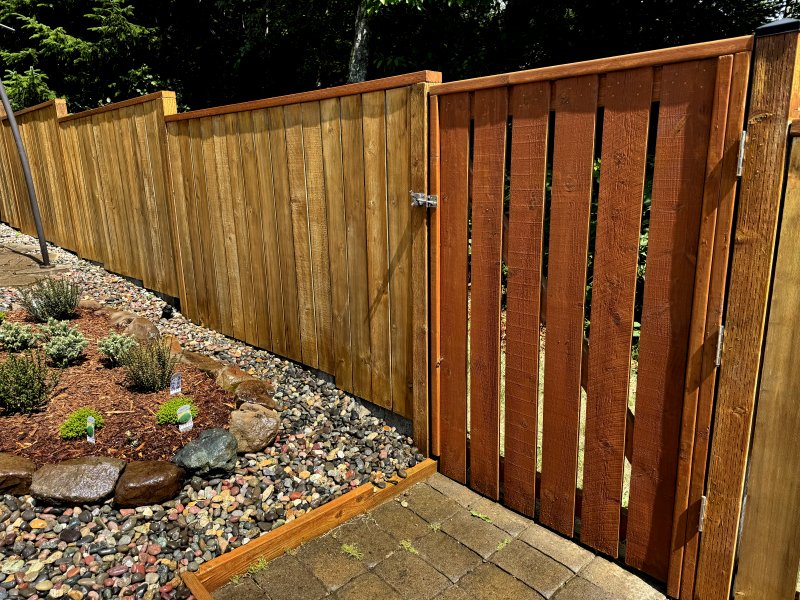
Here is the back side, up against the forest behind my yard. The fence
slats are cedar. But the gate was a type of "outdoor treated" wood (not quite "pressure treated"). |
 |
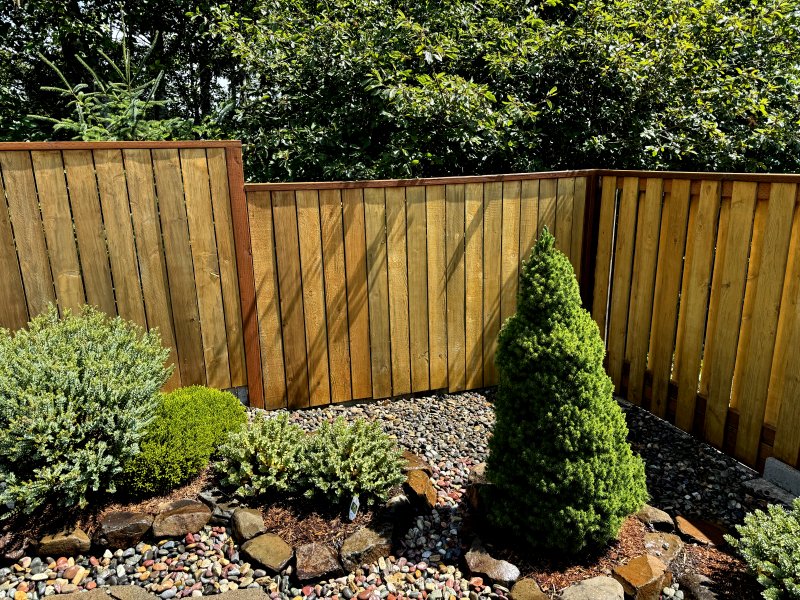 |
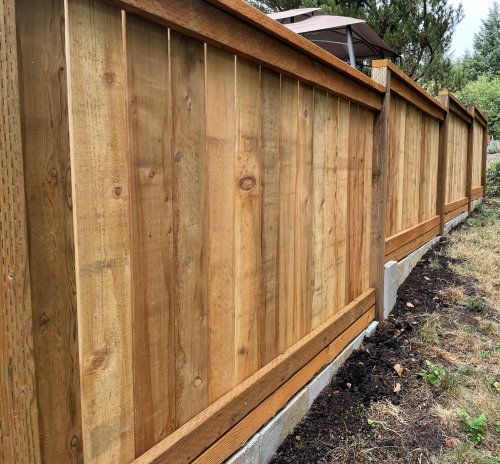
Here is the South corner. |
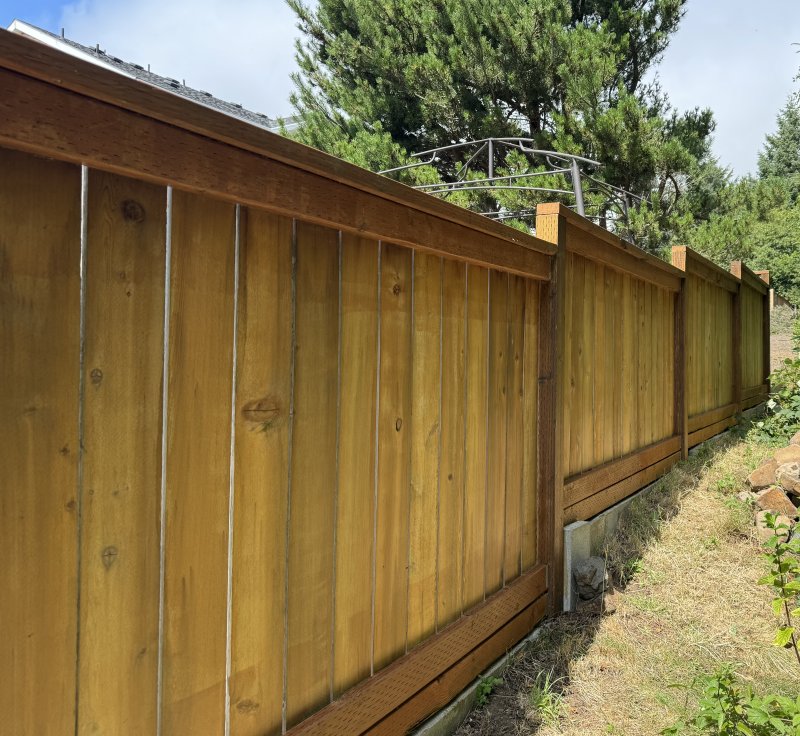
And here is the "back" of the back side - the side facing the woods. Compare
the color of these four pictures to the original, brand-new color in the three images above, under "The finished back
fence". |
 |
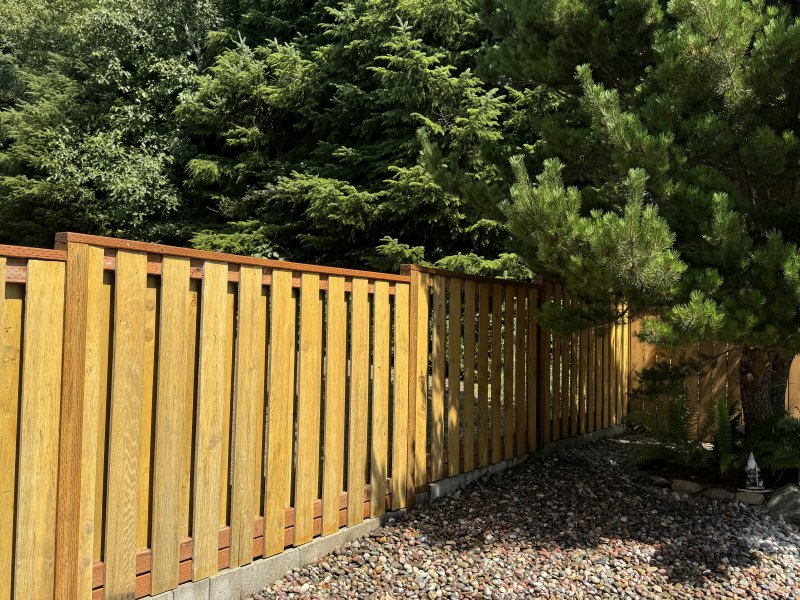 |
And finally, here is the North side. |
Copyright © 2024 J.A.