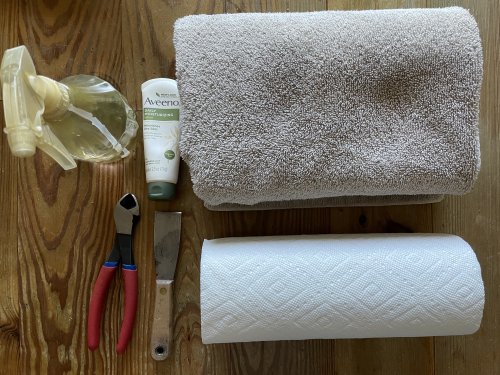
Tired of erratic behavior from your toilet?
You have to hold the handle down because the "flapper" closes too quickly.
You have to jiggle the handle to get the flapper to close at all.
The toilet requires hearing protection when flushed, or sounds like a loud hissing water snake.
The toilet "ghost flushes" about every 2 or 3 hours.
You can of course call the plumber and spend about $200 - $300 to get if fixed, after
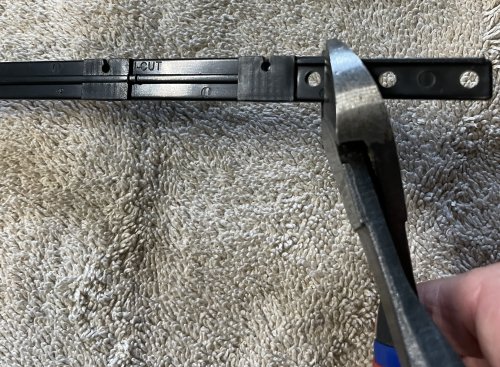
a 2 or 4 week delay.
OR: You can fix it yourself for about $40 - $50 bucks, AND clean the toilet and the area around it - the
way you would want it to be cleaned. And maybe even paint the area behind the tank to match your wall color if
you want to.
How hard is it? It's probably a 4 to 5 on the D.I.Y. scale of 1 - 10. The newer plumbing parts all have simple
connections, with rubberized washers that seal by hand-tightening in many cases. Other fasteners require only
minor tightening with a wrench. Leaks are less common with these parts. Final adjustments are vastly simplified as
well.
So give it a try. The tips that I provide in this article should keep you out of trouble.
Do note that this article applies to "standard" toilets, with a separate tank and bowl,
and standard flush and fill mechanisms.
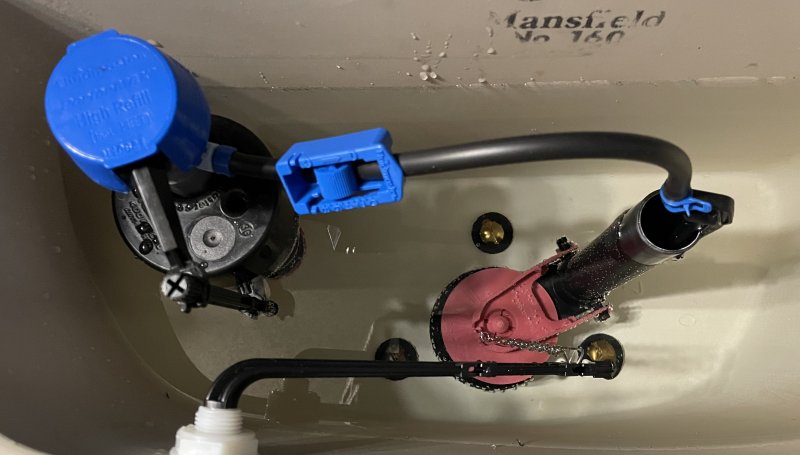
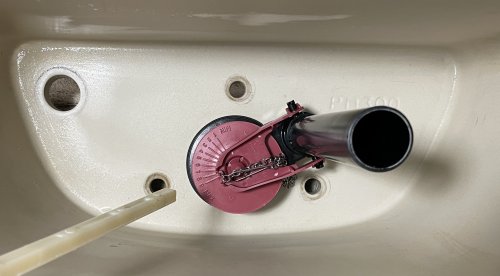
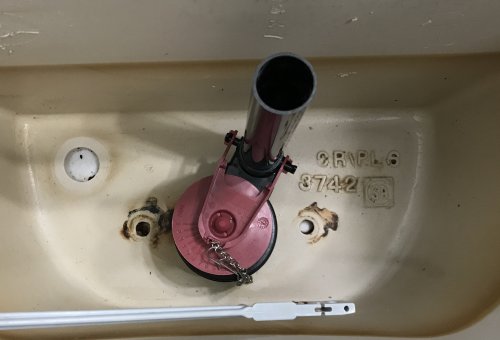
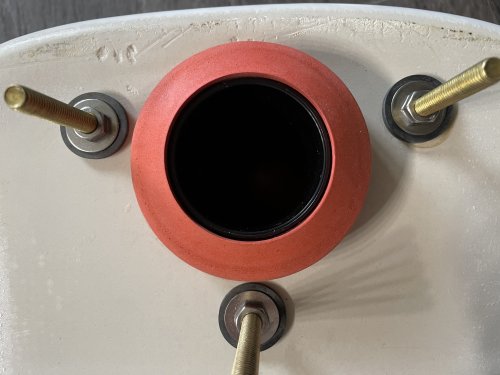
Here's a "Before" picture of a Crane toilet tank in need of an overhaul. Note
the corrosion on the float arm.
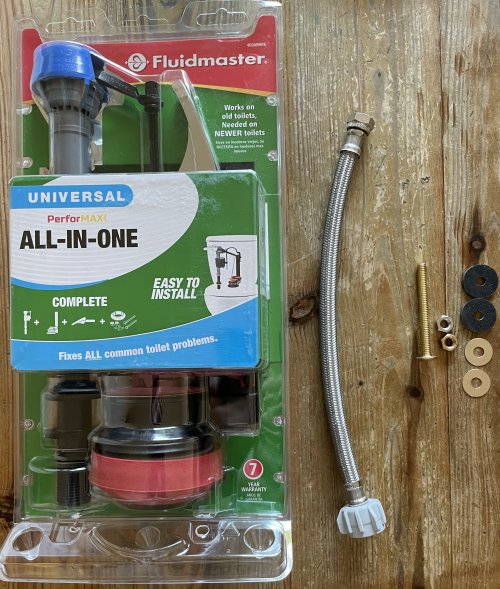
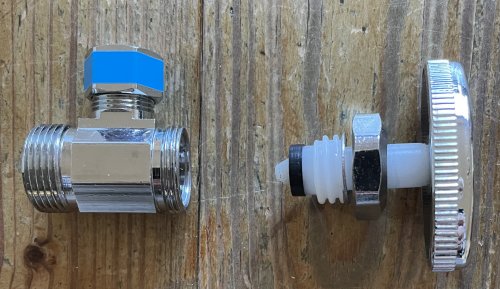
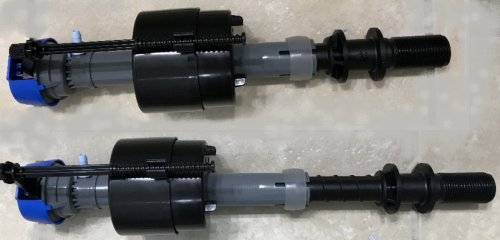
The assembly on the left is called the "Fill Valve". This is the old style valve - the same design
that has been used since the 60s - and it uses a plastic or metal float to shut the water flow off.
The item in the center is the "Flush Valve", whose red flapper is raised by a chain that attaches
to the flush handle. |
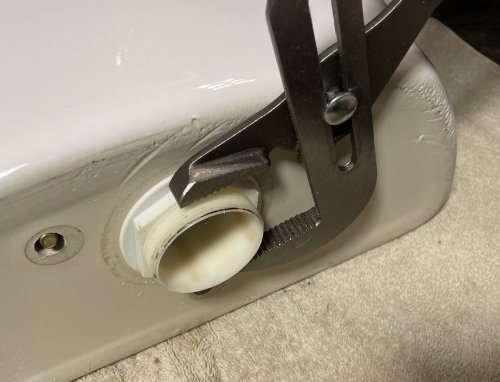
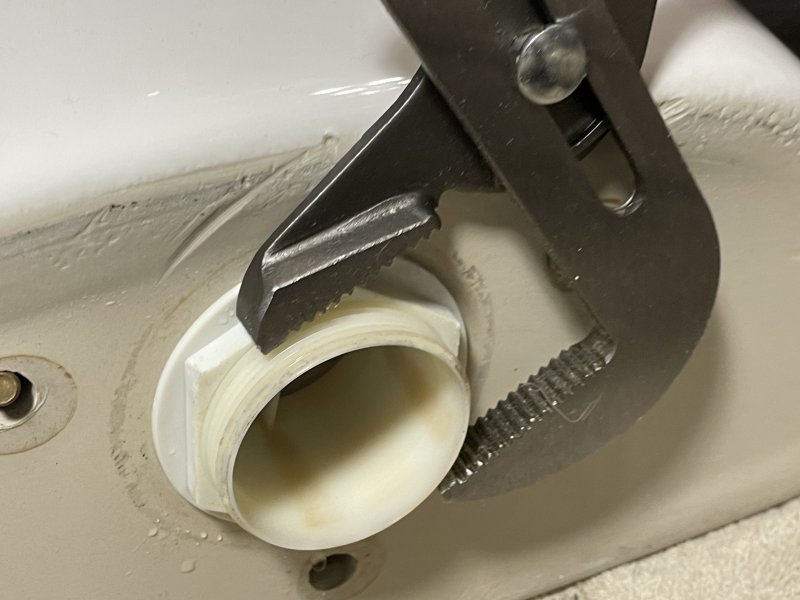
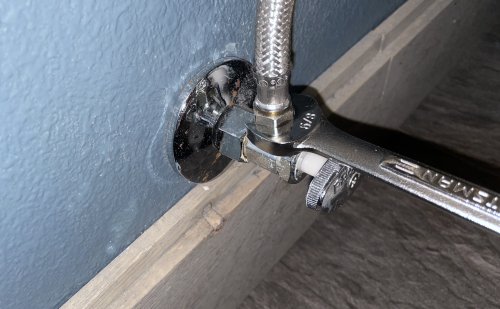
1 The first step is to shut off the water
valve at the wall.
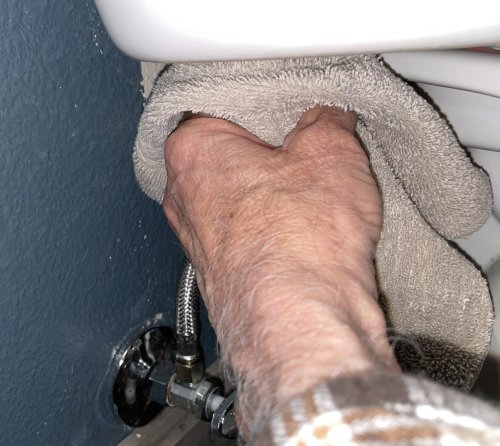
But before shutting it off, wipe the shaft with a cloth dampened with a bit of the cleaning spray.
Why? Because the shaft will be covered with dust. When the handle is turned, this shaft will slide past the
shaft seal (often called "packing material"). We don't want the dust/grit to damage this seal.
Also, before turning it off, make sure you know where the house main water shutoff valve
is located! The reason is discussed next. |
 |
 |
1a First of all, be careful in trying
to turn it too tight! The shutoff valves with the nylon shaft can break! (Applies to both toilet shutoffs
and water faucet shutoffs). This has happened twice to me, even in a relatively modern house -
built in 2007. If this happens, you will have to turn off the main water supply. You aren't totally screwed if
this happens. See steps 1c and 1d for a fix.
So, the shutoff valve may continue to leak when you shut it off. And turning it too tight risks
risks breakage. If it leaks too much, it will be necessary to shut off the main water supply. But also
see steps 1c and 1d.
|
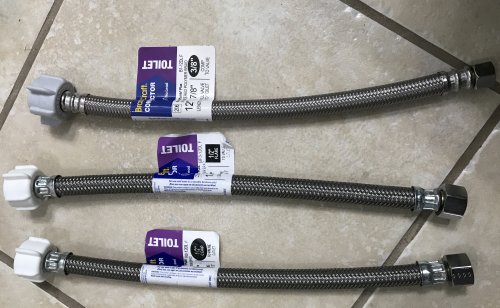
1b Here's another type of supply line.
You will be doing a lot of good to replace this type of line with the newer braided lines. Note that
this shutoff valve actually did what it was supposed to do: successfully shut off the water! (Yes. We live
in an imperfect world. . .) You can ignore the next two sections.
|
 |
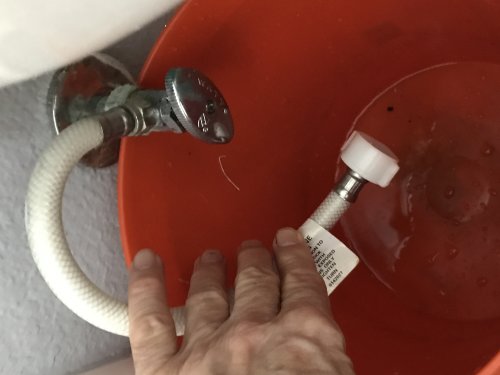 |
1c Do this sort of thing often?
Maybe you may want to rebuild your neighbor's pots, or those of your parents or in-laws. If so,
these items may be of interest.
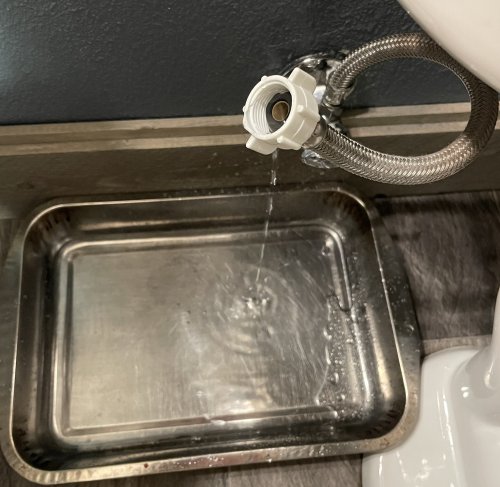
Does the water keep dripping, even though you have closed the water valve behind the toilet?
The two parts on the left of this picture will enable you to fix the toilet without shutting off the main
water supply. NOTE: This also applies to the valves that supply the kitchen or bathroom sinks, too.
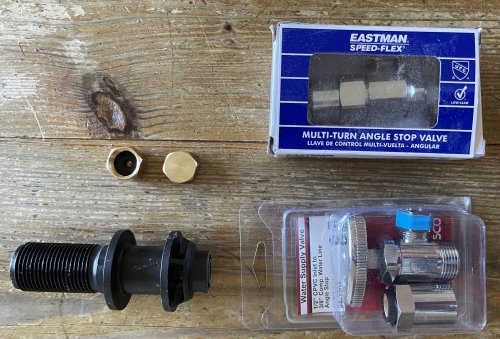
The upper left is a "3/8 comp cap". Remove the original water supply line and put the cap in its place.
The black part on the lower left: You can make another type of "emergency cap" by cutting off
the bottom of an old fill valve. I did this, and filled the internal cavity with glue and allowed it to
harden. You would just leave the original supply line in place and just screw this "cap" into the white
nut of the original supply line that you see in 1a and 1b above.
Did your valve shaft break on you? The two pieces on the right are replacement shutoff valves.
You can use the shaft/handle part to replace your broken shutoff valve without having to call
a plumber to replace the entire valve.
|
1d This is one of the replacement
parts shown on the right of the previous picture. Just loosen the nut that holds the shaft
and handle in place. You don't need the remaining part on the left. This is the part that would have
been connected to the water supply line. Thus you can buy any type of assembly, whose water supply
line can be any diameter or connection method, as long as it has the shaft/handle part that
matches yours.
Then shut off the main water supply, and remove the nut on the original shutoff valve
(which held the now broken shaft and handle.) Remove the broken part that's still inside - may have
to use a needle nose pliers - or even a flat blade screwdriver. Then screw the
replacement shaft/handle in the original shutoff valve. Now it's good as new (and you didn't have
to call a plumber to go into the wall to replace the entire valve assembly).
|
 |
 |
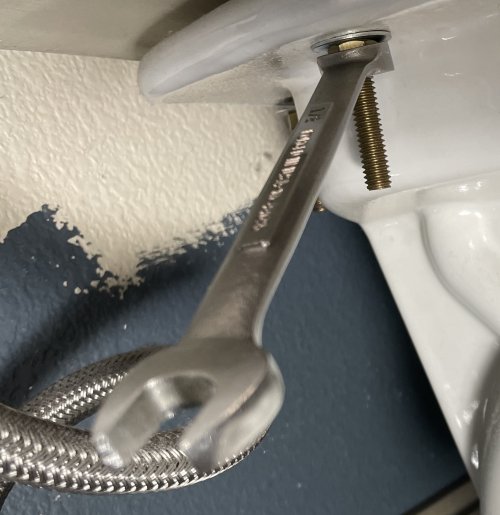
2 Step 2 is to remove the
toilet tank bolts. As I mentioned above, this is MUCH easier with a standard wrench (in this
case a 1/2 inch) than trying to use pliers or an adjustable wrench.
|
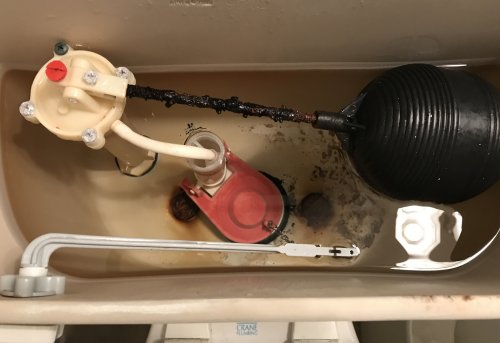
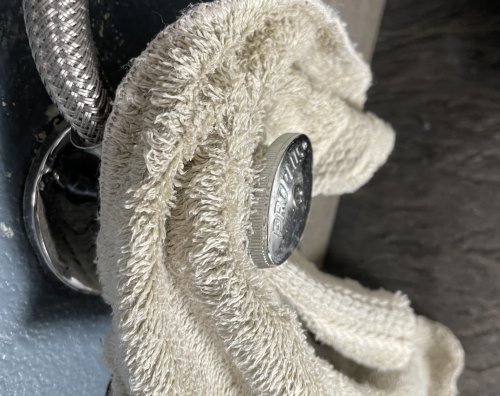
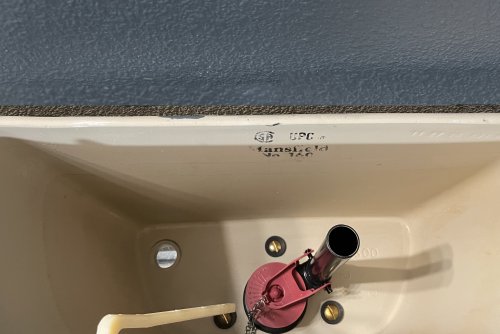
2a Now you can lift the tank
off and lay it on the old towel. This is a Mansfield tank, and it has 3 bolts.
|
 |
 |
2b This is a Crane tank,
and it has 2 bolts. Same for a Toto toilet.
|
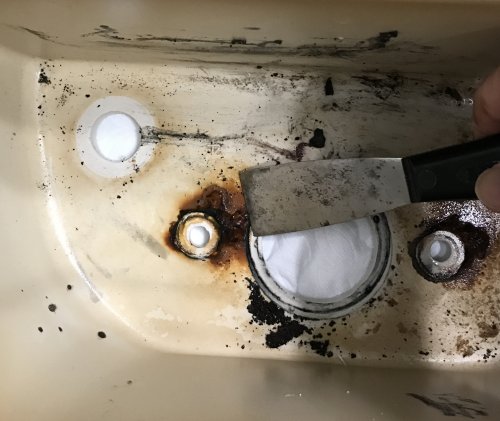
3 Now remove the old rubber
seal and remove the flush valve nut.
|
 |
 |
4 Clean the old tank. This one actually
had rust from the original bolts. This is where a scraper will be handy. Some fine sandpaper also helps.
The black stains from the deteriorated rubber washers actually wash off quite easily. Just about any
countertop cleaner or even glass cleaners will work fine.
|
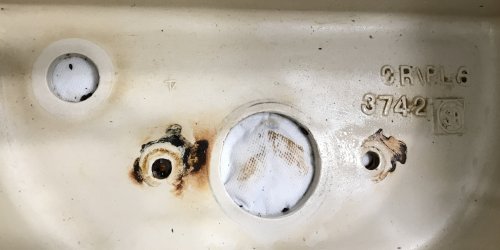
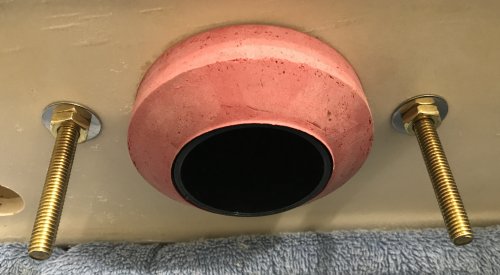
4a Here's the Crane tank all cleaned
up. The stains around the bolt holes are OK, as long as the immediate area around the bolt holes is
free of bumps.
|
 |
 |
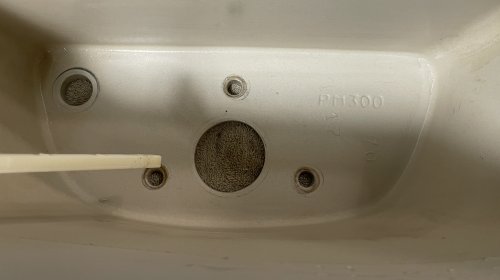
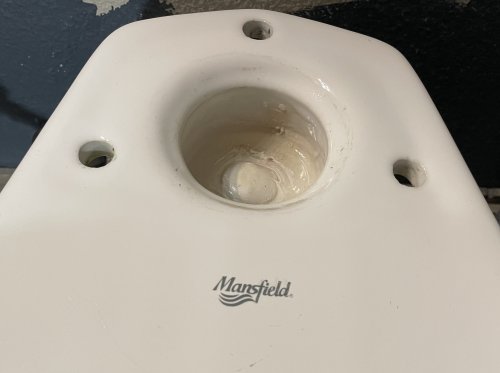
4b And here's the Mansfield
tank all cleaned up. It was much newer than the Crane tank. The white square shaft is part of the
original flush handle assembly.
|
5 Here's your chance to clean
the back side of the toilet bowl itself. Clean underneath as well.
|
 |
 |
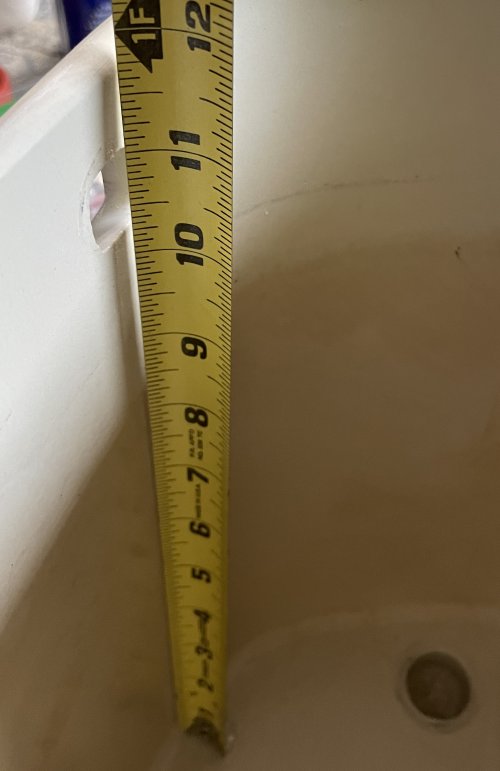
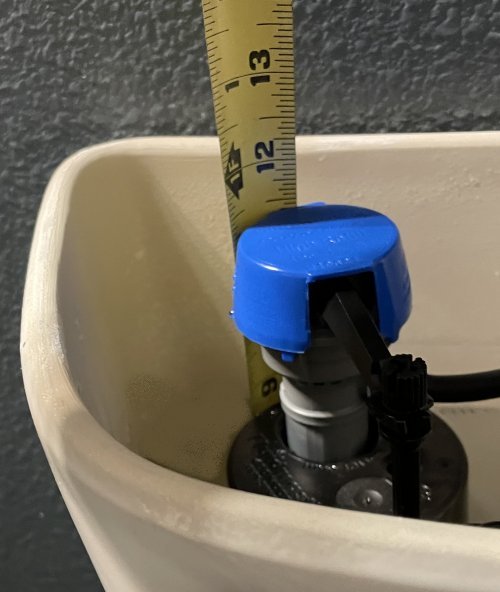
6 Now we want to measure
the height of the flush valve. The latest instructions that come with the Fluidmaster kits are
MUCH clearer! No more "C/L", or "Critical Level" terminology! We simply want to make 3 simple
measurements:
First measure the distance from the bottom of the square flush handle opening
to the bottom of the tank. 10 inches in this case.
We want the top of the flush valve tube to be approximately 1 inch below this.
(next section).
And we want to have the top of the fill valve to be approximately 3 inches from
the top of the flush valve tube. (Sections 9 and 9a)
|
6a So measure from the bottom
of the flush valve's black gasket. I have marked the cutoff point. 9 inches in
this case.
|
 |
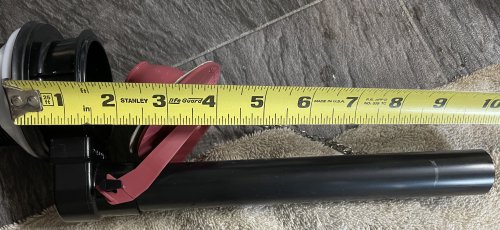 |
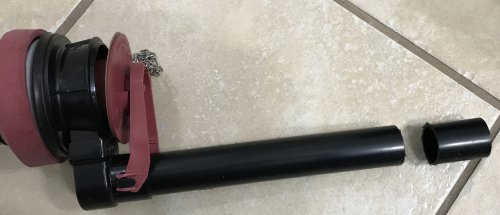
6c If you have the "preferred"
tubing cutter, cut off the excess tubing. Just spin the cutter around the tube, while tightening
the knob a little every few spins.
|
6d A hacksaw works fine, too.
Just smooth off the cut with some sandpaper.
|
 |
 |
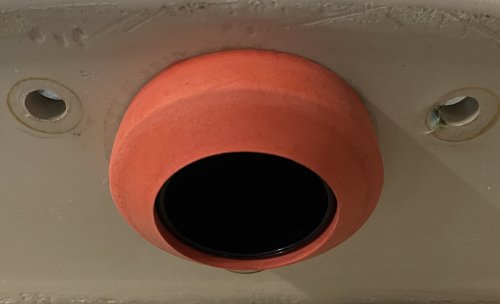
7 Remove the large white nut
from the flush valve, leaving the black rubber washer. Place the flush valve in the tank such
that it does not cover any of the bolt holes. We want the tube to be toward the back, so that the
flapper chain can easily reach the flush handle assembly.
TIP: The chain hook that will connect to the flush handle assembly is secured, for shipping
purposes. Unhook the chain at this point! It will be a lot easier than trying to do this when the
tank is full of water!.
|
7a Here is a good orientation
for tanks with two holes.
|
 |
 |
7b Lay the tank on its back and attach
the big white mounting nut. Hand tighten and then tighten only about 1/2 turn more with the big
wrench. Because of the improvement in plumbing seals and gaskets, it is no longer necessary to "put
the supertight" on plumbing parts.
|
7c Slide the big rubber tank-to-bowl
gasket in place.
|
 |
 |
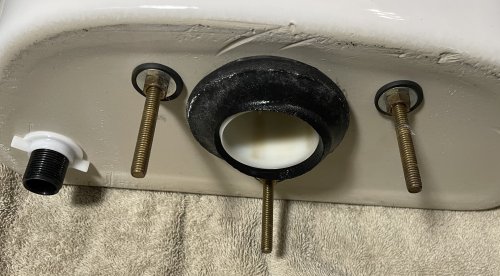
8 Attach and tighten the tank bolts.
Place a black rubber washer on the bolt and slide the bolt through the tank from the inside.
On the bottom side, put a rubber washer followed by a metal washer, and then the nut.
Just loosely hand tighten first. Move the bolt from side to side and feel it contact the ceramic
of the tank. Now try to move it to the center of the hole so that the bolt is not in contact with the ceramic. This
will help reduce the chance of cracking the tank and will help isolate the tank acoustically from the bowl, for less
water noise. Holding the bolt still, bring the nut up and hand tighten. Then use the wrench to tighten it snugly - but
not so tight that the washer is significantly deformed on the inside of the tank.
This picture shows the three bolts and the tank-to-bowl gasket.
|
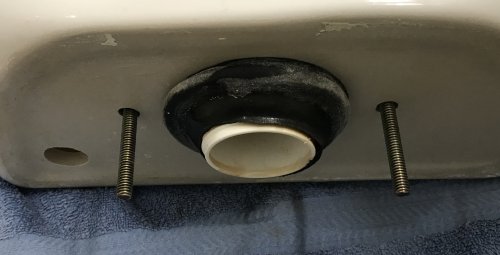
8a Here's the 2 bolt tank.
NOTE: As you see in this picture, I did not put a rubber washer under the tank. I did this rebuild
several years ago, and indeed the Fluidmaster instructions say to use just the metal washer under the tank.
But I have had this method result in tank leaks in the past. Thus in my opinion it is better to have a rubber
washer on both sides:
You have two chances to stop leakage.
You have an additional washer seal in case the inside of the tank happens to be rough around the
bolt holes due perhaps to remaining material from the original bolds and washers.
By using two washers and keeping the bolt away from the tank ceramic, you are keeping the tank
isolated from the bowl and reducing water noise while the toilet refills. This is called "De-coupling" the tank.
|
 |
 |
9 Carefully place the tank onto the bowl.
Put a washer and a nut on each bolt and loosely tighten. If you have extra rubber washers, you can use them
as well. In that case, put the rubber washers on first.
Look at the tank from the front to see if it looks level. You can use a level on top, if you have one. Also
make sure the tank isn't resting against the wall. There needs to be room for the tank lid edge to fit between
the tank and the wall. (See "9a" on the right.) Rock the tank a bit while pulling or pushing on it when
making adjustments (bolt nuts should be loose). Then hand tighten the nuts. For the three bolt tank,
tighten the front two first.
Now gently tighten the nuts with the wrench, until the tank is stable. Don't tighten very much. You will
do the final tightening when the tank is full of water (when it's about 20 - 30 pounds heavier!)
|
9a This shows the tank being at least
about 1/2 inch from the wall.
|
 |
 |
10 Adjusting the fill valve length.
The fill valve is shipped at the lowest height. Lengthen it by grasping the grey shaft (move the float
upward to expose more of the grey part). Grasping the black section, twist the black section to lengthen
the fill valve.
|
10a Place the fill valve in the tank
and measure. As noted above, you want the top of the fill valve to be approximately 3 inches above
the top of the flush valve. The top of the flush valve was 9 inches from the bottom of the tank. So
we add 3 inches for the top of the fill valve. That would be 12 inches, except that the top of the fill
valve is almost even with the top of the tank. So it's11 1/2 inches in this case.
Make sure the rubber washer is on the bottom of the fill valve!
Once the correct height is determined, you can secure the fill valve by attaching the
locknut on the fill valve, under the tank. Hand tighten only. (Make sure the refill line nozzle near the top
is sticking out to the right, toward the interior of the tank.) |
 |
 |
11 Put a bit of WD-40 or light
oil on the threads of the shutoff valve sticking out from the wall. This makes it much easier to
tighten up the braided line nut without getting it too tight. Connect the braided line and tighten
it until you feel the rubber seal beginning to compress. The newer seals do NOT need much
tightening.
|
11a Now connect the large white
nut of the braided line to the fill valve.
Hand tighten this nut. It is helpful to use a dry rag to help you tighten the nut.
Yes, it looks like a nut. NO!! You should not use a wrench to tighten it further. Hand tightening
with a rag is plenty.
|
 |
 |
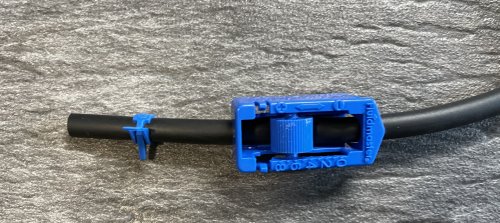
12 Before attaching the refill line,
move the roller first. (The refill line directs some of the water down the flush valve tube
to fill the toilet bowl itself.) If the line is not restricted, too much water will be wasted over-filling the toilet
bowl. The blue assembly clamps the refill line. But you want to move the roller BEFORE attaching
the refill line. Why? Beause it's hard to move the roller!
|
12a Before attaching the black
clip to the refill line, hold the end of the refill line near the top of the flush valve refill tube. You want
an arc, so that the top of the arc is a bit higher than the blue top of the fill valve, but not so much
that the whole refill line is up against the tank lid. Doesn't matter if it touches the lid a bit. Cut off the
excess; it's better to error in having the line too long - not too short!
Push the clip into the refill line and attach it to the flush valve tube. Yes, the clip is "Wierd"!
Push it over the edge of the tube, with the metal part on the outside.
|
 |
 |