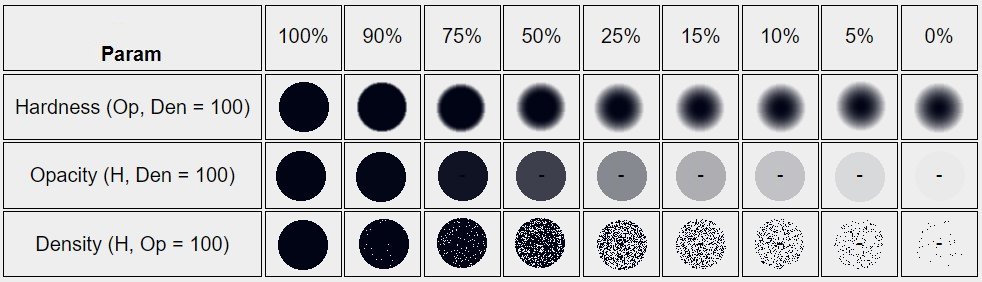
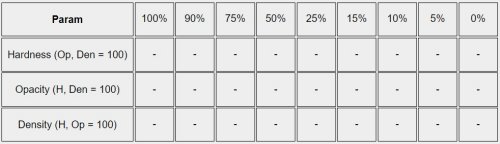
Here are viewable samples of the Paint Shop Pro brush and airbrush settings. It's MUCH easier to tell what each parameter does by looking at a sample! It's almost impossible to describe the difference between "Hardness", "Opacity", and "Density" with words.
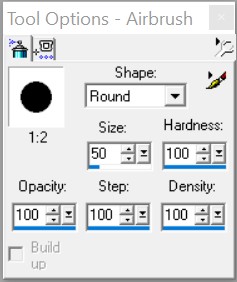
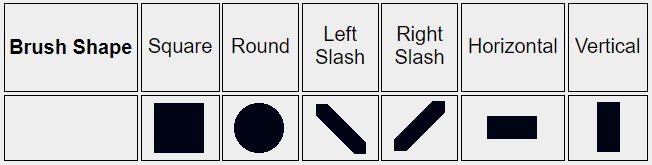
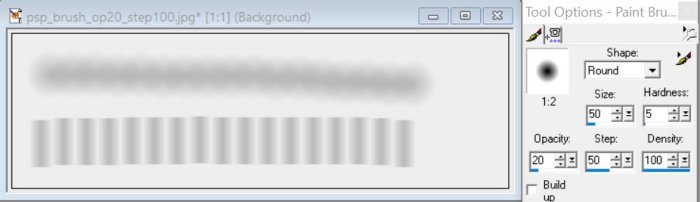
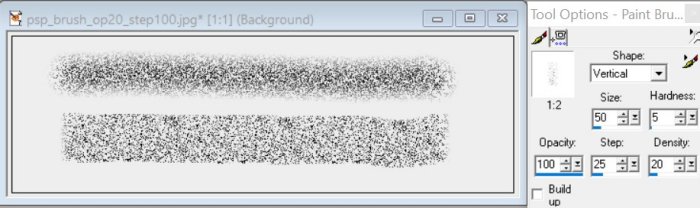
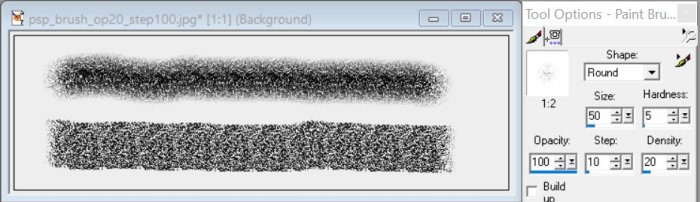
The dialog box looks like this. Settings are: Shape (Round, Square, Left Slash, Right Slash, Horizontal, Vertical) Size Hardness (Defines how sharp or diffuse the edge each instance of the brush mark is. "Instance" means one click of the mouse.) Opacity (How dark or light each instance is. It's almost identical to changing a "Brightness" setting.) Step (How many instances are placed when you drag the brush - higher numbers are fewer instances) Density (How many pixels are placed with each instances. The instance ranges from completely filled to just a few dots.) The icon on the upper left next to the "spray can" allows you to select "Use precise cursors" and "Show brush outlines". "Show brush outlines" displays an outline of the brush in the size you have selected. The "tool" icon on the upper right simply allows you to change to another tool (same as the menu on the left side of the Paint Shop Pro window). |
 |
 |
 |
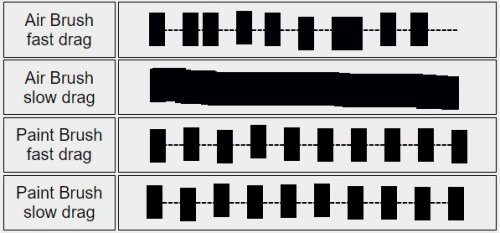
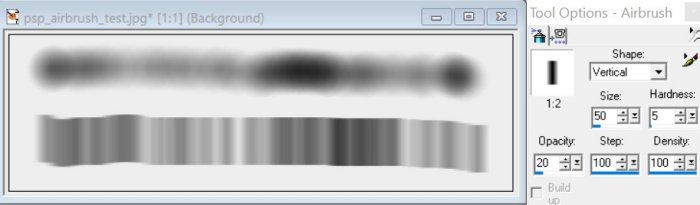
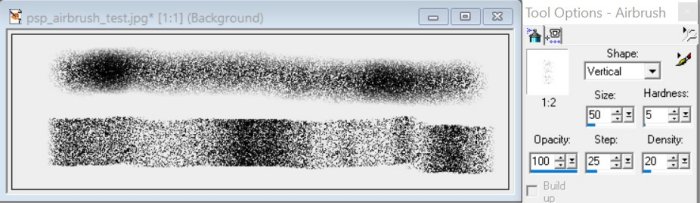
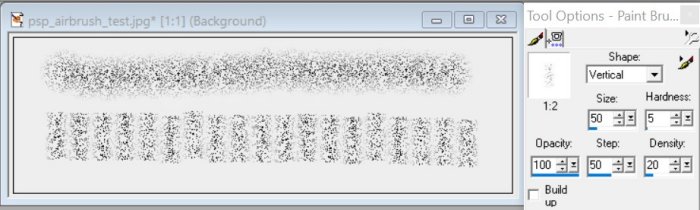
These two sets of images show the effect of different "Step" settings. The Air Brush will fill in between the Step size if dragged slowly. But the Paint Brush will deposit an "instance" only after the Step size has been reached. For example, if you have the Step set to 100, whether you drag the Paint Brush fast or slow, it will wait until you have dragged the brush 100 pixels before it will deposit another "instance". Thus, the image on the LEFT was created by dragging the Air brush rapidly. |
|
 |
 |
So how did I do this? (In case you're curious) I created tables using HTML for the various categories - Brush Type, Parameters, and Step. In the middle of each square is a dash, to be used to indicate where to click with the mouse. Then I did a screenshot of each table and then opened the resulting "JPEG" in
Paint Shop Pro and used the airbrush with various parameters. I clicked once on each dash with
the indicated parameters. Then I did a screenshot of the results. |
 |
|
|
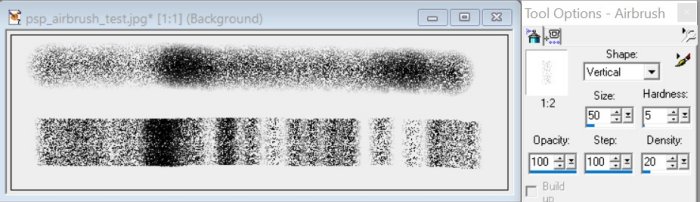
For this set of 4 AIRBRUSH images: The first sample is Step = 100. |
 |
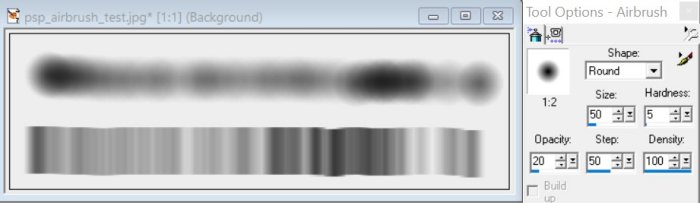
Step = 50 |
 |
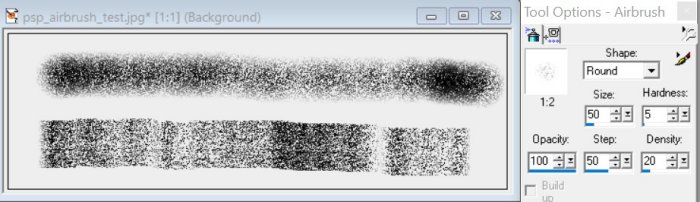
Step = 25 |
 |
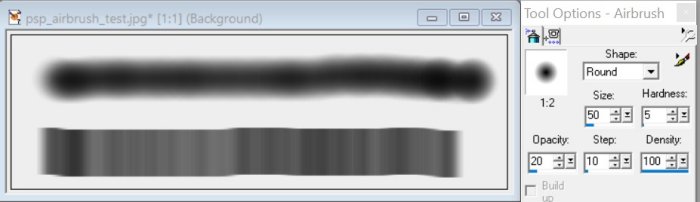
Step = 10 |
 |
For this set of 4 AIRBRUSH images: The first sample is Step = 100. |
 |
Step = 50 |
 |
Step = 25 |
 |
Step = 10 |
 |
|
|
For this set of 4 BRUSH images: The first sample is Step = 100. |
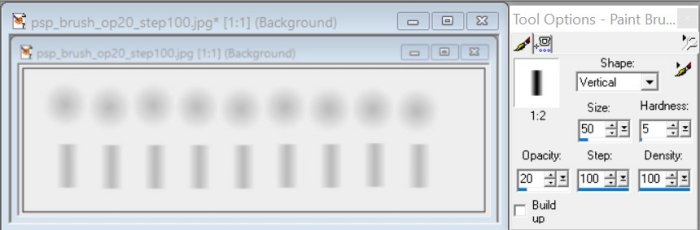 |
Step = 50 |
 |
Step = 25 |
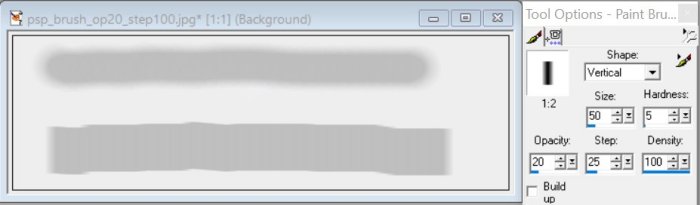 |
Step = 10 |
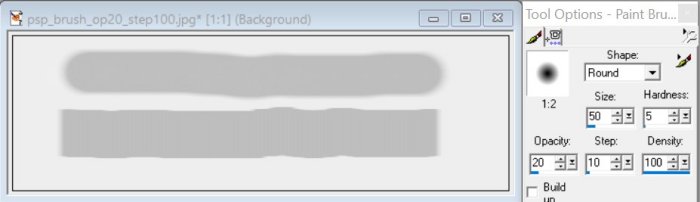 |
For this set of 4 BRUSH images: The first sample is Step = 50 (100 omitted). |
 |
Step = 25 |
 |
Step = 10 |
 |
Step = 25, with extra strokes |
 |
Copyright © 2020 J.A.