Are you tired of the standard issue "Composite 4 Panel Door" that comes with
virtually every house on the planet (except for those lucky ones who got the "Composite 6 panel" doors!),
and it comes only in Banal Bland Builder White. Period.
So, how can you fix this?
You can replace the doors with wood "slab" doors (meaning just the door). But then you would have to drill the hole for the knob locksets, and you would have to "mortise" for the hinges. This requires a router and considerable skill, and you have to exactly match the existing hinge position - or the door will bind. Cost: $400 - $600 per door.
You can replace the doors with "pre-hung" wood doors. This means the door is supplied with matching door jambs. It's a lot easier to mount this assembly, but you have to remove the existing door moulding on both sides, and this moulding is usually caulked in place and is difficult to remove. Cost: $700 - $1000 per door, much more if you have it done.
OR:
You can stain the doors! Cost: $10 per door, $40-$50 if you replace the hinges and locksets
too.
And you're probably thinking "Stain?? But thay ain't wood!" No they're not,
and indeed staining won't work if the doors are completely smooth. (But of course you can paint the doors
instead, and at least eliminate the dreaded Builder white.) However most of these kind of
doors have a "woodgrain" effect, and it's sufficiently deep so that the doors will look really good when
stained. No, really. Take a look at the three finished doors below, compared to the standard
Builder White door.
So take a look at the procedure described below and see if you might want to try it.
Final cost for my 8 doors: Less than $400, including new Kwikset Matte Black locksets and black hinges.
It would have been $7,600 for pre-hung Knotty Alder doors.
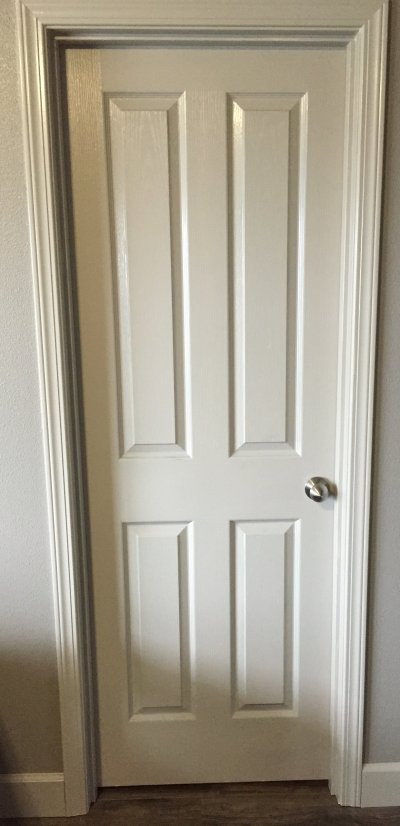
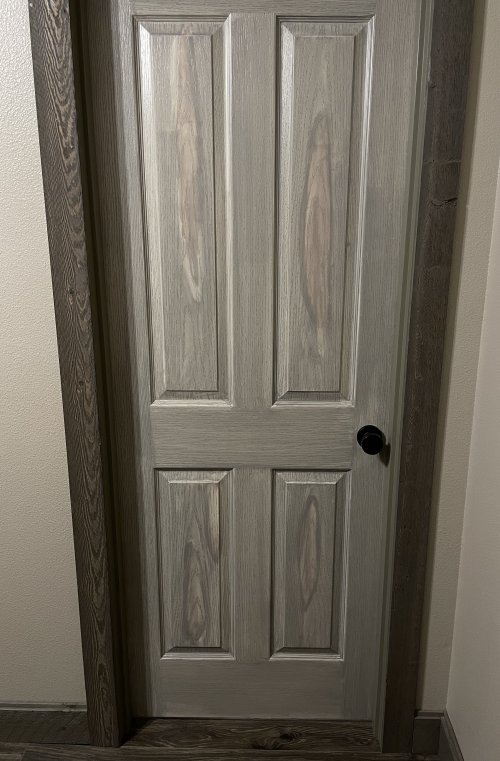
Builder White vs Custom |
|
Here's the standard issue Builder White 4 panel composite door. It's surrounded by the stock "casing" door moulding, also in Boring Bland Builder White. |
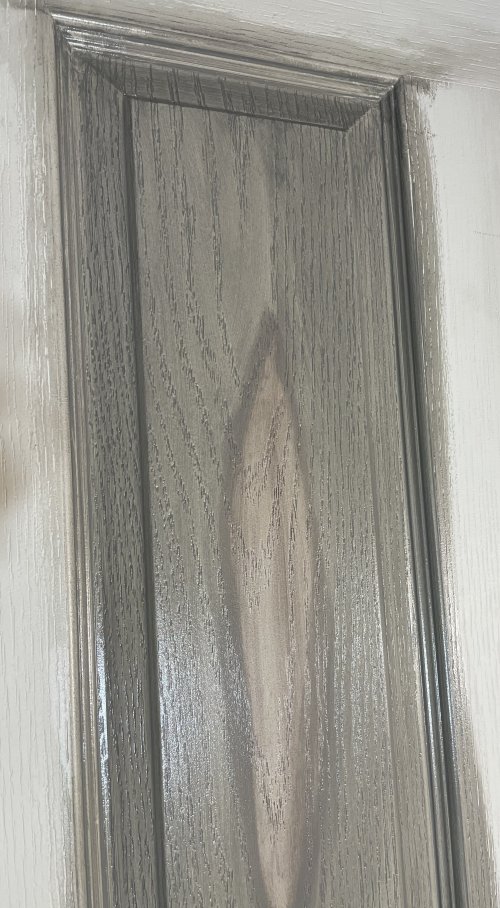
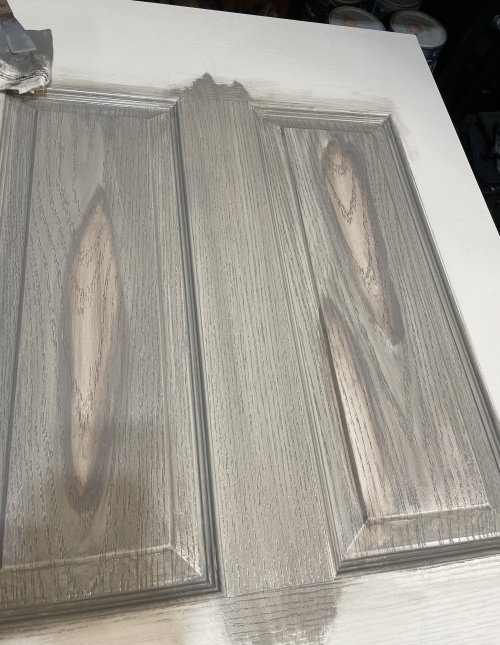
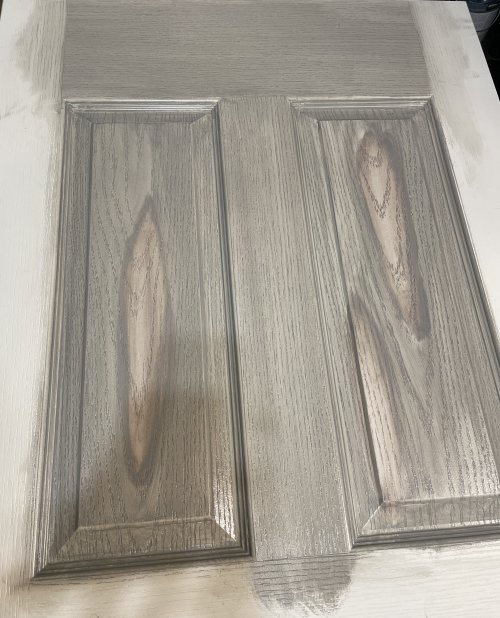
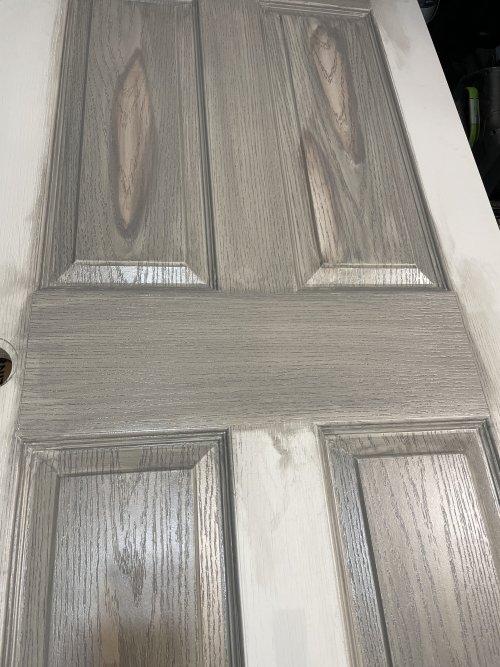
And here is one with about $5 worth of stain! Note that, although these
"4-panel" doors were plastic composite, they actually had a "wood grain" effect, which
the grey stain brought out nicely. The inner "panels" were manufactured with a surprisingly
realistic simulation of real wood. Even with just the grey stain they would have looked pretty
good. But, after a little experimentation, I found that adding some reddish colored accents provided
an authentic-looking wood appearance. |
 |
 |
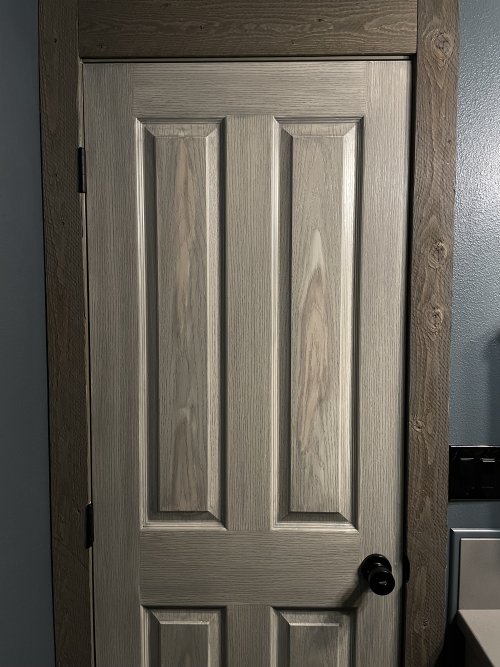
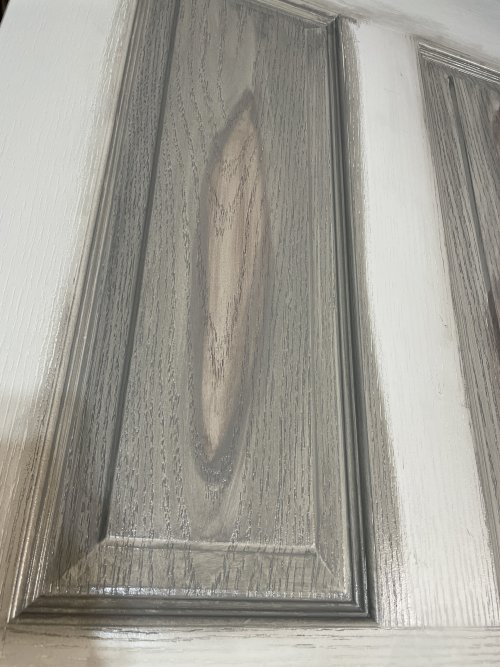
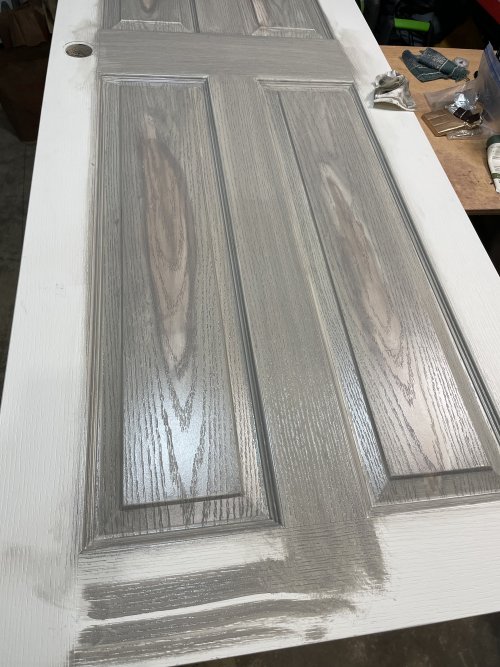
In case I haven't sold you on the idea yet, here's the top part of another of these renewed doors - in this case the bathroom door. |
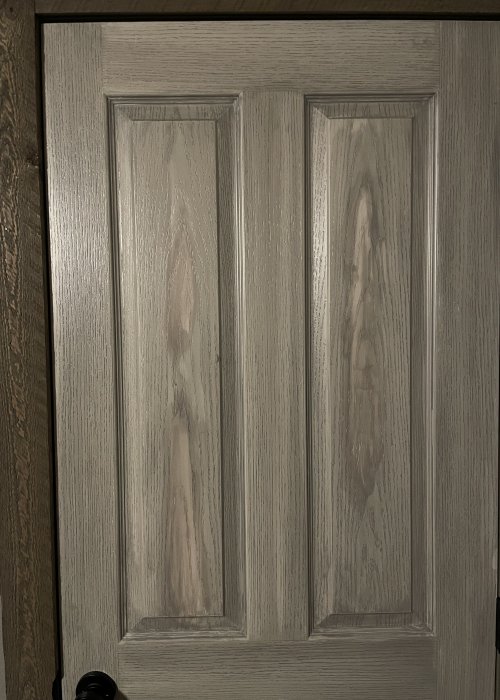
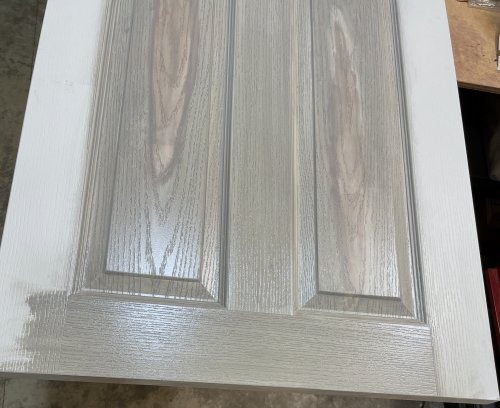
And a zoomed in shot of yet another door. Notice that the accented pattern is different with each one of these doors. This makes each of them look unique, as if they were real wood. |
 |
 |
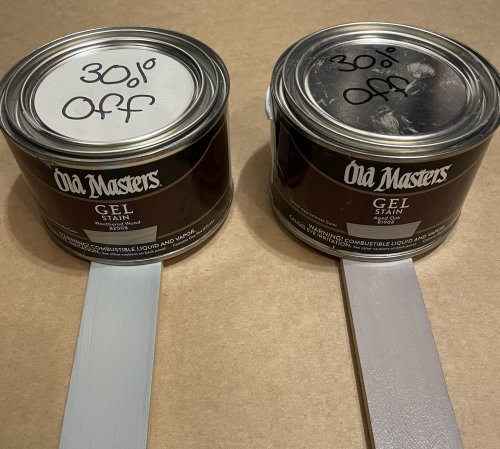
Items Needed For This Project
To stain these plastic veneered doors, a Gel
type stain is much easier to use than thin liquid type stains. I used "Old Masters" oil-based stain.
It dries to a tough finish that already has some gloss, and doesn't seem to require an additional coat of
any type of polyurethane or similar compound. |
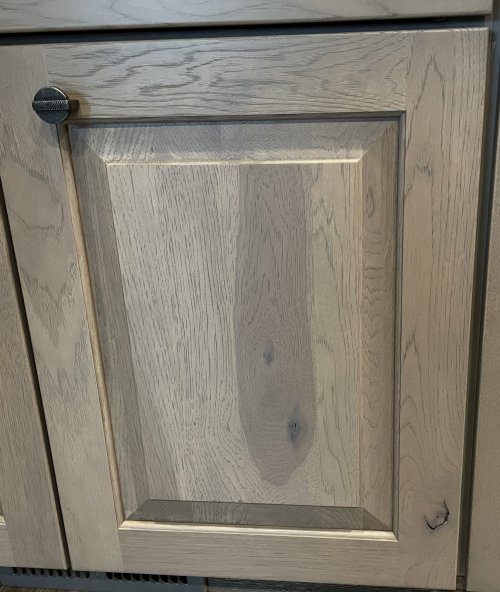
To compare the results to real wood,
here is one of our kitchen cabinet doors, in "Rustic Hickory". Note the prominent U-shaped irregularity -
apparently a branch of the hickory tree. This is the sort of wood-look effect that I was seeking with the two
stains. |
 |
 |
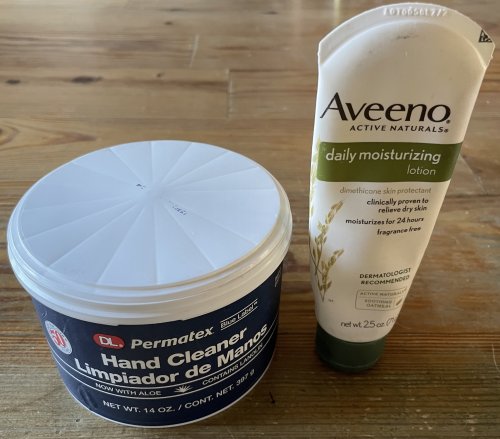
To clean and protect your hands
while doing this sort of thing, here are two items: |
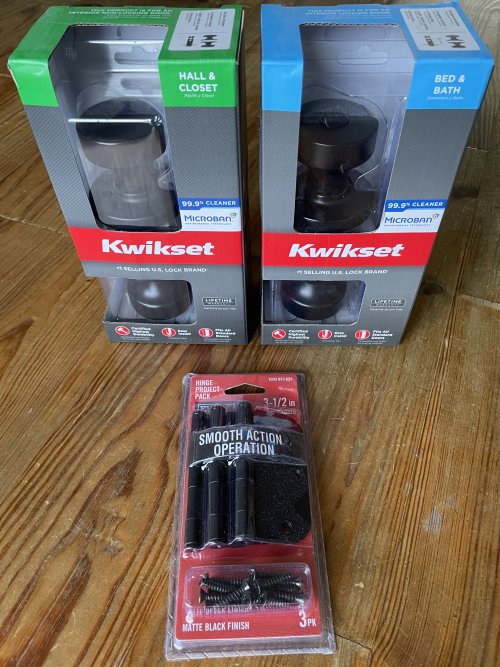
I used Matte Black door knobs
and hinges. Kwikset has recently introduced their "Pismo" line of knobs. They have a unique shape that
you might consider in place of the traditional round knobs or the "handle" style of hardware. They are
also available in nickel, chrome, or bronze. |
 |
 |
Ordering Information. The stain is hard to find in stores! Here's some convenient links. As always, purchasing these items from Amazon helps support your Wracklineblog! |
||
Here's a link for the "Weathered Wood" stain: |
And one for the "Aged Oak" ("wood accents") stain: |
And here is one brand of the hand cleaner: |
 |
 |
 |
The Staining Procedure
But first a bit of "Door Terminology":
The vertical sections on the left and right side of a door are "Stiles"
The vertical sections in the center of a door are "Mullions"
The horizontal sections on the top and bottom, and the horizontal section that separates the sets of panels, are "Rails"
And the decorative sections are "Panels".
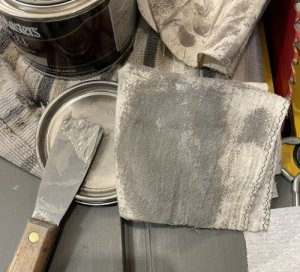
Staining can be tricky. Following the sequence shown here will help you avoid uneven
results. For example, if you apply stain on the upper part of one of the long vertical Stiles and then maybe
stop to stain the panels on the upper part, and then finish staining the lower part of the Stile, the
stain on the upper part will have dried a bit. This leaves a pronounced irregular area at the junction of the
upper and lower part. You can't blend the two sections because the stain is partially dry.
Been there and done that (on my first attempt)!
As a matter of fact, when you start this project, stain the back side of a door first - especially
if it is a door normally left open. This way, only the wall will see your Learning Curve Sins.
Should you have some initial failures, and find yourself discouraged, the few paragraphs at the end of this article might help. . .
 |
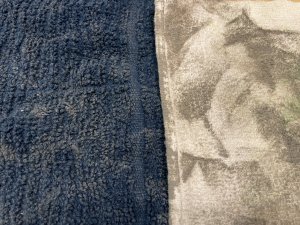
Staining Tip 1: Staining Tip 2: |
 |
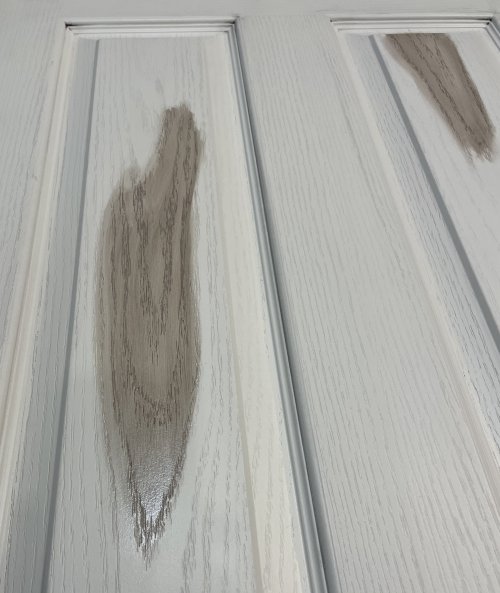
1 The Accents
|
2 Here's another example of applying
the accents. Note that I have even applied the accent down into the sloped area of the panel, giving
the appearance that the irregularity extended down into that area! |
 |
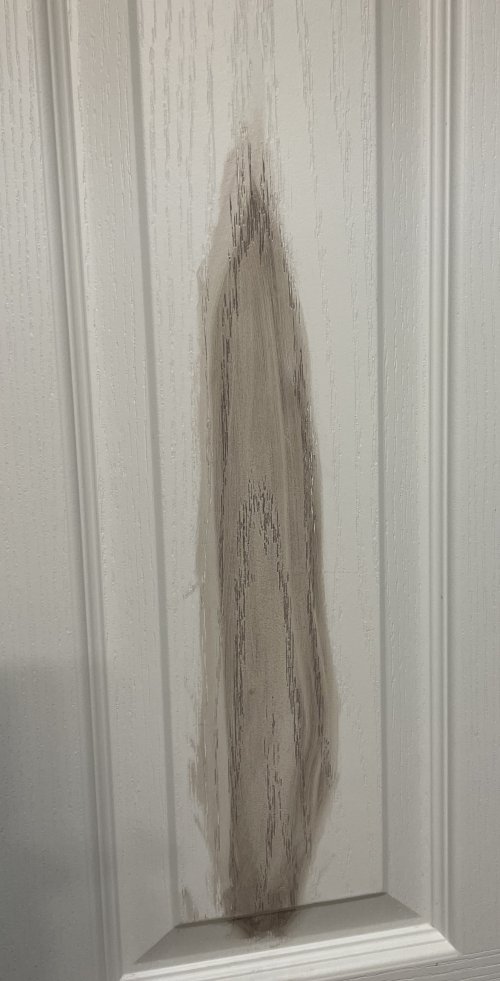 |
3 The Overall
Stain |
4 Continue into the raised
section. Here I have applied stain around one side of an accent. If you get some inside the accent,
just gently wipe it off with a dry rag. However an interesting effect is to gently wipe near one or both
of the ends of the accent, leaving a lightened area. (See the finished door pictures above.) |
 |
 |
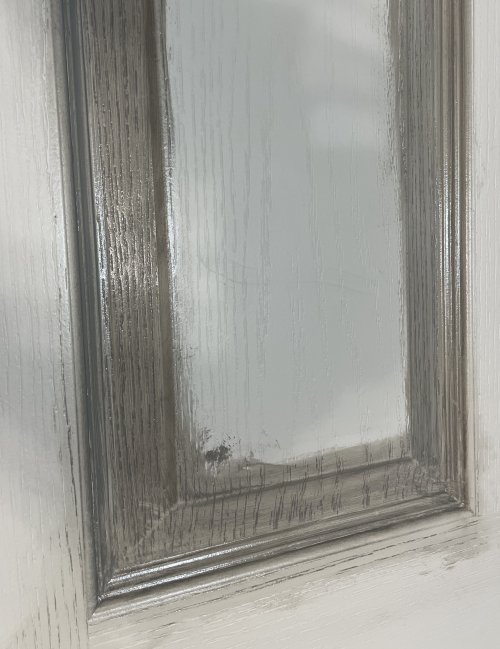
5 Finish the panel. Check
all areas for excess stain or unevenly applied stain, and wipe gently with your staining rag.
The staining rag should be just "damp" with stain at this time. |
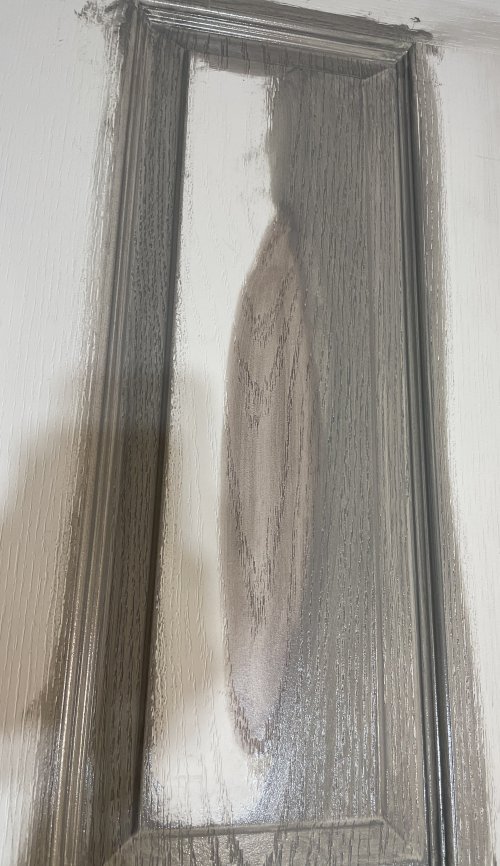
6 Here's two panels stained. Their outer edges have been wiped clean of most of the excess stain. But note that the edges next to the partial stile do not need to be wiped, since you are about to stain the partial stile - (the "Mullion"). |
 |
 |
7 Here I have wiped stain onto the short vertical stile - the Mullion. No need to wipe off the excess stain at each end because the top and middle rails are next. |
8 The bottom rail has been stained. Note that the left and right edge excess stain has been wiped dry. |
 |
 |
9 The middle rail has been completed, and the excess on the edges has been wiped dry. |
10 I have stained the longer
Mullion. Its edge excess can be left because I am about to stain the top rail. |
 |
 |
11 The top rail completed.
Notice that I have wiped off the excess on the right side. I am about to stain the left stile (which
runs from the top to the bottom of the door). |
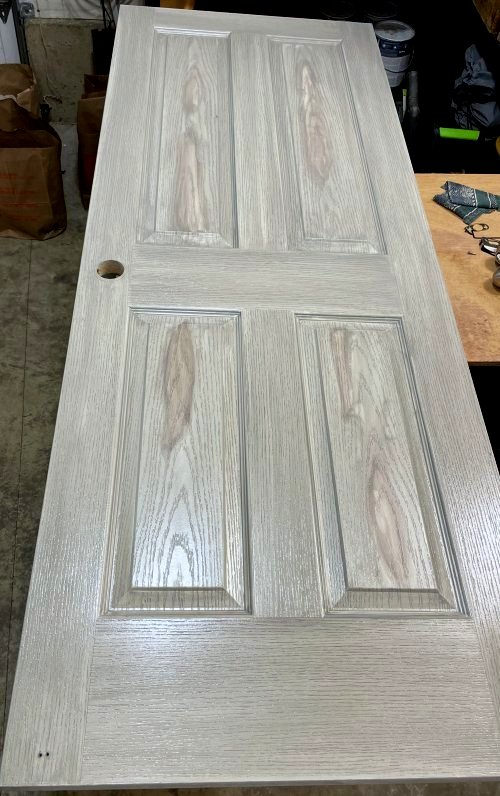
12 And here's the completed
door! You can apply stain to the edges where the door latch and the hinges fit, if you want to. |
 |
 |
Mounting Your "Non-Builder-Grade" Door
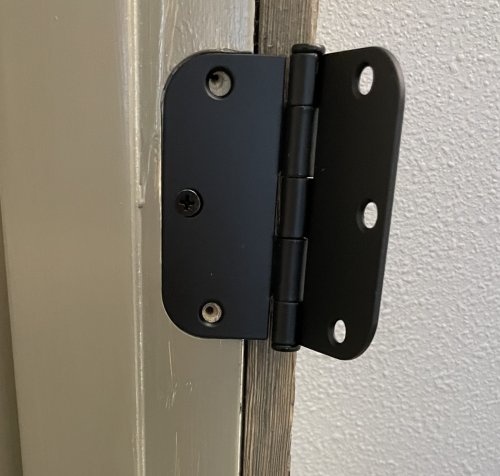
13 Mount the hinges to the door
jamb first. This seems to make it easier to line up the door with the hinges. Make sure the hinge pin is on top!
Install the center screw first, snug it up, and then make sure the edge of the hinge is inside the mortised wood
cut-out. Then snug up the top and bottom screws and make sure the top and bottom edges are fitting
properly in the cut-out. Then tighten all three screws in sequence. "In sequence" is a term that we former
auto mechanics use to mean tightening each screw a little bit at a time until all are fully tightened - maybe
2 iterations. This keeps things from getting bent. |
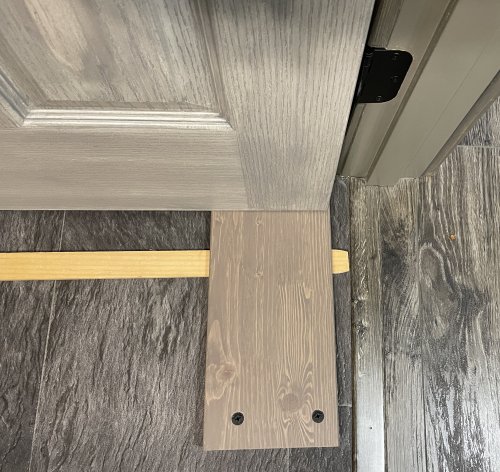
14 Place a piece of wood under the
door and then put one or more paint sticks (or small wood pieces) underneath, until the door lines up with
the pre-mounted hinges. Place a center screw in one of the hinges. |
 |
 |
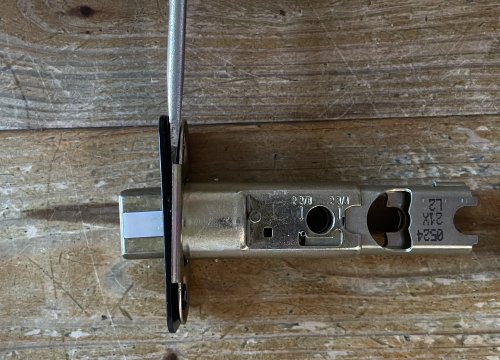
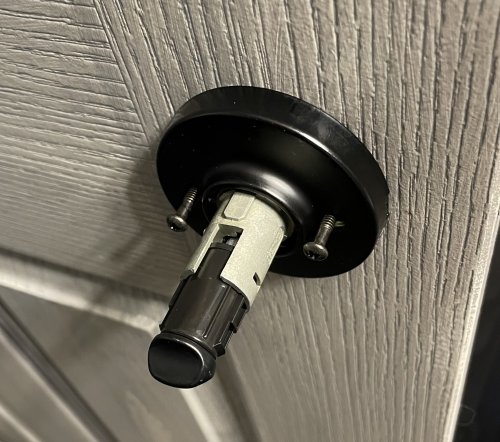
15 The door latch has a rectangular
plate which fits most doors. But some doors have a round collar around the door latch. |
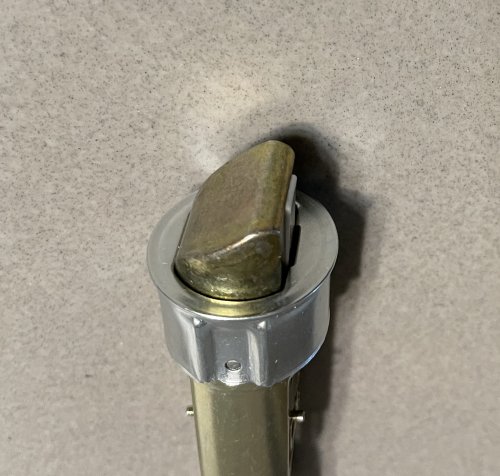
16 Push the collar over the latch, onto the door latch mechanism. Make sure the collar is oriented right! If put on the wrong way, the latch only extends partially. |
 |
 |
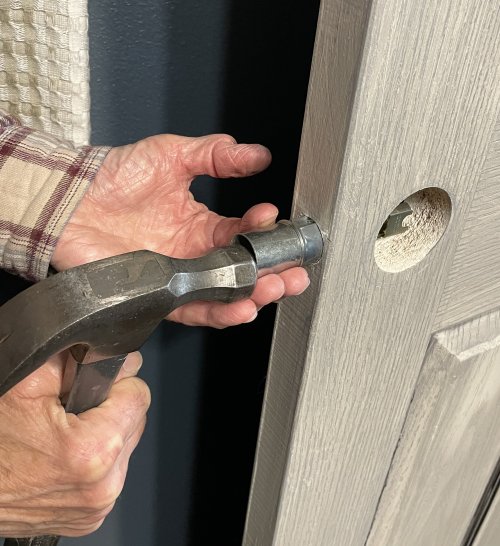
17 Drive the collar into the door, making sure the latch is turned the right way. I just happened to have a metal spacer that was the same diameter as the collar. You can also just place a piece of scrap wood over the collar (collapsing the latch) and drive the assembly into the door that way. |
18 Many locksets have the
doorknob non-removable. This makes installing the two screws awkward! You're trying to turn the screw
at an angle rather than straight. This particular lockset allows the knob to be removed, using the supplied
allen wrench. This allows for much easier tightening of the mounting screws. When you have the screws
snugged up, make sure the mechanism works freely by turning the remaining knob both ways as you
fully tighten the screws. This is an excellent example of tightening "in sequence" to keep things from
binding up. |
 |
 |
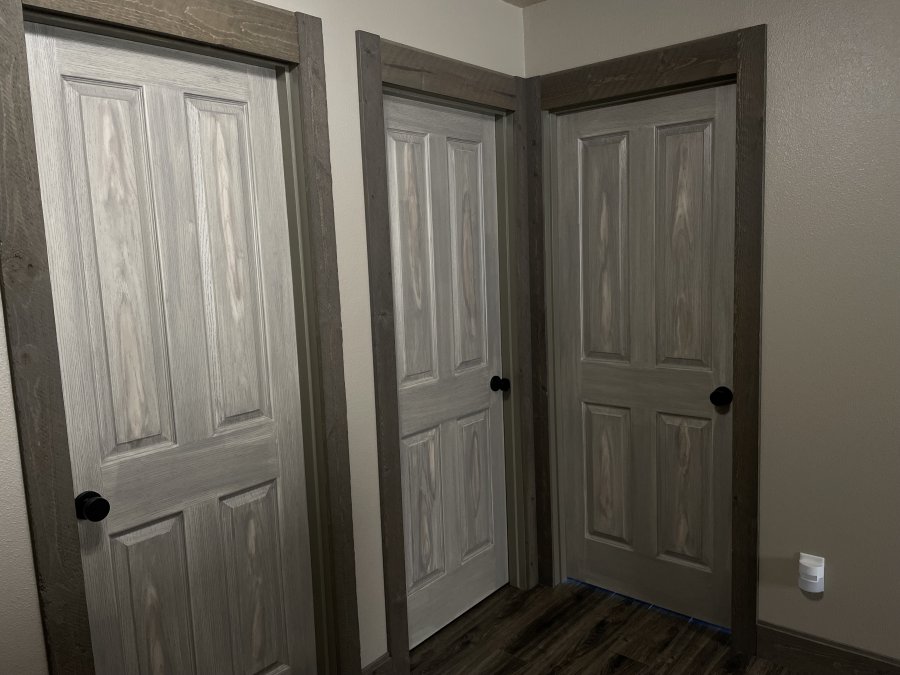
Here's three finished doors in the upstairs hallway/landing, surrounded by the delightful Ghostwood trim. Sure beats Boring Bland Builder White! |
 |
Going a bit deeper. . .
As with any project, especially one that you haven't done before, you might get discouraged. You can't seem to get
the stain smooth, especially if you tried an old towel as the stain rag. (See "Staining Tip #2" above, just before Section
1). Or maybe you let the stain dry a bit on part of a stile and you can smooth out the junction
when you finish the stile. (See the paragraph starting "Staining can be tricky" in the introduction of "The Staining Procedure
above.)
But soon you will see how beautiful one of your finished doors looks, even if it didn't look so in some of the intermediate
steps.
When you are satisfied with your efforts, you can then proceed with your project with greater confidence. Things
will flow more smoothly and you will find yourself in the Zone. The work flows out of your hands instead of your brain.
I find that physical projects like this are a "Life Analogue". You observe them and learn things that apply to your life in
general. You may go through a period of apparent failure and find yourself dissatisfied. But after a bit of success, your outlook
changes. One of your stock investments finally works, for example, and you find that you can create prosperity.
Or, you finally succeeded in a complex project at work, and you find you go to work with enthusiasm and a more upright stance.
Who knows. After enough of this sort of thing, you just might finally accept yourself.
Just the way you are.
What a concept. . .
Copyright © 2022 J.A.