On this page we show how you can be your own body work specialist, so that
you can keep yourself largely free from muscle pain by performing a simple daily self-massage.
Initially you should be able to eliminate existing acute or dormant "trigger points" by using this
technique (and maybe a visit or two to a professional bodywork person). This way, you can achieve
a state where your muscles become limber and in a non-contracted condition.
Then, as an on-going basis, you massage out any new trigger points as they may come up, and also
warm up your muscles each morning (similiar to stretching). This keeps your muscles supple.
Translation: I want to show you how to keep doing the things you did when you were young,
with no limitations!
Something to consider before you embark on this muscle work:
Let's say you really "throw out/pull/overstretch" some muscle(s) such as your lower back (perhaps by picking
up that 50 pound bag of pea gravel, or your 4-year old grandkid who no longer is light as he/she was
as a baby)! If it really hurts to touch or massage the affected region, maybe it would be well to have a session
with a body work pro. They can tell you if whether or not there was some partial tissue damage. If so,
it would be well to let the area heal for a while before trying to massage it.
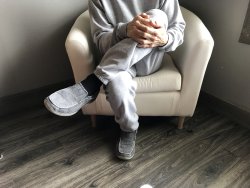
So, back to self-applied massage. This massage can be done while standing up, or while sitting.
It is best done in the morning, usually before breakfast. Why is that? Because you will start your day with your muscles all
warmed up and partially stretched. This alone will make you less likely to "pull" a muscle during the day.
When you first start doing this, you will encounter some tender spots. (I'll point out the most likely areas
in the pictorials below.) These are usually trigger points, as discussed on the previous page ("Eliminate
Muscle Pain" - the "Back" button above). You can massage these out over the course of several
sessions, usually by applying a firm pressure, along with a short stroking motion. When you are just starting out,
it will be well to work the area only briefly. Then move on to other areas. After a few days, or maybe even a week
or two for some spots, you will find that the tenderness will be gone.
You might be tempted to really press hard on these irritated areas, in an effort to "release" the
trigger points. I urge you to instead to start out with relatively light pressure and/or strokes. If you
feel a burning sensation or other irritation, then stop, since you might simply be "spreading inflammation
around"! The result will be that you are even more sore. Just revisit the area during the next few days.
Unsure about the location of any muscle discussed below, or how to massage it? Just consult your
Trigger Point Therapy Handbook On the previous page, a link to purchase this book is given under
"Tools of the Trade", about midway down on the page.
Oh, and one final note: if you have just massaged some tender or painful trigger points - or if you
have just received a professional "trigger point"/"deep tissue" massage - drink some water! The body
work pros would always give me bottled water after a session, pointing out that a good deal of toxins have
been generated, and they need to be flushed out. Further, they consistently said that it is NOT wise
to go out and take a long walk after a session of working trigger points.
On the other hand, if you have already over the period of a few weeks/months gotten your trigs under control, and are doing the daily - or at least bi-weekly - muscle work, then your self-applied massage can be a great way to warm up your muscles and prepare you for that walk, or applying those 40 lb sacks of mulch in the garden, or other household projects!
The Self-applied Massage
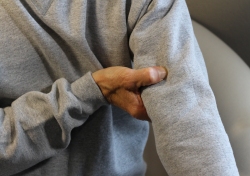 |
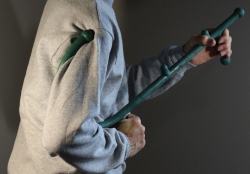
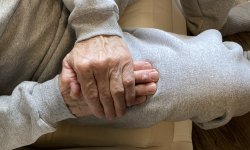
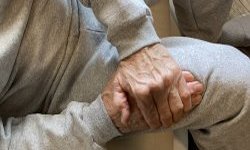
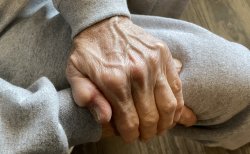
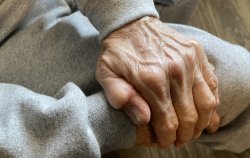
1 Start with the armsMuscle names: biceps, triceps, et al. Your hand and arm muscles are about to get a workout, since they'll be applying pressure to various points
through this procedure. So It's well to warm up these muscles beforehand. |
 |
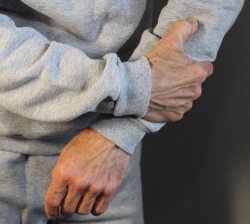 |
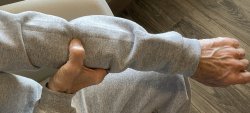
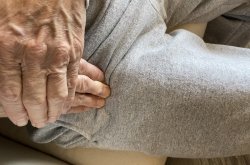
2 The forearms and handsMuscle names: Extensor carpi, extensor digitorum, flexor carpi, bradioradialis and many others (forearms). Opponens pollicis, adductor pollicis, et al (thumb area) Massage the muscles on the forearm (left) and then work the hand muscles around the thumb
(right). Rub all around the thumb and the palm area. It's also beneficial to massage the back side
of the hand between the thumb and first finger. Wrist joint pain is related to these muscles. Have some wrist pain? Concerned tha it might be "Carpel Tunnel Syndrome"? Please see Joint Pain Example #1 below, before the "Stretch" section. |
 |
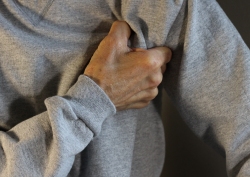 |
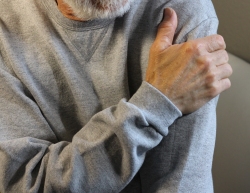
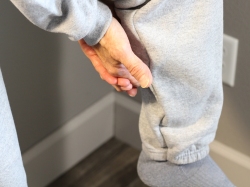
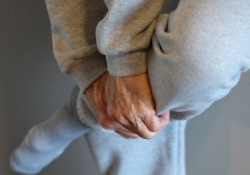
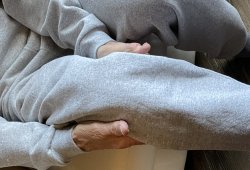
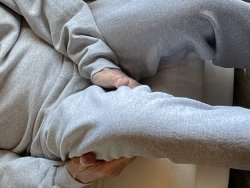
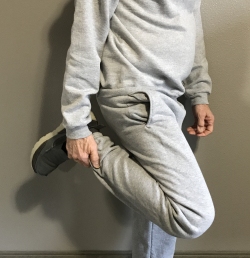
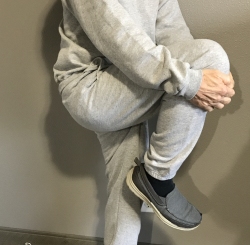
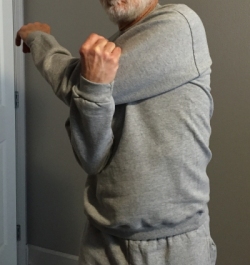
3 The front and back of the armpitMuscle names: pectoralis (front), subscapularis (back) NOTE: Likely tender areas! The whole point of the daily self-massage #1: Right side: Now reach under your arm and massage the muscle that's in the back of the armpit. This is the "subscapularis", and will also likely contain tender spots. It might be helpful to lean against the wall (or the chair back if seated) to help reach this muscle. That is, if you are doing the right side, lean your left shoulder against the wall in order to help push your left arm into a better position to grasp the muscle. |
 |
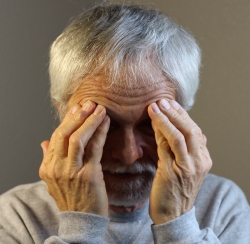 |
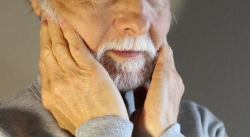
4 Now a little work on your face and jawMuscle names: Masseter (jaw) Left side: Place your fingers above the bridge of the nose and stroke outward. Your fingers should actually
be right on the top of your eye sockets. This actually has a soothing (and partially clearing) effect on your sinuses. The whole point of the daily self-massage #2: |
 |
 |
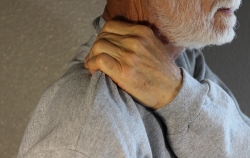
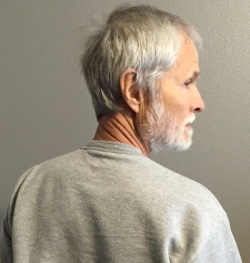
5 Next up is the neck musclesMuscle names: Sternocleidomastoid, levator scapulae, suboccipitals, splenius, semispinalis NOTE: Likely a tender area. |
 |
 |
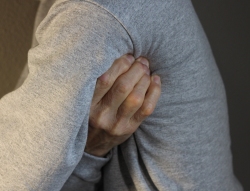
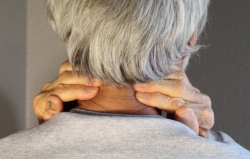
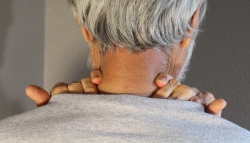
6 Some work on muscles near the neckMuscle names: Upper trapezius Now firmly pinch the muscles on top of the shoulders. To do this, fold your thumb into your palm and then pinch the muscles between your fingers and the folded thumb. Move up the side of the neck, pinching repeatedly until you reach your hairline. These areas, along with your neck itself, will likely be tender when you start this daily treatment, and for that matter any time you have been working at the computer for a while, or doing physical work, or exercises - that is, just about all the time! The whole point of the daily self-massage #3: |
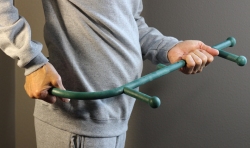
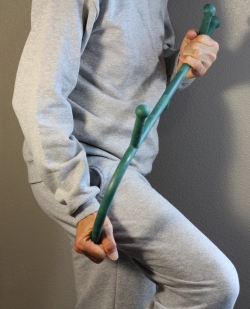
Now for the Theracane Work |
|
|
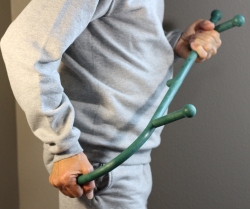
Having prepped your arm muscles (and maybe working any sore area if necessary),
and having massaged your neck, now it's time to reach for the Theracane to massage your upper and
lower back, your glutes, and your hamstrings. |
|
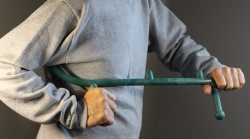 |
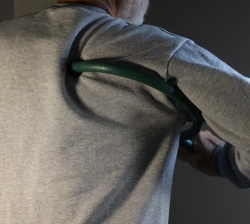
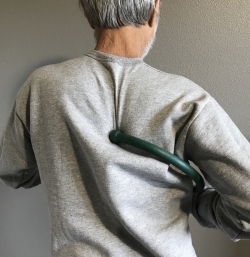
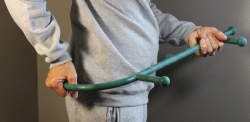
7 The Upper BackMuscle name: Trapezius NOTE: Likely tender areas! |
 |
 |
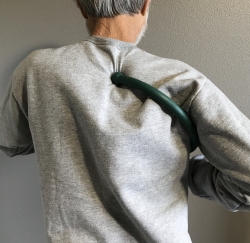
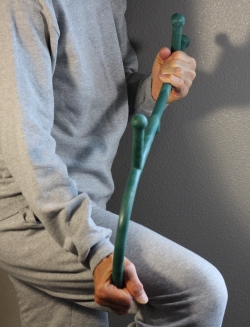
8 Maintaining spinal alignmentMuscle names: rhomboids, serratus, quadratus lumborum. NOTE: May be tender areas next to the spine There are two sets of short muscles in the upper back that connect individual vertabrae to the
scapula (shoulder blade). And there are others in the mid/lower back that connect individual
vertabrae to some of the ribs and/or the top of the pelvis. |
 |
 |
 |
More Tools of the Trade: Vive Double Lacrosse Massage Ball set |
||
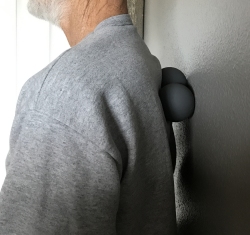 |
To help massage the muscles that connect directly to the vertabrae, it is often helpful to place a joined set
of Lacrosse Balls behind you on the wall, such that your spine is between them. Move up and down by
bending your knees while leaning firmly against the wall. This is also really good exercise for your leg muscles! |

|
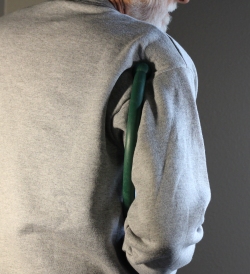 |
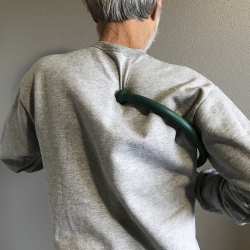
9 Shoulder Areas of Upper BackMuscle names: Supraspinatus, infraspinatus, deltoids While you are tending to your upper back, you will find it comforting to massage the muscles in the shoulder area next to the scapula (left), and sometimes the deltoids (right). |
 |
 |
10 The Lower BackMuscle names: longissimus, iliocostalis, quatratus lumborum NOTE: More tender areas! |
 |
 |
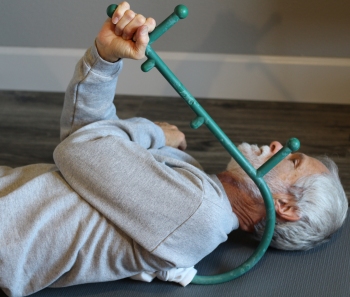 |
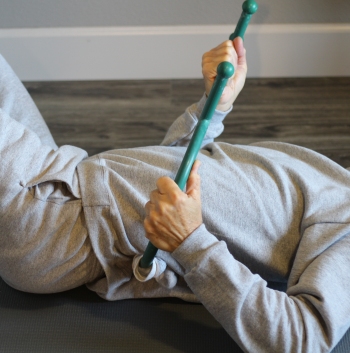
11 Applying greater pressureMuscle names: Various Having a little extra discomfort in the back muscles? You can apply greater pressure by lying on
a mat and prying up with the T.C. |
 |
 |
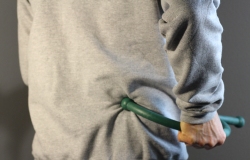
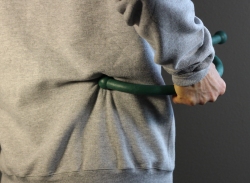
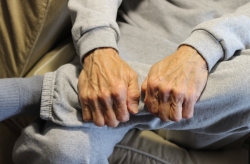
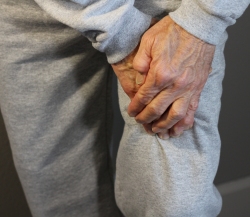
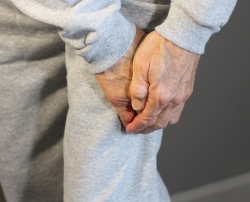
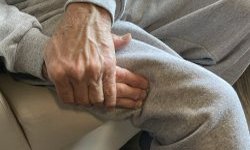
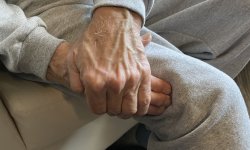
12 Working on the glutesMuscle names: gluteus maximus, gluteus medius, gluteus minimus Place the T.C. on the lower part of the glutes and pull upward. You can use quite a bit of pressure
here. The gluteus maximus is the biggest muscle, and it covers the medius and minimus. The whole point of the daily self-massage #4: |
 |
 |
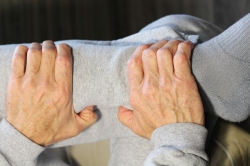
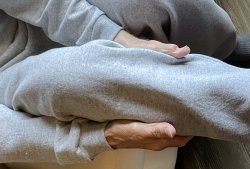
13 Your hamstringsMuscle names: Biceps femoris, semitendinosus, semimembranosus This is the last item for the T.C. Start just behind the knee (left side) and stroke toward your bottom
(right side). |
 |
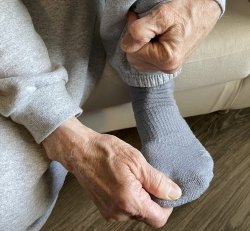 |
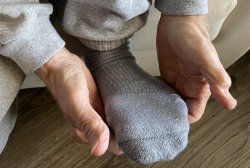
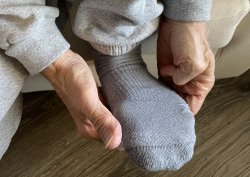
14 Starting on the LegsMuscle names: None We start with the foot. The main purpose for massage here is to keep the foot "loose". This helps
eliminate the occasional pinched nerve in the bottom of the foot. This presents with the classic symptom
of the sensation that your socks are all bunched up. Start with pulling on the big toe. Pull it outward as if stretching it. Also move it around
a bit. The intention here is to keep the foot structure loose. Think of it as a chiropractic "adjustment" on
the big toe. |
 |
 |
 |
15 The CalvesMuscle names: Gastrocnemius, soleus, tibialis posterior NOTE: Likely some tender areas, particularly for you ladies that like platform shoes! |
 |
 |
15a More Detail on the CalvesMuscle names: extensor digitorum longus, extensor hallucis longus While you are working the lower leg, from time to time you can massage the "extensor digitorum longus".
This muscle is responsible for flexing the toes upward. It is on the front side of the leg, next to the tibia bone.
This is the side facing "outward" (where the fingers are positioned in the images). |
 |
 |
16 Lower Part of the SoleusMuscle name: soleus From time to time, massage the lower part of the big soleus muscle, on the lower part of your calves.
This is where the thumbs are positioned in the images |
 |
 |
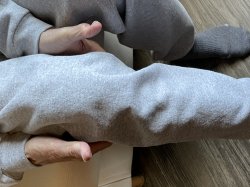
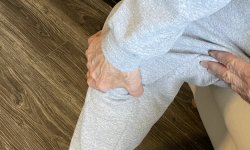
17 The quads and the "I.T. band"Muscle names: Quadriceps: rectus femoris, vastus intermedius, vastus lateralis. Side of thigh: iliotibial band Using supported fingers, stroke your quadriceps repeatedly (shown on left). Note that the quads really like to
be massaged, and will reward you with some "feel-good" endorphins. Knee joint pain is related to all these muscles. Have knee joint problems? Please see Joint Pain Example #2 right below. |
 |
18 Back side of legMuscle names: Various |
 |
 |
 |
"Joint Problems" Solved by Eliminating Trigger Points, 2 Examples
|
Joint Example #1: Wrist I have had joint pain in my left wrist - off and on - for years. A couple of years ago it became somewhat "acute", and I began to think about getting an MRI and possibly going for some joint surgery for "arthritis", which was offered by a local University. I had received their ad in the mail a few months earlier. The ad referred to a process called "Joint Debridement". "Arthroscopic debridement is a surgical procedure that removes the broken down bits of cartilage and tissues to help reduce pain and improve movement." Sounded pretty convincing to me. Surgery always does! But I thought I might just try working trigger points instead, in part because the surgery location was 80 miles away! So I began to concentrate on the forearm muscles. I introduced these in section 2 above.
But this time I throroughly worked these muscle a couple of times each day. Sure enough,
there were some tender spots on these muscles. After a week or week or so, I was quite surprised to find that the
wrist pain was almost gone. Soon after, my "wrist joint" issue was gone. This was over a year ago. |
||
 |
 |
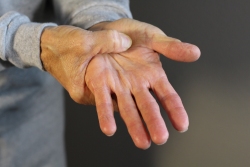
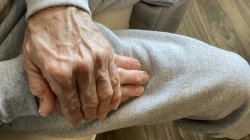
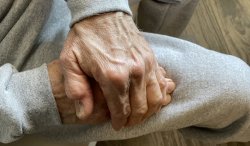
On the inside of the arm (palm up), stroke down the length of the forearm until you reach the wrist. There is a set of muscles on the "left" side of the inside arm and another set on the "right" side. So it's two sets of strokes along the length of the forearm. Do these massages firmly. These will be the "flexors" and a few other muscles. Then massage the wrist area itself with your thumb. |
On the outside of the arm (palm down), do the same thing. Two sets of muscles. These will be the extensors, along with a few other muscles. Also massage the back side of the wrist as well. |
 |
|
Joint Example #2: Knee From time to time, I would have some issues with my right knee. Occasionally,
when I would squat down fast, a quick sharp pain would prompt me to get right back up. "I surely
have torn something", it seemed. I got into the habit of squatting slowly. The whole point of the daily self-massage #4: You can fix many "Joint Issues" without surgery! So now, as with the wrist joint described above, I give these muscles extra attention during my morning self-massage. . |
|
 |
Muscle names: Quadriceps: rectus femoris, vastus intermedius,
vastus lateralis. Also the Sartorius. |
 |
 |
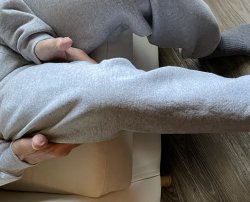
Continue the stroke down the leg. You can even go down to the knee joint, even though we are actually going to repeat this stroke starting closer to the knee - explained in the next two sections. |
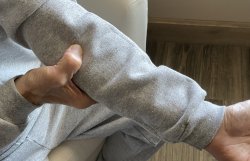
Now for a key area. We are going to massage the quads near the knee joint. Start somewhere in the middle of the upper leg, with the "supported fingers." Press hard and stroke down to the knee joint. You will likely encounter some rope-like structures buried in the muscle. These are trigger points, perhaps the main ones causing all your joint issues. Press hard. |
 |
 |
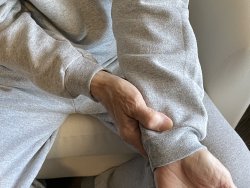
To get more concentrated pressure, try using a supported
thumb. As a matter of fact, while I was sitting on the stairs one evening with my head propped up on my
arms and my elbow on my legs, I could feel the tenderness in this area (lower quads just above the knee
joint). So, in addition to the supported fingers or supported thumb, try just using your elbows for
massage in this area! |
 |
 |
 |
 |
It also seemed to help to do a little extra work on the "I.T." band (#17 above). This band and its associated muscle (Tensor Fasciae Latae) runs along the entire outer edge of the upper leg. You can actually start all the way from the top, at the hip bone. |
 |
 |
Of particular interest were the muscles on both the inner and outer side of the lower leg, just below the knee joint. Both of these muscles were tender and showed signs of embedded trigger points. In the left picture, it's the thumb doing the work on the inner side. It will be likely be easier to use the fingers for on the outer side (right picture). |
Another area is on the back side of the knee joint.
The hamstrings on the back side may also be involved with constricting the knee joint. For me, these
muscles also contained tender areas, and seemed to be associated with occasional discomfort that I would
experience when straightening the leg while reclined in bed. |
 |
 |
 |
Muscle names: Popliteus, Plantaris |
 |
Some Stretches to do After your Muscle Work
You will find that after you do this daily self-massage, you will have warmed up quite
a bit. This self-massage is a great way to take away the early morning chill before you eat breakfast.
It's also a good time to do a few of your favorite muscle stretches.
NOTE: The keyword is after your self-massage! Your muscles should be warmed
up a bit first.
Stretch Guidelines:
No stretching on muscles with trigs! Muscles with active trigger points are muscles that are already contracted and tight. Trying to stretch these muscles is a bit like trying to stretch a rubber band that is holding a 10 pound weight!
Stretches should be gentle! This ain't exercise. It's actually a form of relaxation. Pull the desired muscles slowly at first and then with gradually increasing force. If there is any discomfort, pause, let the muscles adjust, and then maybe resume stretching. Or stop and go to another muscle group. You can even empasize the "relaxation" part by exhaling slowly when pulling on the muscles.
After a few weeks of the self-applied massage and gentle stretching, the muscles will become pregressively less "stiff", and you will notice that you are able to go tighter with the stretches.
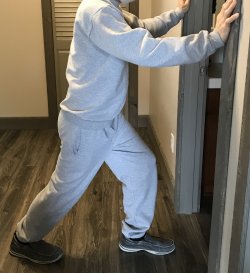 |
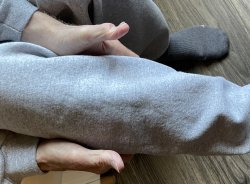
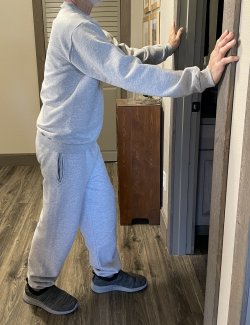
Calf Stretch and Psoas StretchOn the left, we show the typical calf stretch. Lean against the wall or a doorway and stretch your calf
muscles, both left and right. In this picture I am stretching the right calf. |
 |
 |
 |
 |
More StretchesOn the far left, I show a good stretch for the quadriceps. |
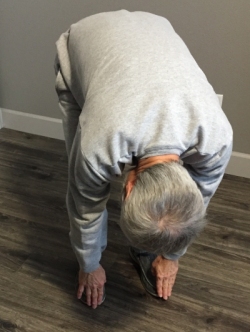
Three More StretchesFinally, I lean over and touch my toes (with 3 or 4 "warmups" before trying to fully touch my toes). |
 |
 |
 |
A Final Reminder: Make It All Last!
Doing all this muscle work would be a great way to start your day in the morning.
Preferably every day, but at least consider it two or three days a week. Remember, it is quite possible
to eventually eliminate muscle soreness from your life.
But don't let the Well Being Mindfulness stop after these self-treatments. Keep it thoughout the day.
How? By observing your posture throughout the day. You know. Everything your mom, your
chiropractor, your massage therapist have been telling you to do:
Stand and walk upright (like you are winning the war against gravity).
Sit up straight. No, really!
And don't be reading books or working on laptops with your head down (and having to be supported by all your suboccipital muscles). Prop up the books and get an external screen for that laptop - if you use one on a daily basis.
And last but not least. . . let your shoulders relax every chance you get. They're all scrunched up right now, aren't they, supporting your tensions, your worries, your work-related stresses, maybe even your weekend or vacation plans. Play some soft music and listen to that quiet voice that says "Be still."
Copyright © 2022 J.A.